How children can practice clipping before a ropes course
How children can practice clipping before a ropes course
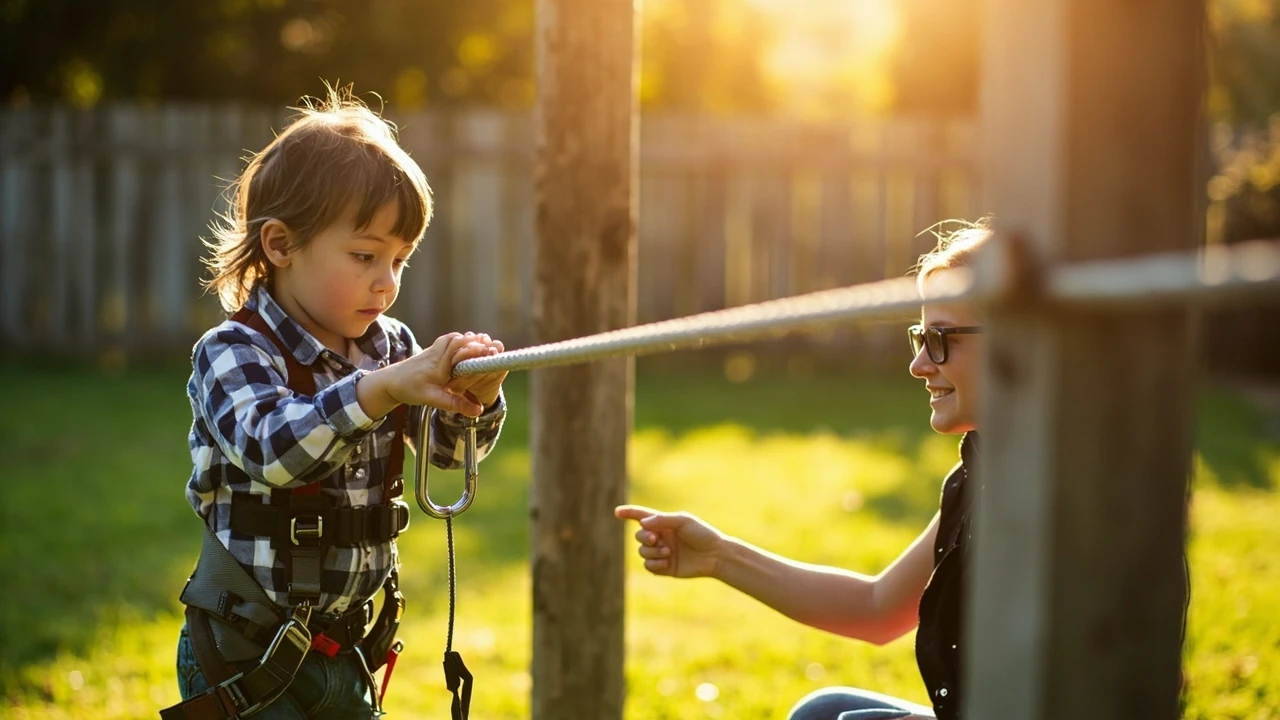
A child standing at the start platform of a high ropes course, carabiner in hand, wire waiting overhead, is a familiar moment for any parent. The course is calm, the harness fits, the helmet is on, and yet the child hesitates. The next move is small, but it is the one that decides whether the rest of the crossing feels exciting or scary: clipping the carabiner to the safety line. Practising that single action before the visit is the most reliable way to make the day run smoothly.
Clipping is the act of opening a carabiner, sliding it over a steel cable or through a metal loop, and closing the gate so the lock snaps shut. On a ropes course the clip keeps a child attached to the safety system at all times, which is why it is the skill the entire visit depends on. The good news is that clipping can be rehearsed at home, in a park, or at a low practice setup, using the same hand movements a child will repeat on the course.
What follows is a practical walk-through of how children can practice clipping before a ropes course: the equipment that helps, the timing and sequence that matters, the mistakes to look out for, and how parents and instructors can structure rehearsal so the skill sticks. It is written for families planning a first ropes course visit, for groups preparing a school or scout outing, and for operators who want a clearer picture of how to support younger climbers.
Why clipping is the one skill worth practising
Clipping looks simple. A child lifts the gate, slides the carabiner along the cable, and lets the gate close. The problem is that this action is done with a hand often shaking from excitement, from a fear of heights, or simply from the unusual feeling of being suspended. The clip must happen above the head, often while balanced on a wobbly footbridge, sometimes while the previous clip is still attached to a lanyard. The mental load is heavier than the physical one.
When a child has practised the motion, the brain stops treating clipping as a new task. The hand knows the path, the thumb knows the gate, and the eyes know where the cable sits. The child’s attention can shift to balance, breathing, and the next step. Without practice, the same child can freeze at the first transition and lose confidence for the rest of the course.
There is also a safety reason to rehearse. Most modern ropes courses use a continuous belay or smart belay system in which two clips travel along the cable at the same time. If a clip is half-closed, slid on at the wrong angle, or attached to the wrong loop, the system may not catch a fall the way it should. Practising lets an adult check the child’s grip, gate control, and visual focus before the day of the visit.
What children actually need to learn to clip well
Before any practice begins, it helps to break clipping into a few small skills. Each one is something a child can train at home without any special equipment.
- Gate control: opening the carabiner with one hand and feeling the spring tension that snaps the gate shut.
- Cable tracking: following a steel cable with the eyes, even when it sits above the head and behind a helmet brim.
- Thumb reset: releasing the gate cleanly so the carabiner does not snag on gloves or harness webbing.
- Two-clip rhythm: moving one clip forward before unclipping the previous one, the pattern used on continuous belay systems.
- Verbal check: saying or hearing a short confirmation such as “clipped” so the adult knows the gate is closed.
These five skills cover almost every difficulty a child will meet on the course. Practising them in the weeks before the visit is more useful than any amount of pre-visit pep talk on the morning of the trip.
Setting up a clipping practice area at home
Children do not need a full ropes course to learn the motion. A simple practice area, set up in a living room, garage, or garden, is enough. The point is to repeat the same hand action over and over until it feels ordinary.
Materials that work for home practice
- One or two real or replica carabiners of a type similar to those used on a continuous belay system, such as a snap-hook with a self-closing gate.
- A short length of smooth steel cable or a rigid metal rail mounted between two points at about chest height for the child.
- A simple webbing loop or piece of rope tied between two chairs to act as a stand-in for a safety line.
- A child-sized harness or a small webbing belt with a D-ring so the child can carry the carabiner the way they will on the course.
- A soft mat or grassy area for falls during early practice, in case a clip is dropped.
How to build a mock cable
A mock cable is the most useful tool for home practice. Stretch a length of 4 to 6 mm steel cable, or even a smooth wooden dowel, between two fixed points such as fence posts or wall hooks. The cable should sit at the height the child’s chest will be when standing on a course platform, often between 90 cm and 110 cm for younger children. Tighten it so it does not sag. The point is not to copy the real course exactly, but to give the hand a real surface to slide a carabiner along.
For a softer setup, a length of rope tied between two points works too, but the carabiner will not slide as smoothly. Children learn the right wrist motion faster on a rigid surface, even if that surface is a broom handle resting on two stacks of books.
Step-by-step practice routine for children
A practice session of fifteen to twenty minutes, repeated two or three times a week, is enough for most children to feel ready. The routine below is the one used by many ropes course instructors during school preparation visits and can be adapted at home.
Stage 1: dry drills without a cable
Have the child sit at a table with a carabiner in front of them. The goal is to learn the gate.
- Pick up the carabiner with the thumb on the gate, index finger on the spine, and middle finger supporting the bottom.
- Press the gate inward with the thumb and feel the spring pushing back.
- Release the gate and listen for the click as it closes.
- Repeat ten times, alternating hands.
This stage teaches gate control. Without it, children tend to grab the carabiner in the palm and struggle to open the gate cleanly on the course.
Stage 2: clipping onto a fixed point
Hang a metal ring, a piece of climbing webbing, or a fixed loop from a hook at the same height as the practice cable. The child now practices the full motion.
- Stand in front of the loop with the carabiner attached to a harness D-ring.
- Reach up and open the gate with the thumb.
- Slide the open carabiner through the loop.
- Release the gate and check that the lock is closed.
- Unclip and repeat with the other hand, then alternate hands ten more times.
This stage introduces the reach and rotation that the real course will demand. Watch for the thumb getting caught on the harness webbing, a very common beginner error.
Stage 3: sliding the carabiner along the cable
Now move to the practice cable. The motion is the same as stage 2, but the child must slide the carabiner along the length of the cable rather than just push it through a loop.
- Start at one end of the practice cable.
- Open the gate, hook the carabiner onto the cable, and close the gate.
- Slide the carabiner along the cable for about a metre, keeping the gate facing the direction of travel.
- Unclip at the other end and walk back to the start.
- Repeat, this time keeping the eyes on the cable and not on the hands.
This stage is the closest rehearsal to a real course. The child learns the rhythm of clip, slide, unclip, walk, repeat. Many children find this stage easier than stage 2 because the cable is a familiar shape and the hand can rest on it during the slide.
Stage 4: two-clip practice for continuous belay systems
Most modern ropes courses use a continuous belay system such as those made by Trublue, Saferoller, or similar designs. The child is attached to the cable with two carabiners connected by a short lanyard. To move, one carabiner must be clipped ahead before the other is unclipped. This stage teaches the rhythm.
- Attach a second carabiner to a separate lanyard so the child now has two clips hanging from the harness.
- Have the child clip the first carabiner to the cable a short distance ahead.
- Without unclipping the first, slide the second carabiner further along the cable.
- Unclip the first carabiner only after the second is fully closed.
- Repeat the pattern along the full length of the practice cable.
The two-clip rhythm is the one that catches children out on a real course. Practising it at home removes the surprise of the second carabiner and turns a tricky motion into a simple count: clip, clip, unclip, slide.
Practice equipment families can borrow or buy
Most families will not need to buy a full ropes course kit. A few items cover every stage of the routine.
| Equipment | What it trains | Where to get it | Approximate cost |
|---|---|---|---|
| Locking carabiner (real or replica) | Gate control, two-handed clipping | Climbing gym, hardware store, or online | $10 to $30 |
| Short steel cable and turnbuckles | Sliding the carabiner on a rigid line | Hardware store | $15 to $40 |
| Webbing loop or strap | Reaching up to a fixed point | Climbing shop or outdoor store | $5 to $15 |
| Child-sized harness | Carrying the carabiner the way the course requires | Rental from a ropes course operator or a climbing gym | $20 to $60 |
| Two short lanyards with clips | Continuous belay rhythm | Climbing gym or online | $15 to $40 |
Borrowing a harness from a local ropes course or climbing gym is often the cheapest way to start. Many operators lend kit for pre-visit practice if families ask in advance, and some will host a short ten-minute familiarisation session for nervous first-time climbers.
When and how often children should practise
Like any new motor skill, clipping needs repetition spread over several days. Cramming practice the night before the visit tends to leave children more anxious than confident. A light, regular routine works best.
| Age group | Recommended frequency | Session length | Best time of day |
|---|---|---|---|
| 4 to 6 years | 3 to 4 short sessions per week | 5 to 10 minutes | Mid-morning, when the child is alert |
| 7 to 10 years | 2 to 3 sessions per week | 10 to 15 minutes | Late afternoon, after a snack |
| 11 to 14 years | 1 to 2 sessions per week | 15 to 20 minutes | Any calm window in the day |
A good rule is to stop each session while the child still wants to do one more repetition. Ending on a successful clip leaves a positive memory of the skill and makes the next practice easier to start. A useful marker of progress is when the child can clip and unclip on the practice cable while talking about something else, which shows the motion has moved from conscious effort to automatic action.
Common mistakes to watch for during practice
Watching a child practise is just as important as the practice itself. Most clipping problems on a real course come from a small habit that built up at home. Spotting the habit early is the easiest way to fix it.
- Pulling the gate with the index finger: this is slower and weaker than using the thumb. The thumb gives a clean, straight push along the spine of the carabiner.
- Looking at the hands instead of the cable: on a real course the cable is above the helmet. Children who keep their eyes on the carabiner tend to misalign it with the cable. Practise looking up at the cable first, then bringing the carabiner to it.
- Forgetting the lock: many carabiners used on ropes courses have an additional twist-lock or magnetic catch. Children sometimes close the gate but forget to turn the lock. Practise the extra step in every repetition.
- Unclipping too early: on a continuous belay system this is the most serious mistake. Practise the two-clip rhythm until the child says “second one on” before removing the first.
- Dropping the carabiner: if a child keeps dropping the clip during practice, the carabiner may be too small or too large for the hand. A carabiner that fills the palm without overhang is usually the right size for a child.
Each of these habits is easy to correct at home, harder to correct on a platform twelve metres in the air. A parent or instructor who gently points them out during practice is doing the most useful teaching of the day.
Adjusting practice for nervous or very young children
Some children take to clipping quickly. Others need a slower build-up. The signs of a child who is not yet ready for the full routine include tight shoulders, holding the breath during a clip, or refusing to look at the practice cable. The best response is to step back, not to push.
- Start with the carabiner alone, on a table, for two-minute sessions.
- Use a teddy bear or a small toy as the “course” the child clips onto. Make it a game.
- Practise the same hand motion while watching a short, calm video of a ropes course to build familiarity.
- Avoid any mention of heights, falls, or safety during the first sessions. The language should stay playful.
- Move to the practice cable only when the child is comfortable clipping the toy.
For children under six, the focus is usually on confidence rather than technical accuracy. The course itself will use a system that tolerates small mistakes, and the harness and clip do most of the work. The role of practice is to remove the unknown, not to turn the child into an expert.
How practice connects to a real course visit
Home practice matters most when it matches the system the course actually uses. A child who has practised on a single carabiner but has never seen a two-clip continuous belay may still freeze on the first platform. Before booking, families can ask the operator which system the course uses and practise that exact pattern at home.
It is also worth reading about how continuous belay systems work on a typical high ropes course so the language used at home matches the language the child will hear on the day. Words like “clip,” “unclip,” “lock,” and “lanyard” should mean the same thing in the garden and at the course.
Many operators run short pre-visit sessions for school groups, scout troops, and birthday parties. These are a useful bridge between home practice and the real course. If the visit is a first time, a quick on-site rehearsal of the clipping motion, even for five minutes, can settle a child’s nerves before they reach the first platform.
Sample practice plan for the two weeks before a ropes course visit
The plan below is a simple way to spread practice across the days before a visit without making it feel like a homework task. Each stage is short, clear, and ends on a win.
- Day 1 to 3: dry drills at a table, two five-minute sessions, focus on gate control with both hands.
- Day 4 to 6: add the practice cable, slide the carabiner along it ten times each session, eyes on the cable.
- Day 7 to 9: introduce the two-clip rhythm with a second carabiner and short lanyard.
- Day 10 to 12: practise in the harness so the child learns the feel of a clip hanging from the D-ring.
- Day 13: light review, one full run-through of the routine, no new skills.
- Day 14 (visit day): no practice. The child should arrive rested and ready.
This plan works for school groups too, with one short session at the start of each of the two weeks before the visit. The aim is repetition, not intensity.
What to do on the day of the visit
Practising clipping before a ropes course pays off most when the day itself is calm. A few small habits help.
- Arrive early enough to walk the course at ground level before climbing. The visual memory helps the hand know where to clip.
- Let the child handle a carabiner at the briefing station. The familiar feel settles nerves.
- Ask the instructor to demonstrate the exact two-clip motion used on the course. Match it to the home practice.
- Use the same verbal cue the child used at home, such as “clipped” or “locked,” as a checkpoint on every transition.
- Stay quiet during the first three clips. Children focus better when an adult is calm rather than chatty.
If the child freezes on a platform, the safest response is to wait, breathe, and ask the child to look at the cable rather than the height. Most children will clip within a minute once the gaze returns to the cable and the hand follows.
How instructors can use this guide with groups
For ropes course operators and school group leaders, the same ideas scale up well. A short, structured pre-visit session cuts down on platform time, reduces instructor fatigue, and gives children a sense that they already know the skill.
- Send a one-page practice sheet home with the booking confirmation, including a picture of the carabiner type used on the course.
- Offer a five-minute ground rehearsal at the start of the visit, using a mock cable on a fence post or handrail.
- Match each child’s home practice to the system used on the course, so the language is identical.
- Mark each successful clip on a small card so younger children can see progress across the visit.
- End the session with a reminder that clipping is a skill, and skills improve with practice, which builds resilience for future visits.
Operators who run pre-visit sessions often see fewer mid-course stops and a faster overall throughput, because children clip on the first attempt instead of experimenting at height.
Frequently asked questions
At what age can a child start practising clipping?
Most children can begin dry drills at a table from around age four, using a real or replica carabiner. The full practice cable is usually suitable from age five or six, when the child has the hand control to slide the clip along a rigid line. Many ropes courses accept children from age four on junior courses, but the practice routine should match the child’s hand strength rather than their age alone.
Is a real carabiner safe for home practice?
A real locking carabiner, used as instructed and kept away from very young children, is fine for practice. The risk of using a real carabiner is small if the child is supervised and the carabiner is not used for climbing. A replica or toy carabiner can work for the first sessions, but the gate action is often different, so it is worth switching to a real one before the visit so the hand learns the right resistance.
How long does it take a child to learn to clip?
Most children can clip a carabiner onto a fixed loop after two or three short practice sessions, and slide it along a practice cable after a week. The two-clip rhythm for a continuous belay system usually takes a little longer, often two to three weeks of light practice. The skill is not difficult, but it is unfamiliar, so the timing depends on how often the child practises and how calm the practice feels.
What if my child is left-handed?
Carabiner gates are designed to be operated with either hand, and most continuous belay systems work in both directions. Children who are left-handed should practise with their dominant hand first, then repeat the drills with the other hand. The goal is for either hand to be able to clip, because the course may require both depending on the layout of the platform.
Can we practise on a real ropes course before the booked visit?
Some operators offer open practice sessions, school preparation visits, or family familiarisation slots at a lower height. These are a useful addition to home practice, especially for the second stage of the routine. It is worth asking the operator when booking whether a short pre-visit session is available, and at what cost.
Do I need to teach my child about the safety system itself?
Light, age-appropriate understanding helps. A simple explanation, such as “the two clips mean you are always attached to the cable, even if you slip,” gives the practice a purpose. A deeper technical explanation of how rope courses are built and inspected is interesting for older children but is not needed for the visit itself.
What should I do if my child refuses to practise?
Stop the session, do not push, and try again in a few days with a different approach. A short game, a story, or practising on a toy often reopens the door. If refusal continues, the visit may need to be delayed, or a different kind of outdoor activity chosen instead. Confidence on the day is more important than any specific skill.
Is practising at home really necessary if the course gives a safety briefing?
A safety briefing teaches the rules of the course, but it does not give a child time to feel the carabiner in the hand. The briefing is the moment to listen, not the moment to learn a new motor skill. Children who have practised the motion at home arrive at the briefing calm, listen better, and clip correctly on the first try.
Quick reference: the core practice routine
For families who want a single page to print and stick on the fridge, the routine below covers everything a child needs to know before a ropes course visit. The whole routine takes about twenty minutes and can be split across two days if needed.
- Sit at a table, hold the carabiner, and practise opening and closing the gate with the thumb. Repeat ten times each hand.
- Stand in front of a hanging loop, clip the carabiner through it, and check the lock. Repeat ten times each hand.
- Clip the carabiner onto a practice cable and slide it along the full length. Eyes on the cable, not on the hands.
- Add a second carabiner on a short lanyard and practise the two-clip rhythm: clip ahead, slide, unclip the rear clip.
- Practise the routine once while wearing the harness so the carabiner hangs from the D-ring the way it will on the course.
If a child can do all five steps calmly, the visit is almost certain to go well. If any step feels shaky, that is the one to repeat the next day.
Putting it all together
Practising clipping before a ropes course is a small piece of preparation that has a large effect on the day itself. The motion is simple, the equipment is affordable, and the routine fits into a few short sessions across one or two weeks. Children who arrive having already opened a carabiner, slid it along a cable, and felt the two-clip rhythm walk onto the first platform with a quiet confidence that no pep talk can match.
For families, the best next step is to set up a practice cable at home this weekend, run through the dry drills with the child, and book the visit for two to three weeks later so the practice has time to settle. For instructors, the best next step is to send a short practice sheet home with every booking and offer a five-minute ground rehearsal on the day. For both, the goal is the same: a child who reaches the first platform knowing what to do with the carabiner in their hand.
Related reading
Explore High Ropes Adventure
Trip tools
Essential adventure planning guides
Use these practical guides to compare rope park activities, prepare for a first high ropes day, check a booking, choose suitable footwear and contact the editorial team. Each page links to the relevant live tools and current planning sections.
Latest articles
- Tame Impala tickets: how to find them, what they cost, and what to know before you buy
- Outdoor pillows: how to choose the right ones for a deck or trail rest stop
- How to find Morgan Jay tickets without overpaying
- How to find national parks near me: a practical local search guide
- Paylater travel: how buy now, pay later works for trip bookings
- Bagsmart Blast Travel Backpack: A Practical Review for Day Trips and Adventure Days
- How to choose an outdoor rocking chair that actually lasts
- Indiana travel advisory map: how to read it before a day trip
- How to plan an outdoor day around a concert stop: a cardi b tickets field guide
- Outdoor sectional sofas: a practical buyer’s guide for patio living