Outdoor research: how to plan, gear up, and run a field day
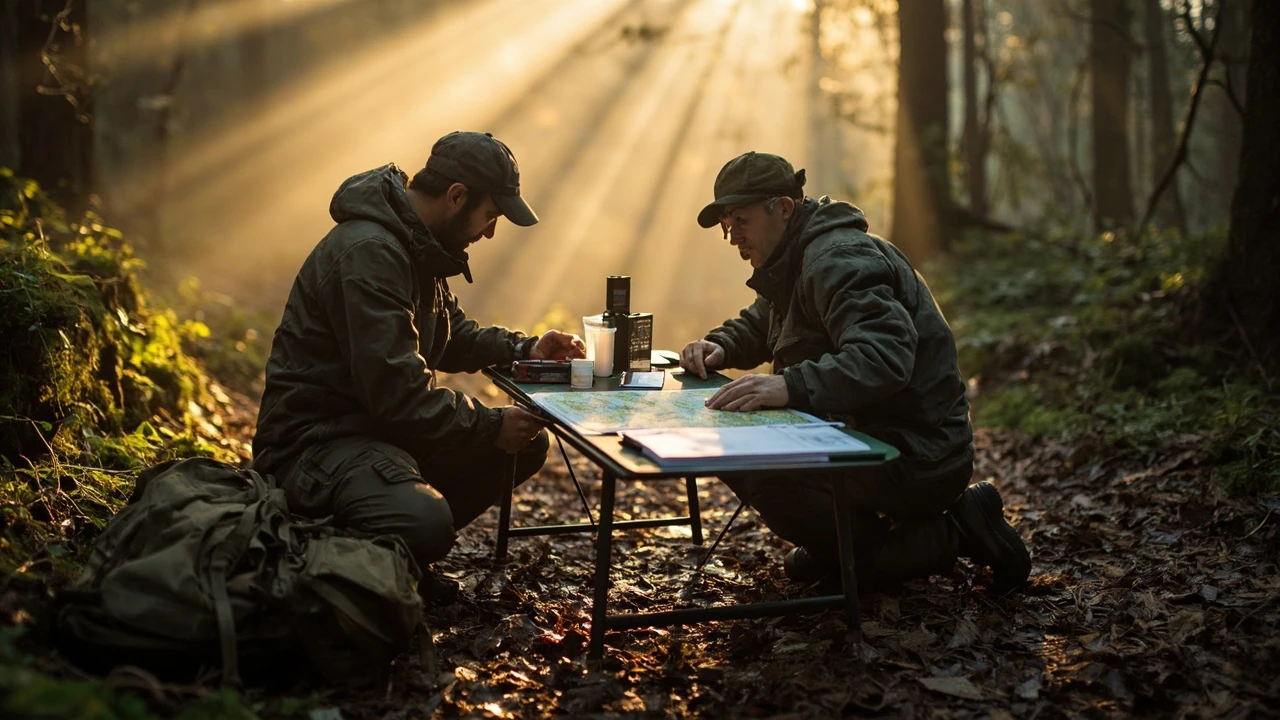
A group of three volunteers stands in a clearing at 6:40 a.m., one holding a printed map and the other two unpacking a weather meter, sample bags, and a notebook. The lead reads the wind direction from a handheld vane, the second marks the sky condition in a grid on a clipboard, and the third quietly counts birdsong intervals against a phone timer. None of them would call themselves scientists, yet every step they take follows a research method built for outdoor conditions. This is what good outdoor research looks like in practice: small, repeatable, and shaped by the weather, the terrain, and the patience of the people doing the recording.
Outdoor research is a broad term for any structured study, survey, or observation that happens outside a controlled building. It covers ecology field work, citizen science projects, archaeological survey days, geocaching-style citizen studies, trail-monitoring volunteer shifts, product testing in real terrain, and education programs that take place in forests, parks, beaches, or climbing sites. The shared element is the same: a question, a method, and a session in a real outdoor setting where conditions cannot be fully controlled. If you are planning a day like the one above, or simply trying to understand what the term covers, this guide walks through the planning, gear, field methods, and follow-up work that make a study session useful rather than just a long walk with a clipboard.
What outdoor research actually covers
Outdoor research is a working phrase used in three different ways. Some people use it for the academic field of outdoor studies, which examines how people experience and learn in natural environments. Others use it for ecology and environmental science, where research is literally conducted outdoors to collect weather, soil, water, or species data. A third group uses it for product testing, marketing, and behavioural observation that has to happen in real terrain because lab conditions do not reflect how people use a product or service.
For most readers who arrive at this page through a search engine, the practical meaning sits in the middle: how do I plan, run, and record a useful field session outdoors, whether for a school project, a volunteer survey, a small business study, or personal curiosity. The rest of this article treats outdoor research as that practical activity and gives you a working method for it.
Common forms of outdoor research
- Ecological and biological surveys: bird counts, plant transects, insect trapping, mammal track plates, water sampling.
- Citizen science projects: phenology logging, weather reporting, noise monitoring, biodiversity apps, light pollution counts.
- Outdoor education research: how participants learn on a ropes course, how trail design affects visitor flow, how a forest school day changes mood or attention.
- Product and gear field testing: layering systems, footwear wear, pack fit, hydration systems, GPS and radio behaviour in tree cover.
- Tourism and visitor studies: how long people stay, what they photograph, where they stop, and how weather changes their choices.
- Archaeological and heritage survey: surface artefact recording, photographic mapping, ground-penetrating radar walks, geophysical transects.
These forms share a planning backbone, even when the science behind them is very different. A bad day of field work is almost always a planning failure, not a science failure, and a good day is the opposite: short, scoped, and methodically recorded.
How to plan a realistic outdoor research day
Planning a field day is mostly about making the day boring in a good way. The interesting surprises should come from the data, not from missing equipment or wrong permissions. A solid plan answers six questions before anyone leaves the car park: what is the question, what is the method, where exactly is the site, what does each person do, what gear is needed, and what is the fallback if the weather turns.
Write the plan on a single page, even if the project is large. Long planning documents tend to be skimmed on the morning of the session, and a one-page brief is what actually gets read while someone is still lacing their boots.
The one-page field brief
- Question. State the research question in one sentence. “Which tree species at site X show visible leaf damage after the late spring frost?” is more useful than “study trees”.
- Method summary. Three to five bullets that describe the procedure in the field. Include the unit of measurement, the time per sample, and the order of operations.
- Site details. Map, grid reference, access notes, parking, nearest shelter, nearest toilets, mobile signal, and the landowner’s contact if relevant.
- Roles. Name each person and their specific job. “Observer”, “recorder”, “photographer”, and “navigator” are clearer than “team member”.
- Equipment list. Grouped by person and by phase: before travel, on arrival, during sampling, on exit.
- Risks and fallbacks. Weather limits, time limits, a clear abort point, and who has authority to call it.
For more general help on shaping a single-day outing, the one-day forest escape planner applies a similar scoping approach to recreational days and is a useful reference for the format, even when the goal is research rather than rest.
Field gear that earns its weight
Gear matters less than people think, but the wrong gear matters a lot. The aim is to carry only what supports the method, while keeping everyone warm, dry, fed, and safe. A field pack for outdoor research usually splits into four layers: capture tools, recording tools, personal care, and contingencies.
Core field kit for most outdoor research days
| Layer | Typical items | Why it earns its place |
|---|---|---|
| Capture and measurement | Hand lens, ruler, sample bags, weather meter, GPS, camera, scale | These are the tools that produce the data. Without them, the day has no output. |
| Recording | Waterproof notebook, pre-printed data sheets, pencils, phone or tablet with offline map | Recording is the bridge between observation and analysis. Bad recording ruins good observation. |
| Personal care | Layered clothing, waterproof jacket, hat, sun protection, water, food, basic first aid | Personal care keeps the team in the field long enough to collect a useful sample size. |
| Contingencies | Spare batteries, power bank, headlamp, emergency shelter, whistle, charged phone | Contingencies are the items you only need once, but you only need them once. |
If you are still deciding what to bring for a wet or changeable day, the wet-weather trail packing list covers layering choices and pack organisation in a more general way that translates well to research days.
Designing the data you will record
Field sessions fail most often at the recording stage, not the observation stage. People see a lot, but write down a small, inconsistent fraction of it. A useful design starts with three decisions: what is the unit of observation, what attributes describe that unit, and how are those attributes coded.
Three rules for outdoor research data sheets
- One column per variable. Splitting “tree condition” into “leaf damage percent” and “bark damage present” is more useful than a single combined column.
- Use closed codes where possible. “Y / N”, “0, 1, 2, 3”, and short species codes record faster and analyse more cleanly than free text.
- Reserve a notes column for everything unexpected, but keep it short. Notes are gold, but they are also the place where data becomes unrecoverable if the sheet is lost or smudged.
Where a digital form is more efficient, build it before the day and test it offline. Tablets and phones are useful in the field, but only when the form has been opened, tested, and saved to the device ahead of time. A paper sheet with a pencil is still the most reliable backup and is worth carrying even when the team plans to go fully digital.
Safety, access, and permissions
Any outdoor research session sits on top of access rules. Public land usually allows observation, but active sampling, marking, or installing equipment often needs permission. Private land always needs the landowner’s consent. Protected sites, nature reserves, and heritage sites have their own permit systems, and the time to learn this is before the day, not during it.
Safety planning for outdoor research follows the same logic as safety planning for any other outdoor day, with a research-shaped twist: the team often has to stay in one place for a long time, which changes exposure to cold, sun, dehydration, and insects more than a moving walk would.
Pre-day safety checklist
| Check | What to confirm | Common miss |
|---|---|---|
| Permissions | Landowner or site manager approval, sampling permit, photography release | Forgetting that an apparently public site is leased or protected |
| Weather | Forecast for the full window, including wind shift and rain timing | Trusting only the morning forecast for an afternoon session |
| Communication | Phone signal, radio coverage, agreed check-in time, out-of-contact plan | No agreed abort signal if the team cannot reach base |
| Medical | Allergies, medications, first aid kit, nearest hospital or rescue point | Assuming everyone is fine because they were fine last time |
| Equipment | Spare batteries, charged devices, working weather meter, working GPS | Skipping a quick power-on test the night before |
For sites that involve rope access, tree work, or water sampling, follow a formal risk assessment rather than an informal one. The shape of the assessment is similar across activities: identify the hazard, decide who is exposed, judge the likelihood and severity, and record the control measures. If the team is leading visitors, the assessment also has to include the visitors’ behaviour, not only the researchers’.
Field methods for common outdoor research questions
Different questions call for different methods, but a small set of techniques covers most of the work done by school groups, volunteer surveyors, and small research teams. The table below maps a question type to a method that fits well and the gear each method needs.
Matching method to question
| Research question | Suitable field method | Minimum useful gear |
|---|---|---|
| Which species use this hedge? | Point count at fixed intervals over a set time | Timer, species checklist, binoculars, notebook |
| How does leaf damage vary along a transect? | Quadrat sampling every 20 m along a transect | Tape measure, quadrat frame, sample bags, identification guide |
| How do visitors use this trail? | Camera trap plus timed count at key nodes | Trail camera, time stamp clock, mounting strap, permission form |
| What is the water quality of this stream? | Spot sampling at marked points with in-field tests | Sample bottles, test strips, cooler, gloves, chain of custody sheet |
| How does a ropes course affect group confidence? | Pre and post survey plus short structured observation | Printed survey, pens, clipboard, behaviour coding sheet |
The last row is the kind of work that visitor-facing attractions often run, and it overlaps with what the high ropes belay systems explained page covers from a different angle. Understanding the activity being studied makes the observation more accurate, especially when the team is recording how participants respond.
Recording behaviour, not just objects
Outdoor research is often about people, not just plants, water, or weather. Behavioural observation has its own pitfalls. People behave differently when they know they are being watched, they cluster in groups that distort the count, and they often do the interesting thing only after the recorder looks away. A small structure goes a long way.
Behavioural recording basics
- Define a clear behaviour list before the day. “Asks a question”, “hesitates at a platform”, “helps another participant” are more useful than “engages”.
- Use a fixed observation window. A 10-second scan every two minutes is easier to keep accurate than continuous logging.
- Pick a coding position before the session starts. A good angle on the activity beats a bad angle with better weather.
- Record the date, time, observer, and weather at the top of every sheet. Behaviour without context is hard to interpret later.
For attractions that run structured activities, behaviour research often focuses on how rule systems and safety briefings shape the experience. A useful reference point is the ropes courses explained page, which describes the activity structures that participants are moving through while being observed.
Working with weather and terrain
Outdoor research does not happen in a vacuum. The same question answered on a still morning and a windy afternoon can give different data, and the difference is the research, not a flaw. A field plan that ignores weather is a field plan that has to be redone when the wind picks up.
How to keep weather honest in the data
- Record weather at the start of the session and at every meaningful change, not once a day.
- Note wind direction and Beaufort estimate rather than only “windy”.
- Photograph the sky and canopy at the start and end of each site visit as a quick visual record.
- If the session is interrupted, note the exact time, the cause, and the new start time. The break belongs in the data, not just in the log.
For visitor-facing sites, weather shapes both the experience and the data. Operators often see the same effect described in the rope park weather guide: rain, wind, and lightning each have thresholds that change both the activity and what the research team can observe.
Analysing field data without drowning in it
The most common reason a research day feels wasted is that the data sits in a notebook afterwards and never gets cleaned. A small amount of structure on the day of the session saves many hours later. A good practice is to spend the last 20 minutes of the day on a “data debrief” before anyone leaves the site.
The end-of-day debrief
- Check that every sheet has a date, time, site code, and recorder name.
- Circle anything ambiguous in red pen and write a short note explaining what was meant.
- Photograph every sheet, even the clean ones. Phone cameras are a quick insurance against lost paper.
- Confirm who is entering the data and by when. A clear owner of the next step is the difference between data that gets used and data that does not.
Once the data is in a spreadsheet, the analysis usually starts with a simple frequency count or a mean with a range. Resist the urge to run a complex model on a small sample. A clean summary table and a clear chart usually say more than a sophisticated test on noisy data.
Reporting and sharing what you found
Field research becomes useful when the findings leave the field. A short report of two to four pages, with a clear question, a short methods section, a table or chart of results, and a paragraph of interpretation, is enough for most volunteer and small-team studies. Keep the language plain. Long academic language hides simple findings, and most readers want to know what the data says and what to do with it.
Where the work is for a client, a business, or a grant, the report should include a one-page summary at the start so the main message can be read in 60 seconds. Photographs of the field day are a good way to make the methods section more honest, because they show the conditions in which the data was actually collected.
Working with volunteers and visitors
Many outdoor research projects depend on people who are not researchers. Citizen science platforms, school groups, and visitor-facing sites all rely on volunteers or guests to take part in data collection. This raises two questions: how do you make the protocol simple enough, and how do you keep the data quality high.
Making volunteer data usable
- Reduce the number of decisions a volunteer has to make. Each decision is a chance for inconsistency.
- Train in the same conditions as the field day. A classroom training session does not catch the issues that show up in wind and rain.
- Run a short pilot. A 30-minute trial with a small group usually surfaces 80 percent of the protocol problems.
- Use a shared data sheet with version control. Volunteers editing their own copies leads to incompatible data.
For family visitors, the same logic applies at a smaller scale. The family rope park day planner gives a useful example of how to design a day around age, height, and confidence levels, which is similar to designing a research task around the abilities of the volunteers helping with it.
Budget and travel for a research day
Outdoor research does not have to be expensive, but the day has a real cost in travel, food, time, and sometimes site fees. A simple budget helps the team decide what is realistic before committing. Travel, access, and food are the three largest costs for most small projects, while equipment is usually a one-time cost that gets reused.
Sample one-day budget for a small team
| Cost line | Typical range per person per day | Notes |
|---|---|---|
| Travel | Variable, often the largest line | Compare train, car, and shared minivan for the same route. |
| Site access or permit | Often free, sometimes a small fee | Check before travel. Some sites require a written application weeks ahead. |
| Food and water | Modest but non-negotiable | Field sessions burn more calories than people expect. |
| Equipment wear and consumables | Small per day, larger over the year | Sample bags, batteries, print credit, and chalk all add up. |
| Contingency | Around 10 percent of the total | The buffer is the most useful line on the budget. |
For a comparison of how transport choice affects cost and time, the train or car day trip comparison breaks down the trade-offs in more detail and applies directly to research days that start and end in a city.
Ethics and respectful practice in outdoor research
Outdoor research touches living systems, communities, and sometimes private land. A short list of habits keeps the work respectful and reduces the risk of harm to the site, the wildlife, or the relationships that allow future work to happen.
Everyday ethics in the field
- Leave the site as you found it, or better. Sample bags, flagging tape, and string can stay in the environment long after the team has gone.
- Avoid trampling sensitive habitats. Step on rock, gravel, or durable surfaces where possible, and stay on established paths near the edge of a study area.
- Ask before photographing people, and especially before photographing children. A short consent form avoids a long problem later.
- Share the findings with the landowner, the site manager, or the local community. Research that does not return value to the site tends not to be welcome a second time.
These habits are also the kind of behaviour that visitor-facing outdoor sites encourage. A useful reference is the outdoor event travel guide, which frames the visitor experience in a way that researchers can use when they are observing or running public-facing field work.
Common mistakes in outdoor research
The same mistakes come up across many field projects, and most of them are easy to prevent with a small amount of planning. A short list, with the fix next to it, is a useful prompt to read the night before the session.
Mistakes and quick fixes
- Collecting too much in one day. Fix: scope the session to one or two questions and a realistic sample size.
- Recording into a free-text notebook. Fix: use a printed sheet with closed codes for the core variables.
- Forgetting the date, time, or site code. Fix: stamp every sheet at the start and end with a small header.
- Over-trusting the weather forecast. Fix: build a two-hour weather buffer into the plan and have an early abort point.
- Skipping the end-of-day debrief. Fix: book the last 20 minutes of the day for the debrief, not for travel.
- Letting one person carry all the kit. Fix: distribute the gear by role so a missing pack does not stop the day.
When outdoor research needs a formal process
Some projects go beyond a one-day field session. Long-term monitoring, work with protected species, surveys of children or vulnerable groups, and research on private or culturally sensitive land usually need a formal process. This often includes a written protocol, an ethics review, a data management plan, and named responsibility for storage and sharing of the data.
For school and education settings, the process is usually lighter but still real. Parental consent, a clear learning objective, and a simple risk assessment are usually enough. The first high ropes course guide has a useful pattern for thinking about first-time sessions that also applies to first-time research visits: briefing, supervision, clear rules, and a calm end-of-day review.
For visitor-facing attractions that also run research, the formal process is often the same as the one the operations team already uses. The zipline safety guide is a good example of a structured risk and operations document that researchers can adapt when they are observing or working alongside an activity.
Putting it all together for a real day
A real outdoor research day starts the night before. The team checks the weather, charges the devices, prints the sheets, and confirms the meeting time. On the morning, the team meets early enough to drive, walk, and arrive at the site with 30 minutes to spare. The first 15 minutes at the site are spent on a short briefing, a safety check, and a test of the recording tools. The session runs to a planned end time, with a clear signal for early abort. The last 20 minutes are spent on the data debrief, photographs of the sheets, and a short walk around the site to check that nothing has been left behind.
After the day, one person owns the data entry, another writes the short report, and a third circulates the findings to the people who made the day possible. The result is a study that is small, honest, and useful, which is what good outdoor research is meant to be.
Frequently asked questions
What is outdoor research in simple terms?
Outdoor research is any structured study, survey, or observation that takes place outside a controlled building. It covers ecology, citizen science, education research, product testing, and visitor studies, all of which rely on a clear question, a method that works in real conditions, and a recorded set of observations.
Do I need special permission to do outdoor research?
It depends on the site and the activity. Observation on public land is usually fine, but active sampling, marking, or installing equipment typically needs the landowner or site manager’s consent. Protected sites and nature reserves have their own permit systems, and the time to confirm permission is before the day of the session.
What is the minimum useful gear for a field day?
A working field day usually needs a weather meter, a measuring tool, a notebook or printed data sheet, a camera, a phone with an offline map, layered clothing, water, food, and a small first aid kit. Adding spare batteries, a power bank, and a headlamp covers most of the common contingencies.
How is outdoor research different from indoor research?
Indoor research controls most of the environment, which makes experiments easier to repeat. Outdoor research has to work with weather, terrain, and real participants, so the methods are usually simpler, the sample sizes are smaller, and the data sheets are more disciplined. Outdoor research also tends to describe what is happening rather than test a single variable.
Can school groups do useful outdoor research?
Yes, as long as the question is scoped to what a small group can record in one session. A short transect, a simple species count, a visitor survey, or a behaviour tally is enough to produce a useful result. The protocol should be rehearsed in the classroom before the field day, and the data should be checked by an adult at the end of the session.
How do I keep data safe in the field?
Use waterproof notebooks or laminated sheets, write in pencil, and photograph every sheet at the end of the day. Where a digital form is used, save the form to the device before leaving, test it offline, and back the data up to a cloud account on the same day. A clear owner of the data entry and storage step is the most reliable safeguard.
What is the biggest mistake in outdoor research?
The most common mistake is trying to collect too much in one session. A focused question with a small, well-recorded sample usually produces better results than a broad question with a large, inconsistent dataset. Scoping the day to one or two questions and a realistic sample size is the simplest way to avoid this.
How do weather and terrain affect the data?
Weather and terrain change what is observed and how the team behaves. A windy day changes insect counts, a rainy day changes visitor numbers, and rough ground changes the pace of the team. Recording the weather at the start and end of each site visit, and noting any change in the middle, keeps the data honest and makes the analysis more reliable later.
Can outdoor research be done as a volunteer?
Yes. Many of the largest citizen science projects depend on volunteers to collect data, and the protocols are usually written to be followed by non-specialists. The key is to read the protocol carefully, run a small pilot, and stay in touch with the project coordinator when something unexpected happens. A short debrief at the end of each session is a good habit for volunteer projects as well.
How do I share the results of a small field project?
A two to four page report is usually enough for a small field project. It should include the question, a short methods section, a table or chart of results, and a paragraph of interpretation. Photographs of the field day and a one-page summary at the start make the report easier to read. Sharing the report with the landowner, the site manager, and the volunteers who helped keeps the work connected to the people who made it possible.
Related reading
Explore High Ropes Adventure
Trip tools
Essential adventure planning guides
Use these practical guides to compare rope park activities, prepare for a first high ropes day, check a booking, choose suitable footwear and contact the editorial team. Each page links to the relevant live tools and current planning sections.
Latest articles
- Sweet tart ropes: what the flavour means in a ropes course
- Demon Slayer movie tickets: how to find a screening and prepare for a day out
- How to choose NBA tickets without overpaying
- Time travel movies worth watching on a slow weekend
- Overseas adventure travel: how to plan a trip that actually works
- Choosing an outdoor bench that actually lasts
- Lows adventure: how low-ropes courses work and who they suit
- outdoor couch
- United travel bank: how prepaid travel money cards actually work
- National parks in California: a practical guide to choosing your trip