Best mountain biking trails: how to choose, where to ride, and what to check
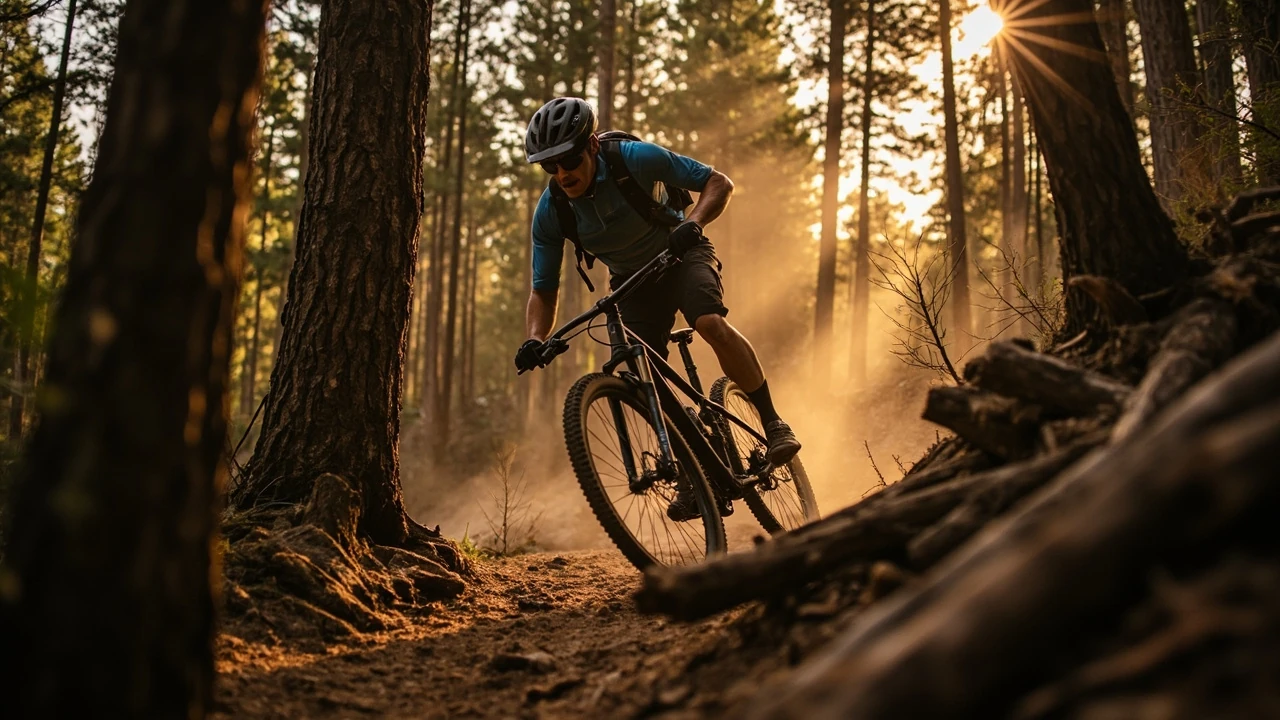
Choosing the best mountain biking trails is rarely about finding the single hardest or most famous line. It is about matching terrain, distance, elevation, and technical features to the rider, the bike, and the time available. A coastal route that thrills one cyclist can feel flat and unrewarding to another, while a forest loop that beginners love can be a poor choice for someone training for a high-altitude endurance ride.
This guide walks through the practical decisions that turn a generic list of “top trails” into a shortlist that actually fits. It covers how to read trail descriptions, compare regions by character rather than fame, match a route to your fitness and bike, plan a day or weekend around a ride, and avoid the common mistakes that turn a good trail into a bad day.
Best mountain biking trails: how to pick the right one for you
The phrase “best mountain biking trails” is short, but the intent behind it varies. Some readers want a curated list of world-class destinations. Others want a safer, closer loop for a Sunday morning. A few are planning a multi-day trip and need help comparing regions. The first step is to be honest about which of those you actually are, because the criteria that matter change with the goal.
A trail that is best for an experienced rider looking for a challenge is rarely the same trail that is best for a family with mixed abilities. Treat any list of “bests” as a starting point, not a verdict, and filter it through the constraints below.
Define what “best” means for this ride
Before looking at a map, write down three answers:
- What kind of ride do I want: a flowy cruise, a technical skills day, a long endurance loop, or a short burst of adrenaline?
- How much time do I really have, including driving, setup, and post-ride food?
- Who is coming, and what is the weakest rider’s comfort level with climbs, descents, and exposure?
Those three answers filter out most of the internet’s trail noise. A four-hour endurance loop is not a good answer for a two-hour window with a tired partner. A black-diamond descent is not a good answer for a first-timer who has not yet practiced braking on loose dirt.
Match the trail to the bike you have
The bike in the garage sets hard limits. A rigid singlespeed is wonderful on smooth gravel and punishing on rocky descents. A full-suspension trail bike is versatile but still has limits on jump lines and freeride features. Electric mountain bikes extend range and climbing ability but add weight and change handling on tight switchbacks.
Trail descriptions often skip the bike question. A “moderate” climb on a heavy e-bike with a low battery is a very different ride from the same climb on a light hardtail. When in doubt, look for local rental shops or clubs that describe trails in terms of the kind of bike they expect, not only the colour-coded difficulty rating.
Use difficulty ratings as a starting point, not a verdict
Most trail systems use a colour scale, often green, blue, red, and black. These are useful but inconsistent across regions. A blue trail in a flat area may feel like a green in the mountains, and a red in a dry climate can be slippery and exposed after rain. Read the rating alongside elevation gain, surface description, and width.
For a closer look at how outdoor venues describe their own difficulty, see ropes courses explained: types, safety systems, and who they suit, which uses a similar step-by-step approach to matching challenge to participant.
Reading trail descriptions without being misled
Trail copy tends to emphasise the dramatic bits: the climb with the view, the rock garden, the drop. Useful information is often buried. Knowing what to look for, and what to ignore, saves wasted hours on a route that was not what you expected.
Five numbers worth checking
Every good trail description should give you five numbers. If any are missing, treat the listing as incomplete.
- Total distance, in kilometres or miles, not “a short loop”.
- Total elevation gain, since 300 m of climb feels very different on a 5 km loop than on a 30 km loop.
- Highest point and exposure, because altitude and side-slope both change the difficulty of a descent.
- Surface mix: tarmac, gravel, root, rock, sand, or mud.
- Water sources and bailout points, especially for longer routes.
Language to translate
Trail copy has its own dialect. “Rolling” usually means short, repeated climbs rather than flat ground. “Singletrack” means a trail wide enough for one bike, which is technical in its own way because there is no room to pass on a climb. “Technical” often means rocks and roots, not necessarily steepness. “Flow” implies smooth corners and rollers built to carry speed. “Exposure” is a word that always deserves attention: it means a side slope where a mistake has consequences beyond a soft landing.
For day planning, the same logic used for a realistic day trip budget applies: small details add up, and a route that looks simple on paper can become expensive in time and energy once the real numbers are honoured.
Regions and the character of their trails
Trying to rank regions is a losing game, because “best” depends on what you value. The table below compares common trail regions by character rather than fame. Use it to think about the kind of riding you want, then look for specific areas that match.
| Region type | Typical surface | Typical climb feel | Best for | Watch out for |
|---|---|---|---|---|
| Coastal cliff trails | Packed earth, rock slabs, occasional loose gravel | Short, punchy climbs with views | Riders who want scenery and short, varied loops | Side-wind, exposure, salt air on drivetrains |
| Inland pine and hardwood forest | Rooty, loamy, sometimes sandy | Steady climbs under tree cover | Flow trails, technical skills, summer heat avoidance | Wet roots, slippery leaves, ticks in tall grass |
| Alpine and high mountain | Bedrock, scree, alpine grass | Long sustained climbs above the treeline | Strong climbers and high-altitude training | Weather changes, thin air, exposure on ridges |
| Desert and canyon | Sand, slickrock, embedded rock | Steep, technical, often hike-a-bike | Riders who like a mix of hike and ride | Heat, water supply, loose ledges and sand traps |
| Lake and river valley | Mixed gravel, hardpack, root sections | Gentler gradients near water | Families, long-distance mixed groups, e-bike tours | Flooding after rain, slippery river-edge rock |
| Old mining and quarry networks | Hard-packed clay, embedded rock, steep grades | Short, sharp climbs on firm ground | Riders seeking repeatable technical terrain | Loose rubble on corners, heavy braking ruts |
Within any region, the character of trails can still vary. A coastal area may have both gentle family paths and serious ridge traverses. A desert may have smooth slickrock for confident beginners and chunky technical lines for experts. The region is a starting filter; specific trails still need their own check.
Matching trail type to rider experience
Rider experience is more than years on a bike. It includes fitness, bike-handling skills, and how comfortable you are with specific features like drops, rock gardens, or narrow bridges. Honest self-assessment protects both enjoyment and safety.
Beginner-friendly trail traits
A good beginner trail has gentle gradients, wide corners, a smooth surface, and escape routes if a rider wants to stop. It should not require riding technical features to finish. Look for phrases like “family-friendly”, “accessible”, “green-graded”, and “wide path”. Short loops near a town or car park are usually safer than long point-to-point routes, because help is close if anything goes wrong.
For families planning a day around different age groups and height or skill rules, the planning logic in how to plan a family rope park day around age and height rules translates well: choose the hardest activity first, then plan food and rest around it.
Intermediate trail traits
Intermediate riders can usually handle sustained climbs, root sections, and small drops, but they value trails that flow rather than punish. Words to look for include “flow trail”, “machine-built”, “berms”, and “rollers”. These features let you carry speed and recover from mistakes, instead of testing your reaction to every metre of terrain.
Advanced and expert trail traits
Advanced trails add consequences: bigger drops, longer rock gardens, narrow ridges, or steep chutes. Descriptions get vaguer, often using local names. At this level, a guide for the first visit, a recent local report, or a group of experienced riders is worth more than another list online. Local knowledge of recent rockfall, reroutes, or closures is often the difference between a great day and a long walk back.
Planning a day or weekend around the ride
The best mountain biking trails are only as good as the day built around them. A common mistake is to fit a long ride into a tight schedule and then run out of time, energy, or food. A short, well-paced day usually beats a long, stressful one.
Build a realistic timeline
Estimate driving, parking, signing in or paying fees, kit-up time, the ride itself, post-ride cleaning, food, and the drive home. Then add a buffer. If the buffer feels generous, the day will probably feel relaxed. If it does not, the day is already too tight.
The same logic shows up in the one-day forest escape planner: travel time, food, and weather windows each eat into the active part of the day, and they have to be budgeted before the activity itself.
Weather and season
Weather changes how a trail rides. The same loop can be hero dirt after a dry week and a muddy mess the day after rain. Riding wet trails on clay or loam also damages the surface for the next riders, so many trail networks ask you not to ride when the soil is soft. Before heading out, check the local trail association or land manager for current conditions and any temporary closures. The same questions about closures and weather that apply to rope parks in rain and wind apply here: who decides, how is it communicated, and what is the refund or reschedule policy if your planned trail is closed.
What to pack
Packing for a mountain bike ride is a balance between weight and self-reliance. For a short loop near a car park, you can carry very little. For a remote route, you carry more. A useful middle ground for a half-day ride is:
- Helmet, gloves, and glasses or clear lenses, even on overcast days.
- Two water bottles or a hydration pack, plus a snack that does not melt.
- A basic tool kit: multitool, spare tube, mini pump or CO2, tyre levers, and a small patch kit.
- A thin waterproof layer, even in summer, because temperatures drop in the shade of forest cover.
- A simple first-aid kit and a charged phone in a waterproof bag.
For wet or changeable conditions, a small dedicated packing list, like the one in what to pack for a wet-weather trail day, helps avoid both overpacking and the much more common problem of under-preparing.
Trail etiquette and the unspoken rules
Most trail systems work because riders follow a small set of conventions. Breaking them is rarely dangerous on its own, but it quickly makes a route unpleasant for everyone.
Yielding and passing
Rules vary by region, but the core idea is the same: the rider who can slow down most easily, yield. On tight singletrack, that usually means the downhill rider yields because stopping on a climb is harder and less controlled. On wide paths, the faster rider passes, using a friendly voice or bell to warn. Pedestrians and horses usually have priority over bikes, and a slow, polite stop is always the right call.
Surface care
Braking skids and cutting corners erode trail surfaces, especially on clay and loam. Smooth, weighted turns protect the trail and usually feel better to ride. If a trail has rain closures, they exist because the soil cannot recover while riders are on it. Respecting them protects the route for the rest of the season.
Sharing with other users
Many of the best mountain biking trails are shared with walkers, runners, horse riders, and other cyclists. A short greeting, a controlled pass, and a willingness to wait a few seconds go a long way. Trail associations and land managers notice, and their goodwill keeps trails open.
Choosing between guided and self-guided riding
For new areas, a guide can be worth the cost, especially for a single expensive trip. For a local network, self-guided riding with a map and a recent trail report is usually enough.
| Option | Best for | What you get | What it costs you |
|---|---|---|---|
| Self-guided, with map app | Local riders, repeat visitors, easy or moderate terrain | Flexibility, low cost, familiar pace | More pre-trip research, higher risk of route errors |
| Local club group ride | Visitors with some experience, riders wanting company | Local knowledge, safety in numbers, social route | Fixed pace, limited customisation |
| Guided day | First visit to a region, advanced terrain, time pressure | Route choice, skills coaching, mechanical support | Higher cost, fixed schedule, less solitude |
| Skills camp or coaching trip | Riders wanting to step up a level | Structured progression, video review, controlled environment | Time commitment, training focus instead of exploration |
The right choice depends on the trip. A quick weekend in a new region is often best with a guide. A regular Saturday loop at home rarely needs one.
Common mistakes when picking a trail
Most bad trail choices come from a small set of recurring errors. Spotting them in advance is easier than learning from them in the field.
Chasing difficulty instead of fit
Harder trails are not automatically better trails. A confident intermediate rider will have more fun on a flowy blue than on a sketchy black that does not match their skills. Difficulty is a filter, not a goal.
Ignoring the drive
A two-hour drive turns a four-hour ride into a long day and often forces riders to cut the route short. A closer, less famous trail with more time on the bike is often the better day.
Skipping the bailout plan
Every long route should have a clear shortcut back to the start or a road. Without one, a small mechanical or a tired rider becomes a big problem. Identify the bailout before you start.
Trusting a single review
One rider’s dream trail is another’s nightmare. Cross-check at least two or three recent sources, ideally from riders whose style matches yours. Reviews from a year ago may describe a trail that has since been rerouted or damaged.
Forgetting food and water
Under-fuelled riders make poor decisions on technical terrain. A small snack every 45 to 60 minutes keeps energy steady and concentration sharp. On warm days, water and electrolyte intake matter as much as the line choice.
How to read a trail map and a route file
Digital route files, often in GPX format, are useful but easy to misread. The route line on a screen does not show surface, traffic, or exposure, only direction. Use the file as a guide and pair it with a written description or a local source.
What the route line shows
- Distance and overall direction, useful for matching a route to a time window.
- Climb profile when paired with elevation data, which gives a sense of effort.
- Turn-by-turn cues when annotated, which help when phone signal is poor.
What the route line hides
- Surface quality, including roots, sand, or rock slabs that are not visible on a map.
- Width and exposure, which only become clear on the ground or in a trail report.
- Gate status, seasonal closures, and private-land sections that may block a route.
Safety essentials beyond the bike
Trail riding is a low-risk activity for most riders most of the time, but a small set of habits reduces the chance of a bad day becoming a serious one.
- Tell someone where you are going and when you expect to be back, especially on remote routes.
- Carry a basic first-aid kit and know how to use it.
- Match your speed to the trail, not to your ambition, especially on unfamiliar descents.
- Stop and check the bike after any hard impact, since cracks in rims or bars can fail later.
- Keep the phone charged, but do not rely on signal: paper maps still work where phones do not.
Putting it together: a short, practical checklist
Before committing to a trail, run through this list. It is short on purpose, so it can be used on a phone in the car park.
- Is the route distance and elevation a fit for the weakest rider and the time available?
- Does the surface match the bike and the tyres I have, including recent weather?
- Is there a clear bailout, and do I know how to use it?
- Do I have water, food, tools, and a layer for changing weather?
- Has anyone ridden this trail in the last two weeks, and did they describe any issues?
- Is there a known closure for weather, wildlife, or land work?
- Do I know who to call if something goes wrong, and does my phone have signal or do I have a backup plan?
Frequently asked questions
What makes a mountain biking trail “good”?
A good trail matches the rider’s skills, fitness, and bike, while offering a sense of flow, scenery, or challenge that fits the day. Quality is not only about technical difficulty; a smooth green loop can be the best trail of the day if it fits the group.
How do I find the best mountain biking trails near me?
Start with local trail associations, bike shops, and clubs rather than global lists. They usually publish current conditions, maps, and rules. A recent conversation with a local rider is often more useful than a top-ten article from a distant region.
Are the best mountain biking trails only for advanced riders?
No. Many of the most popular trails are intermediate or beginner-friendly, because they are the ones that get the most maintenance and the most repeat visitors. Advanced trails exist in most regions, but they are a smaller part of the network and usually less crowded.
Do I need a full-suspension bike to ride the best trails?
Not always. A good hardtail handles many of the best trails in many regions, especially smoother flow trails. Full suspension helps on rougher, rockier, or steeper terrain, and on long descents. Match the bike to the trail, not the other way around.
How do I know if a trail is safe to ride after rain?
Check the local trail association or land manager for current conditions. Many networks publish a status page with closures. If the surface is soft clay or loam, the trail is usually best left alone for a day or two, both to protect the surface and to avoid a sketchy, slippery ride.
Should I ride alone or in a group?
For familiar, low-risk trails close to help, solo riding is reasonable if you tell someone your plan. For remote, technical, or new routes, a group is safer and more fun. As a rough rule, the further from help and the harder the trail, the more a group adds.
How fit do I need to be to ride the best mountain biking trails?
Fitness needs match the route. A flat 10 km loop on hardpack is suitable for most reasonably active riders. A 40 km loop with 1,000 m of climb on technical ground is a serious training ride. Pick a trail that fits your current base, then build from there.
Are e-bikes allowed on mountain biking trails?
Rules vary by country, region, and trail network. Many trail systems now allow class 1 e-bikes on the same trails as regular bikes, while restricting faster classes or motor-only riding. Always check the local rules before riding, since access can change between networks.
How can I tell if a route description is honest?
Honest descriptions mention distance, elevation, surface, and current issues. Vague phrases like “epic” or “world-class” without numbers usually mean marketing rather than information. Cross-check with at least one recent, independent report.
What is the single biggest mistake riders make when choosing a trail?
Choosing a trail that is too long, too technical, or too remote for the time and group available. Almost every other problem on a ride, from hunger to a small mechanical, becomes worse when the route is already pushing the limit.
Related reading
Explore High Ropes Adventure
Trip tools
Essential adventure planning guides
Use these practical guides to compare rope park activities, prepare for a first high ropes day, check a booking, choose suitable footwear and contact the editorial team. Each page links to the relevant live tools and current planning sections.
Latest articles
- Best mountain biking trails: how to choose, where to ride, and what to check
- Costco Disneyland tickets: how members really save and what to watch
- High ropes course waiver questions to read before you sign
- Extracurricular activities: how to choose the right fit for kids and teens
- Shibuya Sky tickets: how to choose the right time, deck, and pass
- How adventure park staff perform pre opening checks
- adventure time characters
- Finding the best dog parks near me: a practical local search guide
- Can glasses be worn on a zipline safely?
- Monterey Bay Aquarium tickets: types, prices, and how to plan your visit