Zipline landing positions explained: how to approach, brake, and dismount safely
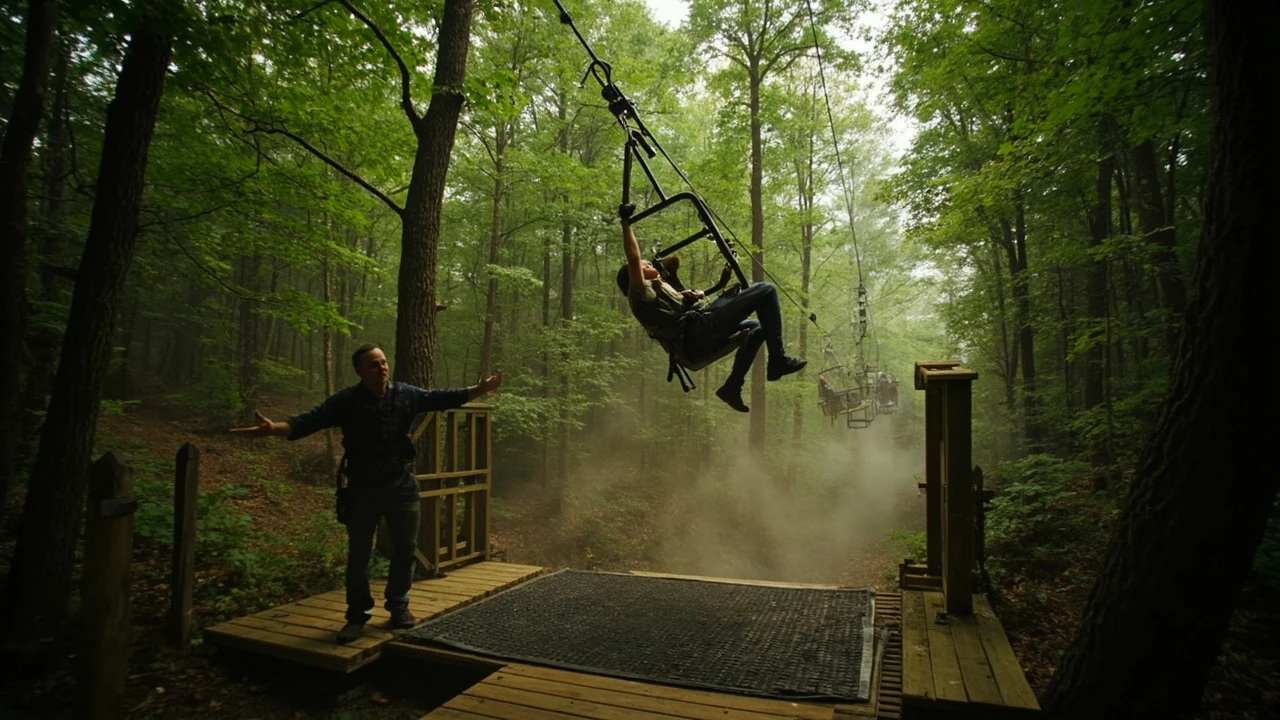
Zipline landing positions explained: how riders approach the platform with control
Most zipline injuries happen on the ground, not on the cable. Slips, twisted ankles, and shoulder knocks at the landing zone account for a large share of the incidents that adventure parks actually record, and the single biggest factor behind them is body position in the last three to five meters before the platform. This guide walks through how zipline landing positions work, why a small change in posture changes everything, and how the standard positions shift between tour-style ziplines, course-style ziplines, and training setups. It is written for first-time riders, parents watching from the side, and instructors who want a clear, practical reference to share with new participants.
The goal of any landing position is the same: keep the center of mass low and behind the trolley, give the guide something safe to reach, and let the rider absorb the remaining forward energy through the legs instead of through the head, neck, or wrists. Every variation of landing posture is built on those three ideas.
Why the landing is harder than the ride
A zipline rider spends most of the trip in a stable, suspended posture. The trolley handles the speed, the harness handles the weight, and the rider’s job is mostly to enjoy the view. The last few meters change that. Gravity has been slowing the rider for most of the line, but the trolley still carries momentum, the harness shifts the body’s effective weight, and the legs are not touching anything. The body has to convert that horizontal momentum into a controlled stop on a target that may be a wooden platform, a small landing mat, or a trained catcher.
Three things make the last few seconds different from the rest of the ride:
- The reference point changes from the cable and harness to the ground, which forces a rapid visual and postural shift.
- Arms go from relaxed to functional, because they are the first contact point with a guide or a trolley leash.
- The legs go from dangling to load-bearing, often with very little time to react if speed is higher than expected.
That is why a calm, well-rehearsed landing position is more important than grip strength, courage, or experience on the cable.
The three standard zipline landing positions
Most parks use one of three posture families, and the choice depends on the design of the line, the height of the platform, and whether a guide is present. A rider who understands all three can adapt to almost any setup without panic.
| Position | Body shape | Best for | Main risk if done wrong |
|---|---|---|---|
| Seated landing (also called “scoop” or “deep seat”) | Hips back, knees bent, torso angled back roughly 30 to 45 degrees, hands gripping trolley or straps | Tour-style ziplines with a guide and a clear landing zone | Hitting the buttocks on the platform edge if the rider stands up too early |
| Standing landing (also called “run-out” or “step-out”) | Upright posture, knees slightly bent, arms forward to absorb and balance, one foot ready to step | Long ground-level lines, training ziplines, and course-style ziplines that end on a flat surface | Twisting an ankle on uneven ground or leaning too far forward and falling |
| Superman or prone landing | Body horizontal, face down, arms and legs extended, head up | Low tandem lines, children’s courses, and certain harness systems built for prone riders | Neck strain or face impact if the rider lifts the head at the wrong moment |
Some parks mix elements. A tour operator may use a seated posture for a tall, fast line and a standing posture for a low practice line at the same site. The label matters less than the mechanics: hips low, eyes up, hands in a known position, and feet ready to take weight.
How to set up a seated zipline landing position
The seated landing is the most common position on commercial tour ziplines, especially on lines that end on a small wooden platform. The shape looks like sitting in an invisible chair, and it works because it keeps the heaviest part of the body, the hips and seat, behind the trolley and the harness attachment point. A rider in a deep seated position is harder to tip forward and easier for a guide to control.
A good seated landing has five checkpoints:
- Feet together, toes pointed slightly down, so the lower legs form a single clean shape rather than two separate obstacles.
- Knees bent, with the knees roughly above the ankles, not pushed forward of the toes.
- Hips pushed back as if sitting, so the torso is reclined at about 30 to 45 degrees from vertical.
- Arms up and back, with one hand on the trolley or on the upper trolley strap, ready to dampen any sway.
- Eyes up, looking toward the platform or guide, not down at the legs or the cable.
The most common error is letting the knees drift forward. When that happens, the hips rise, the torso comes upright, and the rider effectively turns the seated shape into a standing shape in mid-air. The guide then has to brake a heavier, more upright body, and the platform edge becomes a real hazard.
How to set up a standing zipline landing position
Standing landings show up on longer run-out lines, on training ziplines at adventure parks, and on course-style ziplines that end on a flat grass or wood-chip surface rather than a raised deck. They are also used by experienced riders on tour lines when the platform is wide, low, and clearly visible. The posture is closer to how a person would run or step off a small ledge, and it requires more calf and core control than a seated landing.
The setup looks simple but has its own checklist:
- Feet shoulder-width apart, with the toes pointing straight ahead, not splayed outward.
- Knees slightly bent, ready to flex as the weight arrives, not locked.
- Hips stacked over the ankles, torso upright or very slightly forward, never leaning back.
- Arms held forward at about waist height, palms facing each other, ready to absorb and balance.
- Head neutral, eyes fixed on a point about three to five meters ahead on the ground.
On a standing landing, the harness and trolley are usually lighter and the cable is lower, so the rider does not have to fight a strong pendulum effect. The danger is the opposite: the rider may forget there is still momentum and step out of the harness as if the line had already stopped, which is a common cause of forward stumbles on grass run-outs.
How to set up a prone or superman landing
Prone landings are less common on commercial ziplines but show up on tandem lines, on some children’s courses, and on certain training harnesses where the rider flies face down with arms extended. The position is essentially the opposite of a seated landing: the chest leads, the back is roughly horizontal, and the legs trail behind. It is used because it gives a stable flying shape and works well with low-tension lines and small landing mats.
For a prone landing, the rider should:
- Keep the body in a straight line from head to heels, with no bend at the hips.
- Hold the arms slightly out to the sides or forward, depending on the harness, to keep the chest off the mat on impact.
- Keep the chin slightly tucked, with the eyes looking forward and down toward the mat, not straight ahead.
- Brace the core so the lower back does not arch on contact.
- Let the guide or catcher take the final deceleration; the rider’s job is to stay long and flat, not to grab or kick.
Because the face is closer to the landing surface, prone riders should remove loose hats, sunglasses on cords, and anything that can swing into the chin or mouth. Instructors usually have riders practice the prone shape on a mat before they ever leave the platform.
Hand placement, glove use, and the role of the guide
Hand placement is the most underestimated part of zipline landing positions. The hands are the first thing a guide reaches, the first thing that touches a brake leash, and the first thing to hit the platform if a rider’s body tilts forward unexpectedly. Most parks teach a specific hand position because hands do more than look correct: they transmit information about speed, sway, and timing.
Three common hand positions show up across the industry:
| Hand position | Where the hands sit | What it controls | Typical setting |
|---|---|---|---|
| T-grip or trolley grip | One or both hands on the trolley above the head | Steady the trolley and dampen sway | Tour-style ziplines with a guide |
| Brake-leash grip | Hands on a leather or webbing leash attached to a braking block | Add drag in the last few meters | Lines without a guide, or self-braking systems |
| Cross-arm or “X” position | Arms crossed over the chest or in front of the face | Protect the head and face on a hard stop | Prone harnesses and certain children’s setups |
Gloves matter here, too. A thin leather or synthetic palm glove lets a rider grip a brake leash or trolley strap without the friction burns that show up after a single run. Many parks provide gloves and require them on braking lines, partly because a burned palm changes how a rider holds a hand position on the next run.
The guide’s role is the other half of the picture. On a guided line, the guide stands on the platform and gives a clear call when the rider is about three to five meters out. That call is the cue for the rider to commit to the landing position, not to start it. Holding the position through the call is what actually protects the rider, because the guide is the one timing the catch, not the rider.
Speed, braking distance, and why position has to match the line
Zipline speed depends on line length, rider weight, cable sag, and the height difference between the two ends. A short, steep kids’ line might run at 10 to 15 kilometers per hour; a long tour line can run at 40 to 60 kilometers per hour or more. Braking distance, the stretch of cable between the rider and the platform where the rider has to prepare, is what makes the landing position work or fail.
Three rules of thumb help a rider match position to speed:
- Higher speed means a deeper seated position, with hips further back, so the legs have more room to absorb.
- Lower speed and a flat run-out allow a more upright position, because the impact is lower and balance is easier to recover.
- Uncertain speed, which is common on a first ride, calls for the more conservative seated shape, even if the standing shape would also work.
Operators handle most of the speed control with cable tension, trolley choice, and brake blocks. The rider’s job is to choose a posture that can absorb whatever speed actually arrives. A rider who has set up in a deep seated position on a fast line is far safer than a rider who has half-set a standing position and is still deciding mid-flight.
Common zipline landing mistakes and how to avoid them
Most landing mistakes fall into a small number of patterns. They look different on the surface, but they share a common cause: the rider changes position too late, in the wrong direction, or both. Going through the patterns helps new riders recognize the moment of risk before it arrives.
The list below covers the mistakes that operators see most often:
- Standing up too early. The rider starts in a seated shape, then pulls the torso upright in the last meter. This shifts the center of mass forward and removes the cushioning effect of bent knees.
- Reaching forward with the hands. The instinct is to “catch” the platform, but reaching forward tips the torso and turns the harness into a pivot point.
- Looking down. Dropping the chin and eyes toward the feet collapses the upper back and pulls the head toward the platform edge.
- Gripping the trolley too tightly. A death grip on the trolley locks the shoulders and prevents the small adjustments that absorb sway.
- Letting the legs separate. Splayed legs create two contact points instead of one and almost always lead to a twist on impact.
- Braking too late with a hand leash. On a self-braking line, waiting until the platform is right there makes the stop jerky and can whip the upper body forward.
Each of these mistakes is fixable with a short rehearsal on the ground. Most parks run a short practice at the start of a session, often on a low training line, where the rider can run through the position without the pressure of an actual platform. Riders who take that practice seriously tend to land cleaner on the real line.
How zipline landing positions differ by age and body type
Standard landing positions are written for an average adult body, but parks adapt them for children, smaller adults, and larger riders. The principles stay the same, but the details shift because of weight, height, and how the harness fits.
| Rider group | Posture adjustment | Reason | Extra caution |
|---|---|---|---|
| Children (usually under about 12) | Slightly deeper seated shape, hands kept high on the trolley or strap, feet held closer together | Lower body weight means less pendulum, but a higher center of mass relative to the harness, which makes tipping easier | Check that the harness chest strap is snug, and confirm the child’s hands stay on the strap and not on the cable |
| Smaller adults and first-time riders | Seated position with a wider foot base, eyes on the guide rather than the platform | Unfamiliarity with the line is the main risk, not body size, so visual focus on the guide improves timing | Take the first run on a shorter, slower line if the park offers one |
| Larger or taller adults | Seated or semi-seated shape, knees bent more deeply, hands kept above the head on a longer trolley strap | Greater body mass means more momentum at the same speed, and longer legs need more bend to absorb without locking | Confirm weight limits with the operator and check that the harness is the right size, not just the right weight class |
Parents often ask whether a child can ride a line built for adults. The honest answer is that age matters less than harness fit, weight, and the child’s ability to follow the landing cues. A child who can hold the seated shape, keep the hands on the strap, and listen to the guide can usually ride a slower adult line, while a taller teen who panics and grabs the cable can struggle on a low kids’ line. Operators make those calls on the day, and parents should not push for a line that the guide has flagged as a poor fit.
What guides actually check at the landing platform
From the platform, a guide runs through a small mental list on every single rider. Riders rarely see this list, but it is what makes the landing feel calm and controlled even when the rider is nervous. Knowing the list helps riders understand what the guide is watching for and why certain calls are made.
- Speed at about five meters out, to decide whether to add a brake or to brace for a faster arrival.
- Body angle, to confirm the rider is in a seated or standing shape rather than upright with legs dangling.
- Hand position, to make sure the rider can be reached safely if a manual catch is needed.
- Foot position, to predict how the rider will land and whether a guiding hand at the shoulder will help.
- Helmet and harness, to confirm nothing has shifted during the ride, especially the chest strap on a seated landing.
When a guide asks a rider to “sit deeper” or “hands up” at the platform, that is a real-time correction based on what the guide is seeing in the last few meters, not a generic instruction. Riders who take those corrections on board usually land cleaner on the very next run.
How weather and platform surface change the landing
Wet platforms, wet gloves, and a slippery wooden deck change the mechanics of a landing even when the rider’s posture is perfect. Operators make the call on whether to run a line in rain, and riders should respect those calls, but it also helps to know what changes when the surface is less than ideal.
Three things tend to shift in wet or cold conditions:
- Grip on the trolley and brake leash drops, so hands need to be placed higher and held more deliberately.
- Foot traction drops on wood and metal, so a slightly wider stance or a slightly deeper knee bend helps prevent a slip.
- Cable speed can change, usually dropping in heavy rain, which makes the seated position easier but also tempts riders to stand up too soon.
Wind is the other weather factor. A steady crosswind can push a rider off the centerline of a long line, and the natural reaction, leaning into the wind, is exactly the wrong thing to do at the landing. The right reaction is to stay in the chosen landing position and let the guide or the brake block do the work. Operators usually close lines when sustained winds are high enough to push riders off course, and the threshold varies by site.
Zipline landing positions for kids’ courses and family parks
Family-oriented high ropes parks and adventure playgrounds tend to use lower, slower ziplines with simpler harnesses. The landing positions are still based on the three standard shapes, but the platform is usually a soft mat or a low deck, and a guide is almost always present. For a clear picture of how a typical family setup works, the family rope park age and height rules page is a useful reference. For a broader look at how kids’ courses run from a parent’s perspective, the kids’ activities at high ropes parks guide is also a good starting point.
On these family lines, the seated position is still the default, but the depth of the seat is shallower because the speed is lower. The guide’s call is also more verbal, often with a count, so the child can time the landing to a known cue rather than to a visual judgment. Parents watching from the side can help by rehearsing the same shape with the child on the ground before the run, and by keeping eye contact with the child from the moment the guide calls the cue to the moment the child is unhooked.
How to practice a zipline landing on the ground
Most parks include a short practice, but riders who want to feel truly ready can rehearse the position at home or at the park before clipping in. The rehearsal only takes a minute and removes a surprising amount of the first-run nerves. A simple sequence works for almost any line.
- Stand with feet together, knees soft, and pretend to hold a trolley strap just above the head.
- Push the hips back as if sitting in a chair, keeping the knees above the ankles.
- Hold the shape for five slow breaths, checking that the chest is open and the eyes are forward.
- Stand up out of the shape slowly, then drop back into it, to feel how the legs absorb weight.
- Repeat three or four times, then walk it through once with a partner acting as the guide’s call.
The same sequence works for the standing landing, with a wider stance and a slightly forward lean. For the prone landing, the rehearsal is harder to do without a mat, but the key feel is a long, straight body line with no bend at the hips. A quick mental rehearsal, even sitting in a chair, is better than no rehearsal at all.
Frequently asked questions
What is the safest zipline landing position for a first-time rider?
The seated position is the safest default for a first-time rider, especially on a guided tour line. The hips stay back, the legs stay bent, and the rider can be caught by the guide more easily than in a standing shape. The position is also the easiest to hold under stress, which is what a first run usually is.
How far from the platform should a rider get into landing position?
Most operators recommend setting the landing position at least five to seven meters before the platform, then holding it through the guide’s call. Changing position in the last meter is too late to be useful and can create a jerky transition that throws the rider off balance.
Can a rider steer on a zipline by changing body position?
On most commercial ziplines, no. The line of the cable and the angle of the trolley are designed to do the steering, and leaning to one side usually adds unwanted sway without changing direction. The only body-position changes that matter are the landing shape, and those should be the ones the guide has already asked for.
Why do some ziplines have a brake leash and others do not?
Some lines are built with a passive brake block or a magnetic brake that slows the trolley without rider input, while others rely on a leather or webbing leash that the rider pulls. Lines with a guide usually have a passive brake, and lines built for self-use usually have a leash. The landing position is similar in both cases, but the hand placement is different.
Is it normal to feel a jolt at the end of a zipline?
A small, controlled jolt is normal, especially on lines that end on a hard platform or a brake block. The jolt is the sign that the position is doing its job, because the legs and harness are absorbing the remaining speed. A large, sharp jolt usually means the rider stood up too early or the brake was applied too late.
What should a rider do if the line stops short of the platform?
Stop moving, hold the seated or standing position, and call the guide. Do not try to pull hand-over-hand back to the platform, and do not try to climb on the cable. Operators are trained for short-stops and will retrieve the rider with a rescue system, often within a few minutes.
Do gloves really matter for landing positions?
Yes, on any line that uses a hand brake or a trolley strap. A burned palm changes how a rider holds the strap on the next run, and a slippery palm can let the strap slide at the exact moment the rider needs a firm grip. Most parks that use hand brakes provide gloves or require riders to bring their own.
Can children use the same landing position as adults?
Children use the same seated shape but with a shallower depth, a tighter hand grip on the strap, and a closer foot position. The harness is also different, and the chest strap is usually snugger to keep the child from tipping forward in the seat. A guide will check the fit on the platform before the child rides.
What happens if a rider panics and stands up mid-landing?
Panic stands are one of the most common reasons for minor landing injuries. The rider tips forward, the harness takes the upper body weight, and the legs are not in position to absorb the speed. The guide’s job is to call the rider back into the seated shape, and most riders respond to a calm, loud call. If the rider cannot recover, the guide is trained to take more of the rider’s weight and lower them to the platform.
Are there any landing positions that should be avoided?
Riders should avoid reaching forward for the platform, twisting to look behind, and trying to “run” the last few meters in the air. Each of those movements shifts the center of mass in a way the harness cannot safely support, and each is a pattern that operators see in the more awkward landings. A still, committed shape is always safer than a clever-looking adjustment.
Putting it into practice on your next visit
The cleanest way to use this guide is to match it to the line you are about to ride. Read the briefing, watch one or two other riders land, and rehearse the seated or standing shape on the ground before you clip in. Listen to the guide’s call, hold the position through the catch, and let the legs and harness do the work. For a fuller picture of what a first visit to a high ropes park looks like, including how the zipline fits into the wider course, the first high ropes course walkthrough is a helpful companion read. If the day turns out to be wet or windy, the rope park weather and closure questions page covers what to ask the operator before committing to a line in less than ideal conditions.
A calm, well-rehearsed landing position is the simplest piece of safety gear on any zipline, and it costs nothing extra to use. Treat it as part of the ride, not as an afterthought, and the platform becomes the easiest part of the line rather than the most worrying one.
Related reading
Explore High Ropes Adventure
Trip tools
Essential adventure planning guides
Use these practical guides to compare rope park activities, prepare for a first high ropes day, check a booking, choose suitable footwear and contact the editorial team. Each page links to the relevant live tools and current planning sections.
Latest articles
- AAA travel insurance: what it covers and how to use it on a high ropes trip
- Zipline landing positions explained: how to approach, brake, and dismount safely
- Skate parks near me: how to find, compare, and choose the right one
- Outdoor fan guide: how to stay cool at adventure parks and on the trail
- How high ropes course difficulty ratings work
- Thousand Trails: How the Membership Works and What to Check Before You Join
- Turners Outdoor: A Practical Guide for Adventure Day Visitors
- Low ropes vs high ropes team building activities: how to choose
- Space Needle tickets: a practical guide to choosing, booking, and timing your visit
- Outdoor sauna: how it works, what it costs, and how to plan a safe setup