Lows Adventure 3: What This Beginner-Friendly High Ropes Route Involves
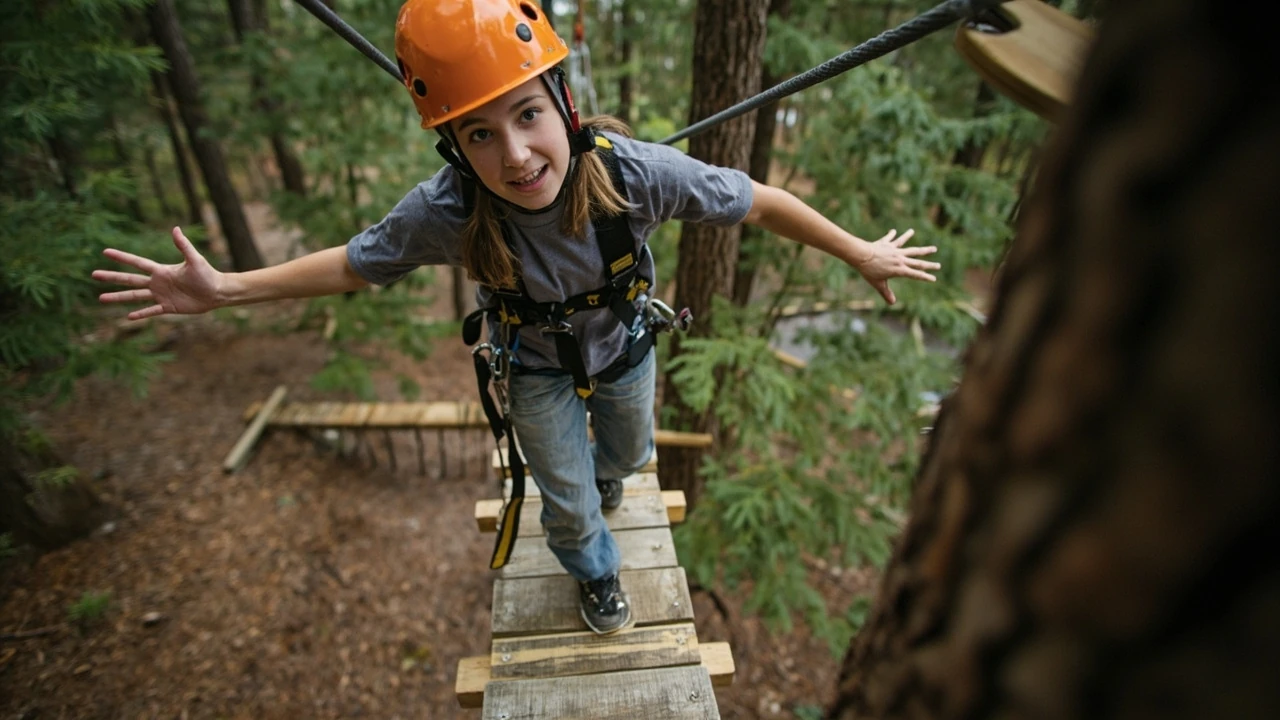
Lows adventure 3: what this beginner-friendly high ropes route actually involves
You stand at the trailhead sign, harness already buckled, reading the route map and trying to match what you see in front of you with the description on the website. The name on the map says “Lows adventure 3,” but the page only mentions a “lower level” route and leaves the practical details for the day itself. That gap is the reason this guide exists.
Lows adventure 3 is the third tier in a typical “Lows” range of routes that adventure parks use to introduce new visitors to elevated obstacles without sending them straight onto the tallest towers. It sits above the easier Lows 1 and Lows 2 entries, but well below the full high ropes circuits. Knowing exactly what that middle position means, what elements you will meet, and what the route asks of you is the difference between arriving over-prepared and arriving under-prepared.
This article walks through the layout of a Lows adventure 3 route, the skill level it suits, the safety systems used, the time and physical effort involved, and the practical decisions you should make before booking. The aim is to help you turn a short route label into a clear expectation of your day.
Where Lows adventure 3 sits in a typical park route system
Most high ropes parks do not run a single mixed-ability circuit. They split the course into levels so that beginners, families, and confident climbers all have a route that matches their ability. A “Lows” designation usually means the obstacles are between one and four metres off the ground, supported by a continuous belay or smart-belay cable, and built for first-time and younger visitors.
Within that “Lows” range, the numbered tiers work like this in most European-style adventure parks:
- Lows 1: The entry level. Very low platforms, wide stable elements, generous handrails, short crossing distances. Suited to children meeting height rules, nervous adults, and first-timers who want a calm first contact with a harness and cable.
- Lows 2: A small step up. Slightly higher platforms, narrower elements, the first moving obstacles such as a balance beam or a short swinging bridge, and a couple of decisions to make about foot placement.
- Lows adventure 3: The top of the Lows range. Higher than Lows 2 but still in the low-elevation category, with longer crossings, more varied elements, and the first real test of stamina and grip strength, while still being suitable for most reasonably fit beginners.
Park-by-park variation is real. Some sites use “Lows” and “Highs” as their two main divisions, with 1 to 4 inside each. Others blend beginner and intermediate routes under a single “Adventure” umbrella. The label “Lows adventure 3” therefore tells you a position, not a universal element list, and the rest of this guide should be read as a practical description of what that position normally means.
What the course layout usually looks like
A Lows adventure 3 route is designed as a one-way loop around a section of the park. You climb a small access ladder or staircase, walk a continuous cable-supported path between trees or poles, and exit back to ground level through a controlled descent point. The whole experience is meant to feel like a single, connected journey rather than a list of separate obstacles.
Typical elements you can expect on a Lows 3 route, in roughly the order you meet them:
- A short access staircase with the first clip-in point and a practice element on a low platform.
- One or two wide balance bridges to settle into the harness and rhythm.
- A swinging element, often a single log or rope swing, that introduces momentum.
- A net or mesh section, which changes the feel of the walkway under your feet.
- A longer crossing, such as a multi-stage bridge with a midway platform.
- One or two more demanding elements, like a barrel run, moving planks, or a small zip-style connector between trees.
- A controlled descent back to the ground, usually by a short auxiliary line, slide, or ladder.
Platforms are normally spaced so that the belay cable is always anchored between trees, and so that a tired climber can rest on a square platform before moving on. Total route length is usually between 80 and 150 metres, and the loop should take most first-timers between 20 and 45 minutes to complete at a comfortable pace.
How high is “low” and how it feels in practice
The word “Lows” is relative, not absolute. In many parks, the Lows range tops out somewhere between three and four metres, and Lows adventure 3 is usually at the upper end of that band. That is high enough to feel exposed on a moving element, but low enough that a slip would land you on a soft surface within a short drop, and the belay system would still catch you.
For most adults, that height feels similar to standing on the first storey of a house. For children, it can feel much taller, especially on an element that sways. Two practical points follow from that:
- The fear response on Lows 3 is real, even at modest height, and tends to peak on the first moving element after the access platform.
- The physical effort is more about grip, balance, and steady foot placement than raw arm strength, because the belay takes the fall-arrest load and you should not be hanging from the cable.
If you have any doubt about how you will react, the access platform is the place to test it. Step off, walk to the first element, and decide there whether to continue. Every well-run park treats that decision as part of the experience rather than a failure.
Who Lows adventure 3 is designed for
Parks set their route levels by height rules, weight limits, age guidance, and the kind of supervision they expect from accompanying adults. A Lows adventure 3 route is normally aimed at:
- Older children and teenagers who have already completed Lows 1 or Lows 2 and want more challenge.
- Adult beginners who are confident on a stepladder but have never been on a high ropes course before.
- Family groups with mixed ability, where stronger members do not want a full Highs route but still want a route that tests them.
- Visitors who have had a gap year or two away from ropes courses and want a sensible re-entry level.
It is generally not aimed at very young first-timers, visitors who are uncomfortable on ladders, or anyone whose mobility, grip strength, or sense of balance is significantly limited on the day. If you are unsure, call the park and describe your situation; staff are used to those calls and will tell you honestly whether Lows 3 or a flatter route is the better match.
Skills you will quietly pick up on the route
One of the reasons the Lows range exists in tiered form is to spread the learning curve across a few routes rather than dumping it on a first-time climber. By the time you finish Lows adventure 3, you will have practised several skills that matter on every higher route in the park.
- Continuous belay handling: Keeping the carabiner or smart-belay device moving through anchors without skipping or backtracking.
- Weight transfer: Moving your centre of mass over each foot before the next step, instead of reaching with your arms.
- Hand placement: Using ropes, side cables, and platform edges as guides rather than as load-bearing handholds.
- Breathing and pace: Slowing down on elements that feel rushed, because the route does not have a time limit.
- Communication: Calling ahead to the climber in front, asking for space, and signalling when you are clipped and ready.
None of these skills is dramatic on its own. Together, they are the difference between a route that feels like walking and one that feels like work, and they are exactly the habits that make later levels feel manageable.
How long the route takes and how tiring it is
Two things determine how long a Lows 3 route feels: the number of elements and the number of pauses. A solo climber moving steadily can finish a 100-metre loop in roughly 20 minutes, while a family with younger children and a few photo stops can take 45 minutes or more. Park staff do not chase you along the route, and there is no time pressure beyond the park’s closing time.
Energy expenditure is harder to generalise. A Lows 3 route is aerobic rather than muscular for most visitors. Your hands, forearms, and shoulders will feel the grip work, and your legs will feel the repeated stabilising steps on moving elements, but the belay system is taking the fall-arrest load the entire time. The biggest factor is usually upper-body endurance, especially on a cooler day when your hands are tight.
If you plan to combine a Lows 3 route with another activity in the same park, treat it as roughly equivalent to a brisk 30 to 45 minute walk on uneven ground, with a small extra layer of grip and balance work on top.
Safety systems used on a Lows adventure 3 route
The “Lows” range is where most parks first introduce their continuous safety system, and Lows adventure 3 is normally the most demanding route that still uses that beginner system. Two setups are common.
| System | How it works | Where you meet it | What to watch for |
|---|---|---|---|
| Traditional continuous belay with two lanyards | Two lanyards with snap-lock karabiners; at any time one is clipped to the cable and the other is being moved between anchors. | Many European parks, especially on longer-established courses. | Never unclip both lanyards at the same anchor. Move one at a time. |
| Smart belay (magnetic or carabiner-based) | A single device that opens at platforms and clips shut automatically at each anchor point. | Newer parks and most modern rebuilds, including many that name a “Lows” range. | Confirm the device has clicked home before transferring weight at each anchor. |
Before the first element, the park will brief you on which system is in use and run a short practice drill. The most common avoidable incidents on a Lows 3 route are skipping an anchor while moving a lanyard, or trusting a smart device before it has fully seated. Both are addressed by a deliberate, slightly slower pace at every transition.
You can read more about the wider safety picture in a separate guide on high ropes belay systems explained for first-time visitors, which covers the logic behind the systems used on Lows 3 and the next level up.
What to wear and what to carry
Clothing matters more than people expect on a Lows 3 route. The harness sits on your hips and thighs, your gloves protect the back of your hand against the cable, and your shoes are the only thing between you and the elements.
- Footwear: Closed-toe trainers or light hiking shoes with a grippy sole. No sandals, no smooth-soled shoes, no boots with deep treads that catch on netting.
- Clothing: Fitted layers you can move in. Avoid very loose trousers that can snag on netting, and avoid scarves or loose hood strings that can catch in karabiners.
- Hands: The park will usually provide gloves. If you have your own well-fitted cycling or gym gloves, bring them.
- Hair and accessories: Long hair tied back, no dangling jewellery, no loose phone straps around the neck.
- What to leave in the locker: Keys, loose coins, and anything that cannot survive a short drop into wood chips.
Most parks also publish a packing list for the rest of the day, especially if rain is forecast. Our guide on what to pack for a wet-weather trail day covers the items worth adding for changeable conditions.
Lows adventure 3 compared with the route above and below it
The clearest way to understand Lows adventure 3 is to place it next to the levels on either side. The exact element lists differ by park, but the position is consistent.
| Aspect | Lows 1 or 2 | Lows adventure 3 | Highs / Adventure 1 and above |
|---|---|---|---|
| Typical platform height | 1 to 2.5 metres | 2.5 to 4 metres | 5 to 12 metres |
| Element variety | Mostly stable bridges, one or two moving elements | Mix of stable, moving, and longer crossings | Wider mix including long traverses, multi-platform sequences, and more dynamic elements |
| Best for | First-timers, younger children within height rules, cautious adults | Confident beginners, older children, families with mixed ability | Repeat visitors, fit adults, older teens with ropes experience |
| Time to complete | 15 to 25 minutes | 20 to 45 minutes | 30 to 90 minutes |
| Physical demand | Light | Moderate, mostly grip and balance | Moderate to high, sustained grip and leg work |
If you have already done a Lows 2 route and finished it feeling like you wanted a bit more, Lows adventure 3 is the natural next step. If you finished Lows 2 feeling like you were at the edge of your comfort zone, it is reasonable to repeat Lows 2 with a different element order or to ask the park whether the Lows 3 elements on the day match the description on the website.
How to plan your day around a Lows 3 route
A Lows 3 route sits naturally in the middle of a longer visit. It deserves a small amount of pre-planning, both for your own state on the day and for the other visitors in your group.
- Book an off-peak slot if you can. Weekday mornings and late afternoons are quieter, which means fewer queues at the access platform and a more relaxed pace on the route.
- Arrive 30 minutes before your slot. Time for check-in, harness fitting, the safety brief, and a toilet stop is easily half an hour, and rushing it makes the route feel harder.
- Eat, but not too much. A light meal 60 to 90 minutes before the route is the right balance. Heavy meals sit uncomfortably under a harness.
- Plan a low-key activity afterwards. A picnic, a short walk, or a café stop lets the grip and shoulder work dissipate before you drive home.
- Check the weather the night before. A short rain shower is usually fine, but high winds and thunder close routes. Our guide on rope park weather and closure questions explains what parks close for and why.
Common mistakes first-timers make on a Lows 3 route
Most first-time mistakes on a Lows adventure 3 route fall into the same handful of patterns. Knowing them in advance is the easiest way to avoid them.
- Rushing the first anchor. The first clip-in is where nervous energy turns into a slipped karabiner. Slow it down.
- Trusting the harness too completely on a wobbly element. The harness catches you, but you still want to keep three points of contact with the element wherever you can.
- Skipping the midway platforms. They are there for rest, regrouping, and for letting faster climbers pass. Use them.
- Looking at the ground on a moving element. The cable will sway less if your eyes stay on the next handhold rather than on the gap below.
None of these mistakes is dangerous on its own, and staff will talk you through them as you go. They are listed here because they are the most common reasons a first Lows 3 route feels harder than it needs to.
Who should skip Lows adventure 3 and pick a different route
Even within a “Lows” range, not every route is for every visitor. There are situations where a different choice is the better one.
- If you are within a few centimetres of a height limit and have not done a ropes course before, start on Lows 1 or 2 to confirm comfort with the harness and the cable, then move up.
- If you are visiting with a group that includes a very nervous first-timer, it is often better to start everyone on Lows 1 or 2, then let the confident members add Lows 3 as a second route.
- If you are on a tight schedule, with less than 90 minutes in the park, Lows 3 plus check-in and briefing is too tight, and a single Lows 1 or 2 route is the more realistic plan.
- If you have an injury to your shoulder, wrist, knee, or ankle, check with the park before booking. Most parks will not refuse you, but they will tell you which elements to avoid.
For visitors who are still choosing the park itself, our guide on how to find a safe adventure park near you covers the checks worth making before you book.
What to do after you finish a Lows 3 route
The first thing most visitors do after a Lows adventure 3 route is sit down. That is a good instinct. A short rest, a drink, and a few minutes to let the hands recover is a more useful end to the experience than rushing straight to the car. If the park has a higher route and you are still feeling strong, Lows 3 is a sensible warm-up for a single Highs loop, but not for a full second Lows 3 in the same session.
It is also worth thinking about how the day as a whole has gone. If you arrived unsure whether ropes courses were for you, finishing Lows 3 without drama is a strong signal that the next level up is within reach on a future visit. If you arrived already confident and found Lows 3 too easy, the high ropes levels are the natural next booking.
Frequently asked questions
What is Lows adventure 3 in a ropes course?
Lows adventure 3 is the third level in the low-elevation range of a high ropes adventure park. It sits between the easier Lows 1 and 2 routes and the taller high ropes circuits, and is built for confident beginners, older children, and family members who want a moderate challenge rather than a full high ropes route.
How high is Lows adventure 3?
Platforms on a Lows 3 route are usually between two and a half and four metres above the ground. The exact height varies by park, but it is high enough to feel exposed on a moving element while still being well within the range where a continuous belay system and a soft landing surface are standard.
Is Lows adventure 3 suitable for beginners?
Yes, in most parks Lows 3 is designed for beginners who are reasonably fit, comfortable on a stepladder, and willing to follow the safety briefing carefully. First-timers who are nervous about height are usually better placed on Lows 1 or 2, with Lows 3 as a second route once they have settled in.
How long does a Lows adventure 3 route take?
Most first-timers take between 20 and 45 minutes to complete a Lows 3 route, including short rests on midway platforms. The time depends on the number of people in your group, how busy the route is, and how often you stop for photos.
What is the minimum age or height for Lows adventure 3?
Age and height rules are set by each park, but a common pattern is a minimum height of around 1.20 metres for the Lows range, with some parks setting a slightly higher minimum for Lows 3 specifically. Always check the park’s own rules before booking, especially for children close to the limit.
Do I need any experience to do Lows adventure 3?
No prior ropes course experience is required for Lows 3. The route is designed so that a careful first-timer can complete it after the standard safety briefing and a short practice drill on the access platform. Experience on Lows 1 or 2 is helpful but not essential.
What safety system is used on Lows adventure 3?
Most parks use a continuous belay system on Lows 3, either a two-lanyard setup or a smart belay device that clips automatically at each anchor. Staff will brief you on the specific system on the day, and a short practice drill at the access platform is mandatory before you leave the ground.
Can I do Lows adventure 3 in the rain?
Light rain is usually fine on a Lows 3 route, because the elements are low and the route is short. Heavy rain, thunderstorms, or strong winds will close the route for safety, and staff will tell you at check-in whether the conditions are within limits. Our separate guide on rope park weather and closures covers the typical thresholds.
What should I wear for a Lows adventure 3 route?
Wear closed-toe trainers or light hiking shoes with a grippy sole, fitted layers you can move in, and no loose scarves or jewellery. Most parks provide gloves, and long hair should be tied back. Lockers are available for phones, keys, and other small items.
Is Lows adventure 3 harder than Lows 2?
Yes. Lows 3 is the top of the Lows range and is a clear step up from Lows 2 in platform height, element variety, and crossing length. Visitors who have completed Lows 2 and want more challenge usually find Lows 3 the natural next step, while visitors who felt Lows 2 was at the edge of their comfort zone are often better off repeating Lows 2 first.
Related reading
Explore High Ropes Adventure
Trip tools
Essential adventure planning guides
Use these practical guides to compare rope park activities, prepare for a first high ropes day, check a booking, choose suitable footwear and contact the editorial team. Each page links to the relevant live tools and current planning sections.
Latest articles
- Sweet tart ropes: what the flavour means in a ropes course
- Demon Slayer movie tickets: how to find a screening and prepare for a day out
- How to choose NBA tickets without overpaying
- Time travel movies worth watching on a slow weekend
- Overseas adventure travel: how to plan a trip that actually works
- Choosing an outdoor bench that actually lasts
- Lows adventure: how low-ropes courses work and who they suit
- outdoor couch
- United travel bank: how prepaid travel money cards actually work
- National parks in California: a practical guide to choosing your trip