Group adventures: how to plan a high ropes day that actually works
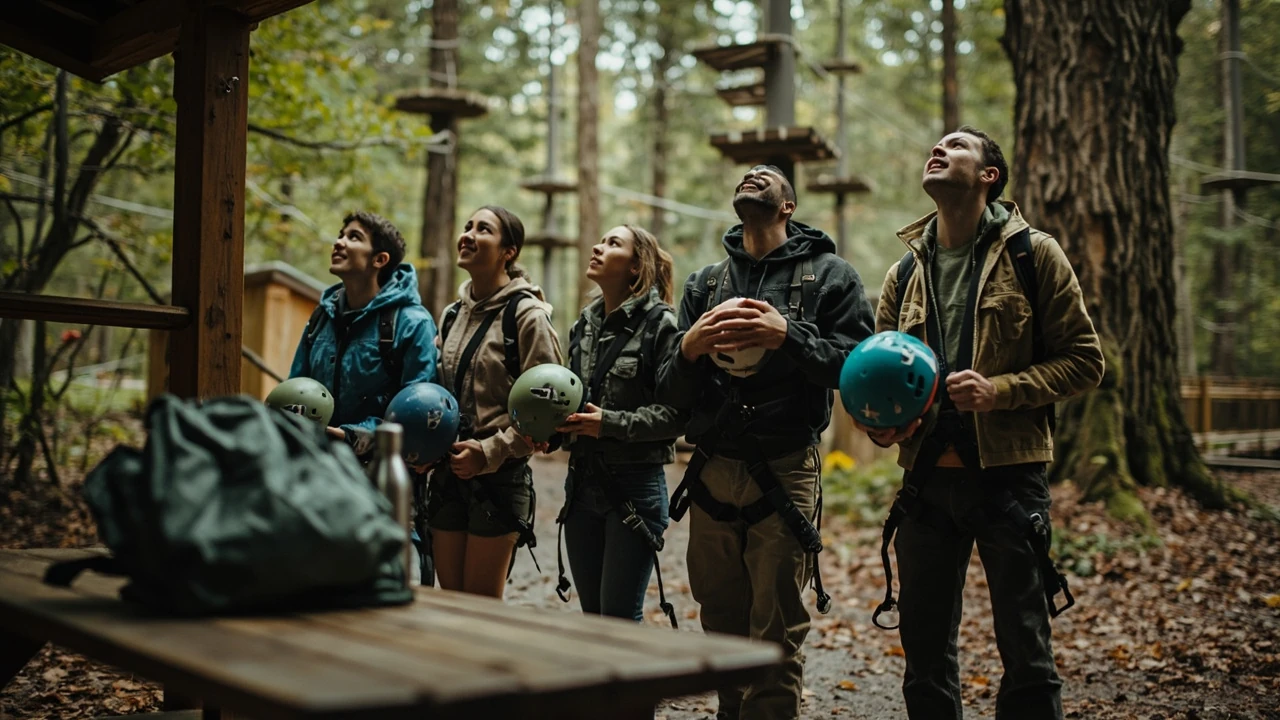
Group adventures at a high ropes park: what organisers actually need to know
A birthday lunch that drifts into a four-hour queue, a team-building day that splits the group into people who climb and people who just watch, a school trip that loses an hour to misplaced gloves. These are the small failures that make a group adventure feel like hard work instead of a shared memory. The good news is that high ropes parks are built for groups, and the friction almost always comes from the planning side, not the ropes. This guide walks through the decisions that decide whether a group adventure day feels smooth or chaotic: how many people to book for, which age and height rules to read first, how to handle mixed confidence levels, what to do about weather, and how to keep the day on budget without losing the fun.
The focus here is on group adventures at a high ropes or adventure park, the kind of venue that combines elevated obstacle courses, zip lines, and ground-level team tasks in one site. The same framework also works for broader outdoor group days, multi-activity centres, and forest escape days. The aim is a single, practical playbook rather than a generic pep talk about teamwork.
Why high ropes works so well for group adventures
High ropes courses are an unusual mix of physical challenge, visual spectacle, and social pressure, which is exactly what makes them useful for a group. Unlike a long hike, which quietly sorts people by fitness, a ropes course produces small, visible moments of courage: a participant clipping onto a wire 12 metres up, a friend on the ground calling out a next step, a quiet round of applause when someone reaches a platform. For organisers, the structure is also easier than most alternatives. The park provides the equipment, the briefings, and a fixed route. The group provides the people and the food.
There is also a logistical reason group adventures default to adventure parks. Courses are designed to be run in waves, which means a single instructor can supervise a dozen participants at once, the gear library is shared, and the venue has solved the hardest safety problems already. Compared with planning a private hike, a scavenger hunt, or a kayaking trip, a ropes course shifts the safety, insurance, and equipment burden to the operator. The group organiser’s job becomes decision-making rather than risk management.
Step 1: define the group before you book
Most planning mistakes happen because the organiser treats the group as one number. A group of twelve adults who all know each other is a different event from a group of twelve that includes a nervous parent, an eight-year-old, and a friend who is only there for the lunch. Before you pick a date or a course level, write down four things:
- Total headcount, including any guests who may not climb.
- Age range, especially the youngest and oldest climbers.
- Fitness range, including anyone with a recent injury, pregnancy, or a fear of heights.
- Reason for the day: birthday, team building, school, sports club, family reunion, or just a catch-up.
This short list determines almost every later choice. A team of university students can be booked onto the hardest course in a single wave. A family group that mixes teenagers and grandparents usually needs a multi-level venue where some people climb and others watch from a terrace with coffee. A school group needs a park that runs dedicated sessions with a higher instructor-to-climber ratio. The reason for the day also shapes the tone: a birthday group is fine with a loud, silly atmosphere, while a corporate offsite often needs a calmer briefing and a quieter lunch area.
Step 2: pick the right course level for a mixed group
Most high ropes parks offer at least two or three difficulty tiers, often colour-coded, usually described as beginner, intermediate, and advanced. The beginner course sits low, uses a self-belaying system, and rarely goes above eight or ten metres. The intermediate course is higher, longer, and includes more balance elements. The advanced course adds moving obstacles, longer zip lines, and free-fall features such as the quick jump.
For a typical group adventure, the beginner course does most of the heavy lifting. It is the level that lets nervous first-timers, older relatives, and children above the minimum height join the same wave as confident adults. Booking the whole group onto the advanced course usually backfires: a third of the group will refuse to climb, another third will climb once and then sit out the rest, and only the remaining third will actually enjoy the harder route.
| Course level | Typical height range | Best fit for | Watch out for |
|---|---|---|---|
| Beginner (green/blue) | 2 to 10 metres | First-timers, families, mixed-age groups, corporate ice-breakers | Can feel slow for very confident adults if booked alone |
| Intermediate (red) | 5 to 15 metres | Active adults, sports clubs, school groups above 12 | Often has tighter height and weight limits |
| Advanced / extreme (black) | 10 to 20+ metres | Experienced climbers, thrill-seeking friend groups | Not suitable for most mixed group adventures; pair with a lower tier for others |
Where possible, book a venue that lets the group split across levels in the same session. The confident adults go to the harder course, the cautious adults and teens go to the beginner course, and the small children either climb a junior loop or stay on the ground with a designated supervisor. The shared lunch then becomes the social glue, because everyone has a story.
Step 3: read the age, height, and weight rules before paying
Age and height rules are not suggestions. They exist because the harness, carabiner, and rope systems are tested to specific force ranges, and a child who is too light will not generate enough tension in a self-belay system to engage the safety catch. Every park publishes its own thresholds, and these are the numbers to check before you send out a single confirmation message.
| Rule | Typical range | Why it matters |
|---|---|---|
| Minimum age | From about 6 to 8, depending on course | Children below this usually cannot complete the safety briefing or operate the carabiners reliably |
| Minimum height | From about 110 cm to 140 cm | Directly affects harness fit and reach between platforms |
| Maximum weight | Usually 100 to 130 kg | Harnesses and lanyards are rated; exceeding the limit is a safety and insurance issue |
| Maximum group size per wave | Often 8 to 14 climbers per instructor | Affects how many waves you need and how long the day runs |
For a closer look at how these rules cascade through a family day, the family rope park age and height guide walks through a realistic example with younger children. Cross-check your group against that kind of breakdown before you commit to a venue, because swapping parks at the last minute is far more painful than reading a page of rules.
Step 4: build a realistic timeline for the day
Group adventures run on a simple rhythm: arrive, gear up, brief, climb, eat, optional second climb, go home. The mistake most organisers make is to underestimate each step. Gear-up looks like five minutes per person but, in practice, takes 20 to 30 minutes for a wave of twelve because the harness fitting, helmet check, and practice run on the training line all happen in a single queue. The briefing takes 15 to 20 minutes even for experienced climbers, because the park has to demonstrate the safety system from scratch.
For a typical half-day group adventure, a workable timeline looks like this:
- Arrive 15 minutes before the booked slot to handle parking, toilets, and payment.
- Gear-up and briefing block: 45 to 60 minutes for a wave of 10 to 14 people.
- Climbing wave: 60 to 90 minutes on the course, depending on level.
- Land and de-gear: 15 to 20 minutes, including return of harnesses and helmets.
- Lunch or coffee break: 45 to 60 minutes.
- Optional second activity: another wave, a ground-based team task, or a zip line only.
If you are running two waves back to back, plan a 30-minute buffer between the end of the first wave and the start of the second. Without that buffer, the second group will queue in their harnesses while you wait for tables to clear, and the whole afternoon drifts by 45 minutes. The one-day forest escape planner has a printable version of this kind of timeline if you want a ready-made structure.
Step 5: split the group so nobody feels left out
The single biggest social decision on a group adventure is who climbs with whom. Small friend groups usually want to stick together, which works fine on the beginner course but can clog an intermediate course if half the group is slow on the high elements. Larger groups benefit from a light split: a “fast” wave of confident adults, a “steady” wave of mixed ages, and a “social” wave of people who mainly want photos and a story for the group chat.
A useful split rule is to put mixed-confidence pairs into the same wave so neither person is the slowest or the bravest in their group. A confident adult paired with a nervous partner is more likely to take their time and stay on the course. Two confident adults in the same wave will race ahead and lose the quieter participants. Two nervous adults together will often find a quiet reason to come down after one element. The pair, not the individual, is the unit that decides pace.
For team-building days, swap the pairings between waves. A morning wave of department-mates and an afternoon wave of cross-department pairs will produce very different conversations at dinner, and most groups notice the difference in how easily they talk afterwards.
Step 6: budget without surprises
Group adventures are usually cheaper than they look at first glance, but the extras add up. A realistic budget has to cover the course fee, equipment hire (often included, but not always), a small spending buffer for spectators, transport, food, and a contingency for the person who decides on the day that they would rather not climb.
| Budget line | Typical cost pattern | How to keep it under control |
|---|---|---|
| Course fee per climber | Often a tiered group rate that drops per head above 8 to 10 people | Ask for a group rate explicitly and ask whether spectators are charged |
| Equipment hire | Frequently included, sometimes a small surcharge for gloves | Confirm in writing; budget for one pair of cheap work gloves per climber |
| Spectators and non-climbers | Free at many parks, a small entry fee at others | Pick a park that does not charge spectators if you have a lot of them |
| Food and drink | Cafe on site, or bring your own picnic | Pre-order group lunches if the park offers them; picnic tables are usually free |
| Transport | Minibus, fuel, or train tickets if car-free | For a longer read on this, see the train or car comparison for outdoor day trips |
| Contingency | About 10 percent of the total | Covers the no-show, the upgrade to a better course, or the optional second wave |
For a longer framework on how these numbers fit into a single day’s spending, the realistic day trip budget post breaks down the same lines across transport, food, activities, and a buffer. The point is not to budget tightly but to budget honestly: a group adventure that comes in ten percent over plan is a success, one that comes in fifty percent over plan usually means a hidden spectator fee or a lunch nobody planned for.
Step 7: handle weather before it handles you
Weather is the most common reason a well-planned group adventure underdelivers. Light rain rarely closes a course, but it does slow the day, soak harnesses, and push lunch indoors. Strong wind above roughly 60 km/h closes the higher courses at most parks. Thunderstorms close everything. The right move is to read the park’s own weather policy before you book, not after the forecast turns.
- Ask the park what they do in steady rain: do they still run, do they shorten the course, do they shift groups to the ground-level elements.
- Ask the wind threshold: at what wind speed they pause or close the higher levels, and whether they call you or expect you to call them.
- Ask about the lightning policy: most parks close instantly and rebook rather than wait it out.
- Pack for the forecast, not for the season. A July day in northern Europe is not the same as a July day in central Europe. The wet-weather trail packing list is a useful starting point even for a ropes day, especially for the picnic and the walk between car park and course.
If the forecast is genuinely bad a day or two before, the better choice is often to reschedule rather than to push through. Most parks are flexible with group bookings as long as you ask more than 48 hours ahead, and a rainy ropes day is not the group adventure anyone wants to remember.
Step 8: run the safety briefing without losing the room
High ropes parks run their own safety briefings, and you should not try to replace them. What you can do is prepare your group so the briefing lands well. Two minutes before the park’s instructor takes over, gather the group and cover three things: phones go in zipped pockets, jewellery and drawstrings get tucked in, and nobody is allowed to push anyone off a platform as a joke. Then step back and let the park’s team do its job.
If you are running a corporate or school group, add a short pre-arrival message: wear closed-toe shoes, tie back long hair, leave the loose scarves at home, and bring a small bag for phones. The result is a faster gear-up, fewer one-to-one corrections during the briefing, and a calmer atmosphere on the training line.
Step 9: food, photos, and the in-between
The in-between moments, the gear-up queue, the lunch, the post-climb coffee, are where a group adventure either becomes a shared memory or dissolves into waiting. A few small choices help. Pre-book a table at the on-site cafe or, if you are bringing your own food, send one person ahead to claim the best picnic spot as soon as the gear-up starts. Most parks allow spectators to watch from below, which means non-climbing relatives can take photos from the ground if the sun is on the right side of the course. For a stronger photo story, ask the park in advance whether a photographer is included for groups, because a few parks offer this as a small add-on.
For group adventures with a wider programme, the same day can also include a low-key ground activity between the two climbing waves. Orienteering, archery, axe throwing, or a short forest task works well because it spreads the social energy across more than one event. The day then has a rhythm rather than a single peak.
Step 10: pick a venue that is genuinely right for your group
Not every adventure park is built for every group. A venue that is perfect for a stag party may be wrong for a primary school, and a venue that runs beautiful school sessions may feel sterile for a 30th birthday. When you are comparing parks, run through this short checklist before you book:
- Course levels available, and whether mixed levels run in the same session.
- Group size per wave, and the maximum number they book in a single slot.
- Food options on site, including vegetarian, vegan, gluten-free, and allergy handling.
- Shaded or indoor areas for spectators, especially important for older relatives and very small children.
- Public transport access, particularly for groups that do not want to drive.
- Photographer, lockers, and whether you can leave bags somewhere safe during the climb.
For a structured approach to this kind of comparison, the how to find a safe adventure park near you post covers the safety questions to ask. The short version is: if a park is happy to answer your questions in writing before you book, that is a good sign. If they are vague about ratios, weather policy, or the belay system, choose a different venue.
Group adventure scenarios, compared
The same advice lands very differently depending on the group. The table below sketches four common scenarios and what to prioritise in each. Use it as a quick sanity check before you book.
| Scenario | Group size | Best course level | Top planning priority | Common mistake |
|---|---|---|---|---|
| Family birthday (mixed ages) | 8 to 20 | Beginner course for everyone, optional intermediate for adults | Spectator area and a shaded lunch spot | Forcing a nervous relative onto the higher course |
| Corporate team-building | 8 to 30 | Beginner for the full group, ground tasks in parallel | ||
| School or youth group | 12 to 40 | Dedicated school sessions on a junior or beginner course | ||
| Friends reunion | 6 to 15 | Mixed levels if available, otherwise beginner |
Communication with the group before the day
Most group adventures are won or lost in the messages you send in the week before. A short, clear note covers what people actually need to know and avoids the chaos of twenty last-minute questions on the morning. A good pre-event message includes:
- The meeting point, the meeting time, and a ten-minute grace window.
- What to wear, including the no-open-toed-shoes rule, the hair-tie rule, and the no-loose-scarves rule.
- What the park provides and what the group should bring, especially gloves, water, and a small snack.
- Who is the contact person on the day, and their phone number, in case anyone is late.
- A short note on the age, height, and weight rules so people can self-check before travelling.
Send the message twice: once two weeks out, once the day before. Repeating the practical details sounds unnecessary, but it is the single most effective way to avoid the small frictions that eat a group adventure day.
Frequently asked questions
How many people is too many for one group adventure?
There is no fixed maximum, but a single wave is usually capped at 8 to 14 climbers per instructor. For a group larger than that, the best approach is to split into two or more waves running in parallel or back to back, with a shared lunch between them. Trying to push 20 to 25 climbers through one slot usually means long queues, a tired instructor, and a wave that finishes an hour after the next one starts.
What is a sensible minimum age for a child on a high ropes course?
Most parks set a minimum age between 6 and 8 for the junior or beginner course, and a higher minimum for intermediate and advanced levels. The exact number depends on the course design, the harness system, and the country’s safety rules. Always check the specific park’s published thresholds, and assume the same child may not be allowed on a higher course even if they passed the junior one.
Can nervous adults still join a group adventure?
Yes, and most parks are used to it. The beginner course is built for adults who have never climbed. The safer approach is to put a nervous adult into a wave with at least one supportive friend, ask the instructor for a slower-paced slot if the park offers it, and avoid putting them on a high, exposed element as their first climb. The point of a group adventure is shared experience, not pressure.
Do spectators have to pay?
It depends on the park. Many high ropes venues allow free spectator access, especially for parents and small children, but some charge a small entry fee or a parking fee. Ask in writing before you book, because the answer changes the budget line for the day and the practical advice you give to family members who are only there to watch.
What happens if it rains on the day?
Light rain rarely closes a course, though it can shorten the higher elements. Steady rain usually means the day runs but with longer gear-up times and a wet picnic. Heavy rain, high wind, and thunderstorms typically close the course, and most parks will reschedule the group rather than refund. The right move is to read the park’s weather policy when you book and have a Plan B date in mind, especially in spring and autumn.
How long does a typical group adventure last?
A standard half-day slot is around three hours from arrival to departure, including gear-up, briefing, one climbing wave, and a short coffee break. A full day, with two climbing waves and a sit-down lunch, runs about five to six hours. If you are combining the ropes course with a ground activity or a second venue, plan for a full day from late morning to early evening.
Is it cheaper to book as a group or individually?
Almost always cheaper as a group. Most parks publish a per-head rate that drops once the group reaches 8 to 10 climbers, and some offer a flat group price above a certain size. The savings are usually modest, but the bigger benefit is the guaranteed wave: as a casual walk-in you may have to wait an hour for the next slot, while a booked group goes straight in.
Do we need to bring any equipment ourselves?
Usually no. The park provides harnesses, helmets, carabiners, and the safety briefing. The exceptions are gloves, which many parks ask you to bring or sell for a small fee, and sensible closed-toe shoes, which you should arrange yourself. Avoid loose clothing, scarves, and large jewellery. A small backpack for phones and water is helpful but can usually be left in a locker or on the ground beneath the course.
What if someone in the group decides not to climb on the day?
Most parks charge a small spectator fee or nothing at all, and the non-climber can watch from the ground. Build a small budget buffer for this, because on a group of twelve there is almost always one person who changes their mind. A common workaround is to put that person in charge of the group photos and the post-climb coffee order; it turns a drop-out into a role.
Can we combine a ropes course with another activity in the same day?
Yes, and it often works well. A common format is a morning climbing wave, a long lunch, and an afternoon ground activity such as archery, axe throwing, or a short orienteering loop. If the second activity is at a different site, leave at least 30 minutes of driving or transfer time. If it is on the same site, the changeover is usually just a 5-minute walk.
A short checklist for organisers
- Confirm headcount, age range, and any height or weight limits two weeks before.
- Book a wave that matches the slowest third of the group, not the bravest third.
- Read the park’s weather and refund policy before paying the deposit.
- Send a pre-event message with dress code, meeting point, and contact details.
- Plan a 30-minute buffer between waves if you are running two.
- Pre-order food or claim a picnic spot during gear-up, not after.
- Keep a 10 percent budget buffer for the no-show, the upgrade, or the second coffee round.
Group adventures at a high ropes park reward the organisers who do the boring work early. Once the headcount, the rules, the food, and the weather are sorted, the day takes care of itself. People will still be talking about the climb three months later, and the only real question is whether you remembered to bring enough batteries for the camera.
Related reading
Explore High Ropes Adventure
Trip tools
Essential adventure planning guides
Use these practical guides to compare rope park activities, prepare for a first high ropes day, check a booking, choose suitable footwear and contact the editorial team. Each page links to the relevant live tools and current planning sections.
Latest articles
- Tame Impala tickets: how to find them, what they cost, and what to know before you buy
- Outdoor pillows: how to choose the right ones for a deck or trail rest stop
- How to find Morgan Jay tickets without overpaying
- How to find national parks near me: a practical local search guide
- Paylater travel: how buy now, pay later works for trip bookings
- Bagsmart Blast Travel Backpack: A Practical Review for Day Trips and Adventure Days
- How to choose an outdoor rocking chair that actually lasts
- Indiana travel advisory map: how to read it before a day trip
- How to plan an outdoor day around a concert stop: a cardi b tickets field guide
- Outdoor sectional sofas: a practical buyer’s guide for patio living