Outdoor challenges that build real confidence
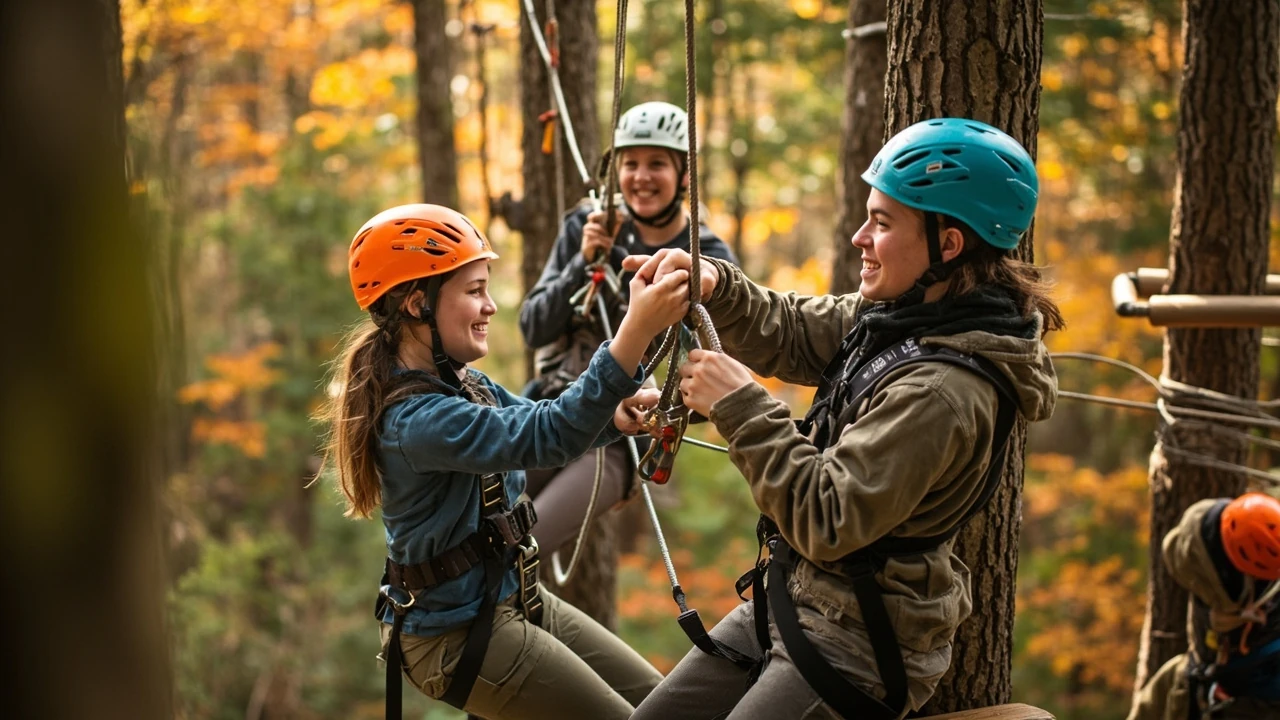
A teenager freezes halfway across a wire bridge forty feet off the ground. A team of office colleagues argues about who has to step onto the next element first. A parent watches their eight-year-old finally ring the bell at the top of a climbing wall. These are the small scenes that define what people actually mean when they talk about outdoor challenges, and they rarely look like a glossy training montage.
The phrase covers a wide spectrum, from a low rope game that takes ninety seconds to a multi-pitch route that takes a full day. The common thread is a deliberate mismatch between the task and the person’s current comfort level, managed in a setting where the consequences of a mistake are real but controlled. That controlled difficulty is what separates a genuine outdoor challenge from a walk in the woods or a gym class.
This article is for first-timers, group organisers, parents, and anyone who has watched a video of a ropes course and wondered whether it would suit them. It walks through the main types of outdoor challenges, the difficulty tiers most operators use, the safety checks that actually matter, and the practical decisions that decide whether a day feels rewarding or pointless.
What outdoor challenges actually involve
An outdoor challenge is a physical or mental task set in a natural or semi-natural environment that pushes a person past their usual limits while keeping the risk of serious harm acceptably low. The push is the point. A scenic hike is a walk, not a challenge, until something about it demands more from the participant than strolling.
Most reputable operators describe their offers in three layers. The first layer is the activity type, such as a high ropes course, an outdoor climbing wall, a team problem-solving game, or a water-based obstacle set. The second layer is the difficulty tier, usually expressed as colour, height, or a beginner-to-expert scale. The third layer is the support system, which covers the harness, belay, briefing, and rescue plan.
For a reader searching for outdoor challenges, the practical question is rarely “what is the definition”. The question is closer to: which activity fits my group, my fitness, and my appetite for risk, and what should I check before booking. The rest of the article works through that decision.
The main types of outdoor challenges
Outdoor challenges are usually grouped by environment, by the body position they demand, and by whether the participant moves vertically or horizontally. The table below sets out the categories a first-timer is most likely to encounter, with a plain description of what each one actually involves.
| Type | Typical environment | What the participant does | Best suited for |
|---|---|---|---|
| High ropes course | Trees or poles, harnesses and lanyards | Clips between elements at height, solves balance and grip puzzles | Teenagers and adults comfortable with heights |
| Low ropes / team challenges | Ground level, simple equipment | Works through balance, trust, and coordination problems as a group | Younger children, mixed-ability groups, team-building days |
| Outdoor climbing tower or wall | Artificial structure or natural rock | Ascends a fixed route using holds, sometimes with auto-belay | Anyone who can grip and pull, including many first-timers |
| Obstacle or mud run | Open field, forest, or trail | Runs, crawls, climbs, and jumps through a set course | Fitness-confident adults and older teens |
| Zip line or aerial traverse | Single cable between two points | Harnessed slide or traverse, often as one element of a larger course | Participants who can handle a strong start and visible drop |
| Water-based challenges | Lake, river, or purpose-built basin | Paddles, climbs, jumps, or balances over water with a flotation system | Confident swimmers, warmer months, supervised groups |
| Multi-activity day | Park combining several of the above | Rotates between elements with a fixed timetable | Groups with mixed interests and energy levels |
The category matters because each one demands a different mental skill. High ropes work the fear of height. Team challenges work the discomfort of depending on strangers. Climbing works the frustration of getting stuck. Obstacle runs work endurance. Mixing the types in a single day gives a more honest test of how a person responds to unfamiliar pressure than a single-format session.
Difficulty tiers and what they really mean
Operators usually describe difficulty with colours, numbers, or a height range, and the labels are not standardised across the industry. A green route at one park may be tougher than a blue route at another, so the label alone is rarely a good guide. The honest way to compare two parks is to ask three questions: what is the highest exposed point, what is the balance demand on the element, and what happens if a participant freezes mid-crossing.
The table below translates the most common difficulty signals into what a participant will actually feel on the course.
| Tier | Typical label | Height range | What it actually feels like | Who it suits |
|---|---|---|---|---|
| Entry | Green, kids, junior, discovery | 0 to 3 m | Low platforms, wide grips, helper staff close at hand | Children, nervous first-timers, mixed family groups |
| Intermediate | Blue, standard, main course | 4 to 8 m | Visible drop, narrower elements, real height commitment | Most adults and teens comfortable with a stepladder at height |
| Advanced | Red, black, expert, sky | 8 m and above | Long traverses, moving platforms, fatigue starts to matter | Experienced participants with no fear of long drops |
| Extreme | Pro, summit, free route | Varies, often above 12 m | Small handholds, long gaps, sustained focus required | Experienced climbers and adventure sport regulars |
The honest answer to “which tier should I book” depends less on athletic fitness than on three things: how the participant reacts to looking down from a first-floor balcony, how they handle a task they cannot finish in a few seconds, and whether they recover quickly from a small slip. People who score low on any of those three usually do better on a one-tier-lower course than on a course that matches their age and strength.
Who outdoor challenges actually suit
Outdoor challenges are not just for sporty adults, and they are not just for children. The right activity depends on the person, not on a generic target group. The list below maps common reader situations to the type of challenge that tends to work well for them.
- First-time adults: a beginner high ropes course with a continuous belay system, or a supervised climbing wall session. The point is to learn the safety system quickly and move to a single memorable element rather than a long ladder of small ones.
- Teenagers: intermediate high ropes or a multi-activity day that mixes climbing, team games, and a single high element. The point is novelty and autonomy, not endurance.
- Families with children under ten: low ropes, junior courses, and short climbing walls with clear height rules. Avoid any course that requires a child to clip themselves in unaided.
- Office or school groups: a structured team challenge block followed by a high ropes session, so the group builds a small shared vocabulary before the high elements. The full-day structure is closer to a guided walk than to a fitness test.
- Older adults and less mobile participants: ground-level team elements, supported climbing walls, and any course that lets the participant stop and rest without losing progress. Many parks now list accessibility details on their booking page.
- Couples and small friend groups: zip line sessions, short climbing sessions, or a single shared high ropes route rather than a half-day pass that pushes them past the fun point.
For group organisers, the rough rule of thumb is that the group will enjoy the day as much as its least confident member, not as much as its most confident one. Building the day around the most athletic person usually produces a half-enjoyed morning and a tired afternoon.
How to judge whether a challenge is run safely
Safety in adventure activities is not a single rule. It is a chain of small decisions, from how the harnesses are checked to what the operator does when the weather turns. A reasonable participant does not need to become an inspector. They need to know which questions separate a serious operator from a careless one.
The list below covers the checks that matter most when a participant or organiser is choosing a venue. The list is not exhaustive, but skipping any of these questions tends to predict a bad day more reliably than reading online reviews.
- Belay system: ask whether the course uses a continuous belay, a smart belay, or a traditional clip system, and ask how long the safety briefing lasts. Continuous systems reduce the chance of a missed clip.
- Staff ratio: a common minimum is one instructor per eight to ten participants on a high ropes course, plus a separate ground supervisor. Higher ratios are better for first-timers.
- Equipment age and inspection record: harnesses, lanyards, and helmets should show a current inspection tag. Operators should be willing to explain their replacement cycle.
- Weather policy: ask specifically about wind, lightning, and wet surfaces. Many parks close above a stated wind speed and after lightning within a set distance.
- Rescue plan: a serious operator can describe, in two or three sentences, how they would bring a stuck or injured participant down from a high element.
- Briefing quality: the pre-course briefing is usually the strongest signal. If it is rushed, the rest of the day will feel rushed as well.
- Medical disclosure: the booking form should ask about heart conditions, pregnancy, recent injuries, and medication, and the operator should read it before the session starts.
A useful first-time reference for the broader safety framework around challenge courses is the English Wikipedia entry on ropes courses, which describes the typical equipment, the difference between high and low elements, and the role of certified instructors. For a more operational view, the Association for Challenge Course Technology publishes the standards and inspection programme used by many operators in North America and consulted elsewhere.
How a typical outdoor challenge session runs
Knowing the shape of the day removes a lot of the mental friction. A standard three-hour high ropes session at a well-run park usually follows a similar pattern, even if the branding and the elements change. The flow is designed to reduce anxiety early and to build skill in small steps.
- Arrival and check-in: paperwork, medical disclosure, height and weight check, signing of the participation agreement.
- Kit-up: harness, helmet, and lanyard fitting by a trained staff member, with a second staff member checking every buckle.
- Ground-school briefing: usually fifteen to thirty minutes, covering the belay system, the rules for moving on the course, and what to do if a participant freezes.
- Practice element: a low element where the participant gets used to clipping and unclipping, usually with a staff member coaching from the ground.
- Course climb: the timed ascent of the main course, with a guide monitoring progress and assisting rescues if needed.
- Descent and debrief: a controlled descent, return of kit, and a short debrief where the operator explains the next tier or activity options.
Most first-timers are surprised by how much of the session is the briefing. The actual climb often feels shorter than expected. This is by design. The work of the day is to remove the mental load so the participant can focus on the next element rather than on the equipment.
Cost, time, and value
Pricing for outdoor challenges varies widely by country, season, and group size, and a specific current price should always be confirmed with the venue. A useful way to compare two offers is to lay them out side by side using the same set of attributes, rather than staring at the headline price.
| Factor | Budget session | Mid-range session | Premium session |
|---|---|---|---|
| Typical session length | 60 to 90 minutes | 2 to 3 hours | Half day or full day |
| Group size | Open, mixed public group | Small pre-booked group | Private or guided group |
| Instructor attention | One to many | One to eight or ten | Dedicated instructor per group |
| Course access | Entry tier only | Entry and intermediate tiers | All tiers, including advanced |
| Add-ons often included | None | Briefing video, water, photo | Lunch, transport, photo package, certificate |
| Best fit | First try, low commitment | Most groups and families | Celebrations, corporate days, special occasions |
The cheapest option is rarely the worst, and the most expensive is rarely the best. A long session for a first-timer usually produces fatigue before it produces growth. A short session for an experienced group usually feels under-cooked. Match the session length to the group’s energy, not to the price.
How to choose a challenge that actually fits
Choosing well is mostly about asking better questions before booking, not about picking the most popular venue. The decision usually comes down to the group’s profile, the venue’s setup, and the practical constraints of the day.
Use the list below as a working checklist when comparing two or three options. Answering these on the phone with the operator is faster than reading a website, and it tells you more about how the venue runs than any photo gallery.
- Group profile: ages, heights, mixed fitness levels, any specific medical or accessibility needs.
- Experience level: has anyone in the group done a similar activity, and how did they respond to it.
- Time available: how long the group is realistically willing to commit, including travel, kit-up, and debrief.
- Weather: expected conditions on the day and the venue’s published weather policy.
- Booking terms: deposit, cancellation window, what happens if the venue closes for weather.
- Photo and video policy: whether the venue takes photos, and whether personal phones or GoPros are allowed on the course.
- Transport: how the group will reach the venue, and whether parking, public transport, or a coach drop-off is available.
A venue that answers these questions clearly and quickly on the phone almost always runs a better day than a venue that does not. The conversation is part of the product.
Common mistakes first-timers make
Most bad days on outdoor challenges come from the same handful of avoidable mistakes. They are not exotic failures, and the operator will not catch them for you. Knowing them in advance lets a first-timer sidestep the predictable ones.
- Booking the wrong tier: choosing the hardest course for a nervous first-timer on the assumption that “they can handle it”. The honest test is the stepladder question, not the fitness question.
- Skipping the medical disclosure: leaving out a heart condition, a recent surgery, or a current injury to avoid being turned away. The disclosure is the operator’s tool to keep the day safe, not a formality to dodge.
- Arriving dehydrated and underfed: a high ropes session burns more energy than people expect, and low blood sugar shows up as dizziness, bad decisions, and panic.
- Wearing the wrong shoes: smooth-soled fashion trainers, sandals, or boots with deep tread that can catch on a platform. A simple flat-soled sports shoe is the most reliable choice.
- Treating the briefing as optional: arriving late, talking through the briefing, or trying to skip straight to the climb. The briefing is where the safety system becomes familiar.
- Pushing past the freeze point: staying on a high element long after the fear has become panic. A short rest on a platform, a word with the ground instructor, and an early descent are all better than a frozen hour on a wire bridge.
These mistakes are easy to avoid, and avoiding them usually means the difference between a memorable day and a forgettable one.
What outdoor challenges teach, and what they do not
Outdoor challenges are sometimes sold with a long list of benefits, from leadership to resilience to better communication. Some of those claims are real, some are exaggerated, and the honest answer depends on what the rest of the day looks like.
What a single well-run challenge session usually produces:
- A small, specific memory of having managed a moment of real fear or fatigue.
- A more accurate sense of the participant’s own tolerance for height, risk, and uncertainty.
- Better calibration for future outdoor days, because the participant now has a real data point rather than a guess.
- A shared story within a group, especially when the group worked through a high element together.
What a single session usually does not produce, and where claims should be treated with caution:
- Lasting changes in confidence or character. A single day can plant a memory, but a real change in self-image takes repetition and follow-up.
- Improved team communication by itself. A team that cannot communicate in a meeting room will not suddenly communicate on a high ropes course. The day exposes existing habits rather than fixing them.
- A universal fitness effect. The session is short, often intermittent, and focused on grip and balance rather than aerobic load.
Used honestly, outdoor challenges are a useful form of feedback. Used as a one-off motivational fix, they tend to disappoint. The framing matters more than the activity.
How to plan a real day, not just an idea
For most people, the gap between “let’s do something outdoors” and a successful day is planning. The list below is a short, practical planner for a single day of outdoor challenges with a small group. It is not a marketing checklist, and it deliberately avoids invented prices or schedules.
- Pick a venue first, date second. Availability and weather matter more than the calendar.
- Set a realistic group size. Six to ten is the comfortable range for most challenge sessions.
- Decide the difficulty tier as a group before booking, not on the day.
- Confirm the medical disclosure for every participant a day in advance.
- Pack flat shoes, a light waterproof, a small snack, water, and any personal medication.
- Arrive at least twenty minutes before the booked slot to allow for parking, paperwork, and a relaxed kit-up.
- Build in a slow lunch or coffee afterwards. Most groups need thirty minutes of quiet to recover from a high session.
- Capture the day in a single shared photo rather than a phone glued to the course.
If a group follows that flow, the day usually looks more like a focused short story than a long, anxious day. That is the right shape for a first time out.
When outdoor challenges are the wrong choice
Outdoor challenges are not always the right activity. There are real situations in which another format, such as a guided walk, a low-key picnic, or a museum day, is a better fit. A short honest list of those situations helps avoid forcing a format onto a group that does not want it.
- Anyone in the group has a current injury, recent surgery, or unstable heart condition, and the operator cannot adjust the activity to remove the risk.
- The group is too large to be split into safe session sizes, and the venue will not run parallel sessions.
- The weather is at the edge of the operator’s published limits, especially high wind, lightning, or freezing rain.
- The goal of the day is calm and conversation rather than a memorable moment. A challenge session makes conversation harder, not easier.
- The youngest or oldest participant is being pushed by the rest of the group rather than by their own choice. Coercion on a high element is a safety issue, not just a social one.
Choosing not to do a challenge is a valid outcome of good planning, not a failure. The format should serve the group, not the other way around.
Putting it together for a first booking
For a first booking, the simplest decision tree is the most reliable. Pick a venue that has a published safety policy, pick a difficulty tier one level below the group’s confidence, pick a session length that fits the real schedule rather than an ideal one, and confirm the medical and weather policies before paying the deposit. The rest is mostly common sense.
For a wider read on related decisions, the first high ropes course guide on High Ropes Adventure walks through what a first session feels like in more detail, and the family rope park age and height rules guide is the right reference if children are part of the group. Both are written for the same kind of reader, and both fit naturally alongside this article.
Frequently asked questions
What is the easiest outdoor challenge for a complete beginner?
The easiest options are usually a low ropes team game, a junior high ropes course, or a short climbing wall with a strong top rope or auto-belay. Look for a venue that offers a practice element before any real height, and a briefing of at least fifteen minutes.
How high are typical high ropes courses?
Entry tier courses usually sit between two and five metres off the ground. Intermediate courses are often between five and eight metres. Advanced and extreme courses can reach twelve metres or more. The exact height should be listed on the venue’s course map.
Do I need to be fit to do outdoor challenges?
Most outdoor challenges are about grip, balance, and willingness rather than endurance. A reasonable baseline is being able to climb a few flights of stairs without chest pain, and being able to pull your own body weight up onto a platform. Specific fitness thresholds vary by venue.
What should I wear for an outdoor challenge session?
Wear close-fitting, comfortable clothing that you can move in, a pair of flat-soled sports shoes with laces, and tie back long hair. Avoid sandals, loose scarves, and jewellery that can catch in the harness or on a carabiner. Bring a small waterproof in case of light rain.
Can children take part in outdoor challenges?
Most operators set a minimum age of around six or seven for low elements and around eight to ten for higher courses, often with a minimum height requirement. The exact numbers vary by venue and by tier, and they should always be confirmed on the venue’s booking page.
What happens if it rains on the day of the booking?
Most operators run in light rain but close for thunderstorms, high wind, or icy surfaces. The venue should publish a clear weather policy and offer either a rebooking or a refund if they cancel for safety. Check the policy at the time of booking rather than on the day.
Are outdoor challenges safe for people with a fear of heights?
Many people with a fear of heights do well on lower and intermediate courses, especially when they start on a practice element and stay on shorter platforms. The honest approach is to choose a one-tier-lower course than feels comfortable, not to push straight into the hardest option.
How long does a typical outdoor challenge session last?
A standard high ropes session is usually two to three hours, including check-in, kit-up, briefing, the climb, and a short debrief. A multi-activity day can run from three to six hours. Shorter sessions exist for first-timers and for groups with a tight schedule.
Do I need to book in advance?
For most venues, yes. High ropes courses, climbing walls, and obstacle runs usually run on fixed session times with capped group sizes. Walk-in spaces are sometimes available on quieter weekdays, but weekends and school holidays tend to sell out several days ahead.
Can I take photos or videos on the course?
Many venues sell photo or video packages taken by their own staff. Personal phones and action cameras are often restricted on high elements because loose equipment is a safety hazard. The venue’s policy should be checked before the session starts.
Related reading
Explore High Ropes Adventure
Trip tools
Essential adventure planning guides
Use these practical guides to compare rope park activities, prepare for a first high ropes day, check a booking, choose suitable footwear and contact the editorial team. Each page links to the relevant live tools and current planning sections.
Latest articles
- How to find Morgan Jay tickets without overpaying
- How to find national parks near me: a practical local search guide
- Paylater travel: how buy now, pay later works for trip bookings
- Bagsmart Blast Travel Backpack: A Practical Review for Day Trips and Adventure Days
- How to choose an outdoor rocking chair that actually lasts
- Indiana travel advisory map: how to read it before a day trip
- How to plan an outdoor day around a concert stop: a cardi b tickets field guide
- Outdoor sectional sofas: a practical buyer’s guide for patio living
- How amusement parks actually work: rides, safety, and what to expect
- Beis Travel: What the Bag Brand Offers for Outdoor Days