Outdoor storage for adventure gear: a practical guide
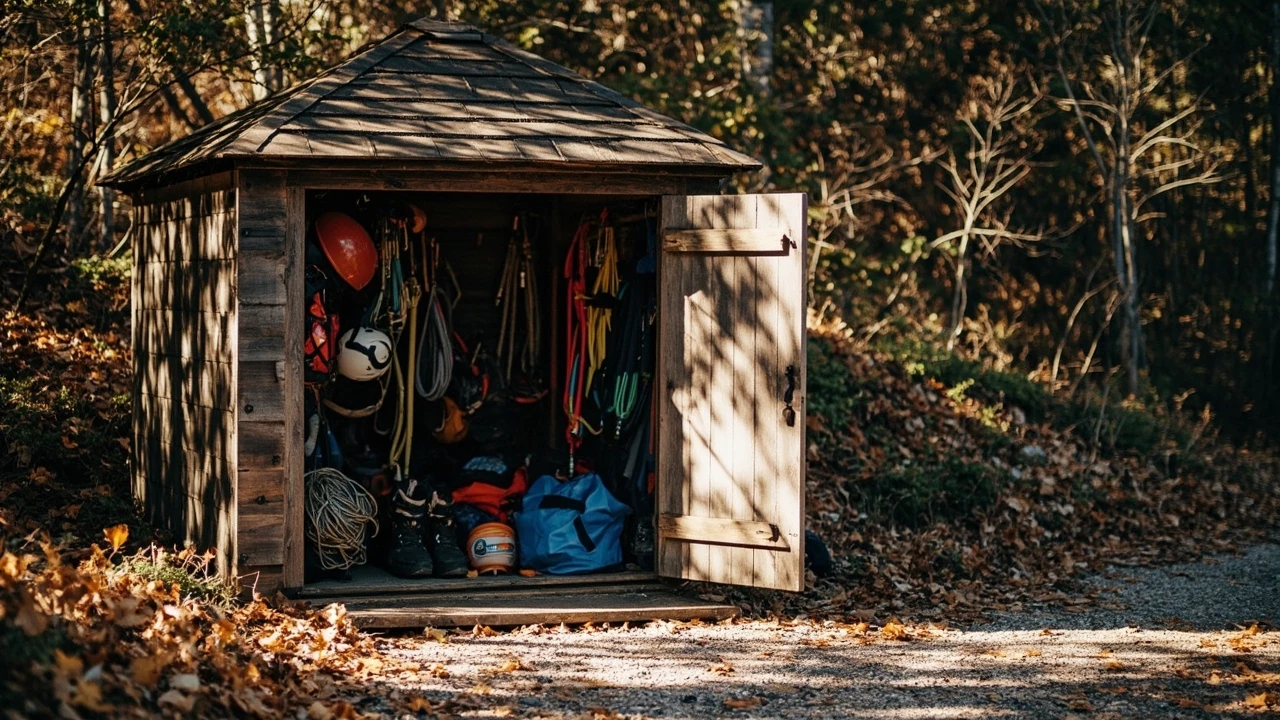
Outdoor storage for adventure gear: a practical guide
A wet helmet sitting on a garage shelf, a ratchet strap frozen stiff in a shed, a pair of climbing shoes that smell faintly of mildew. Most adventure operators, club volunteers, and active families meet the same problem before they ever meet a course: the gear has to live somewhere between trips, and that somewhere has to keep it dry, organised, and ready. Outdoor storage sounds simple until you try to fit a 30 metre rope, four harnesses, a first aid kit, and spare gloves into a plastic box under a tarp.
This guide is for the people who already have the gear and now need a sensible place to put it. It covers the choices that actually matter, from small home setups to small-operator sheds, the trade-offs between boxes, cabinets, and built rooms, and the questions worth asking before you buy or build anything. The focus stays on a practical decision, not on a brand showdown.
What “outdoor storage” really has to do for adventure gear
Adventure gear is a mixed load. Ropes and webbing hate UV and grit. Helmets, harnesses, and metal hardware hate moisture and salt. Electronics, lights, and radios hate temperature swings. A useful outdoor storage setup quietly handles all of these, day after day, without becoming a chore to use.
For most readers, “outdoor storage” means one of three things:
- A small domestic setup at home: a shed, a deck box, a wall-mounted cabinet, or a vehicle-based system.
- A shared setup at a club, school, or volunteer group: a shipping container, a small outbuilding, or a corner of a garage.
- A small-operator setup at a course, campsite, or farm: a purpose-built store room, a converted shipping container, or a locked steel cabinet outside.
Each of these has the same underlying requirements, just at different scales. The decisions around weather protection, security, access, and organisation are similar; only the size and budget change.
The four jobs outdoor storage has to do well
Before looking at products, it helps to name the jobs the storage has to perform. A good setup scores well on all four without making any one of them a daily headache.
- Keep water out. Rain, snow, ground moisture, and condensation are the main reasons gear fails early.
- Keep the sun off. UV slowly weakens rope fibres, webbing, fabric, and even some plastics.
- Stay organised. If you cannot find the right glove in 20 seconds, the system is too clever.
- Stay secure. From curious children to opportunistic theft, the right level of lock and anchoring matters.
When a setup falls short, it is almost always because one of these jobs was treated as an afterthought. A beautiful timber shed that leaks at the door, or a steel cabinet that cooks in the sun, both fail in the same way: the gear inside pays the price.
Common types of outdoor storage for adventure gear
The market uses a lot of overlapping words: deck box, storage chest, bike store, tool shed, equipment locker, shipping container. The list below groups them by how they are built and where they tend to work best.
| Type | Best suited to | Weather protection | Security | Typical cost band |
|---|---|---|---|---|
| Plastic deck box | Small domestic setups, dry climates | Good against rain, weak against long-term UV | Basic; usually padlockable | Low |
| Timber garden shed | Home and small-club use | Good with proper roofing felt and a raised floor | Medium; depends on hinges and lock | Low to medium |
| Metal tool shed or store | Compact equipment storage, secure sites | Good, but prone to internal condensation | High; often integrated lock | Medium |
| Resin or composite store | Coastal or wet sites, family use | Very good; no rot, no rust | Medium to high | Medium |
| Shipping container | Clubs, schools, small operators | Excellent when fitted with vents and a floor | Very high with a proper lock box | Medium to high |
| Built equipment room | Permanent operator sites | Excellent when designed for the climate | Highest; matched to insurance needs | High |
Cost bands are deliberately rough. A small plastic deck box costs less than a meal out, while a fitted shipping container or built room can run into serious money once groundworks, electrics, and shelving are added.
Matching the storage to the gear inside it
It is tempting to choose a shed first and fit the gear into it later. The order usually works better the other way round. A short inventory of the gear, with rough sizes and sensitivities, removes a lot of guesswork.
| Gear category | Examples | Sensitive to | Storage implication |
|---|---|---|---|
| Ropes and webbing | Static and dynamic ropes, slings, long tapes | UV, grit, chemicals, damp | Dark, dry, ventilated, off the floor, in rope bags |
| Hardware | Carabiners, belay devices, pulleys, slings | Corrosion, salt, impact damage | Dry toolbox or hung panels, away from acids and fuels |
| Personal protection | Helmets, harnesses, gloves | UV, sweat, mould, sharp edges | Open shelves with airflow, no direct sun |
| Footwear | Climbing shoes, approach shoes, wellies | Moisture, deformation | Boot rack or shelf, dry area, never sealed plastic |
| Soft gear | Pads, bouldering mats, dry bags | Moisture, pests, sharp hardware | Large closed bins, off the floor, hardware stored separately |
| Electronics and radios | Handheld radios, headlamps, GPS units | Heat, moisture, deep discharge | Charging shelf, moderate temperature, dry box for spares |
| First aid and safety | Kits, blankets, splints, AED | Temperature, contamination, expiry | Clearly labelled shelf, easy access, climate awareness |
Once the gear is listed, the storage choice becomes much clearer. A family that stores a couple of helmets, some ropes, and a pair of boots has very different needs from a school that runs weekly sessions for thirty children.
Weather, ventilation, and the condensation problem
Most storage failures are not dramatic. A tarp tears, a seal ages, a roof panel slips. The real enemy is quiet: condensation. When warm, moist air meets a cold metal or plastic surface, the water lands on the gear instead of draining away.
A few principles help:
- Ventilation matters more than sealing. A slightly leaky box that breathes is usually drier inside than a tightly sealed one in cold weather.
- Keep storage off the ground. A timber base, pallets, or a raised floor stops ground moisture from wicking up.
- Avoid storing wet gear in a closed box. Hang helmets and harnesses in a covered, breezy spot until they are dry, then put them away.
- Mind the roof. Flat roofs collect debris and water; even a small slope extends the life of felt, paint, and seals.
- In coastal or humid climates, choose materials that tolerate salt and water. Resin stores and hot-dip galvanised steel tend to outlast timber in these conditions, though both still need ventilation.
The general field of storage buildings and shelters is a useful reference for how different constructions handle climate, and a good place to check the basic principles before choosing a specific product.
Security at a sensible level
Security for outdoor storage is rarely about stopping a determined thief. It is about slowing down casual problems: a curious child, an opportunistic passer-by, a fox with a talent for opening boxes, a builder who needs to “borrow” a rope for the day.
A practical approach has three layers:
- Physical barriers. Lockable lids, hinged doors with non-removable pins, anchor points for padlocks, and storage that cannot easily be carried away.
- Visibility. A store that is in plain view, near a house, and lit at night is far less likely to be tampered with than one hidden behind a hedge.
- Records and labels. Asset tags, a simple inventory sheet, and clear labels speed up insurance claims and discourage “borrowing”.
For small operators, a closed-shackle padlock rated to a recognised standard, a steel hasp bolted through the door, and a chain anchored to a ground point will deter most casual interference. Anything more tends to be theatre unless the site has had a real problem.
Planning the layout before you build or buy
It is worth sketching a layout, even on a single sheet of paper, before spending money. The exercise usually pays for itself by exposing the real bottlenecks.
- Measure the largest single item. A 50 metre rope, a long ladder, or a folded bouldering mat often sets the minimum depth and width.
- Decide the “grab and go” zone. Helmets, harnesses, and the items used on every session should be the easiest to reach.
- Reserve a drying corner. A peg rail, a couple of hooks, or a hanging line for damp gear keeps the rest of the store dry.
- Plan power and light. Even a small solar or low-voltage light makes evening clean-ups faster and safer.
- Leave a clear floor path. A store that turns into a dump on day one will never become tidy on day two.
For family or club setups, an afternoon of sketching is usually enough. For small operators planning a built room, this is the point at which speaking to an insurer and a local planning authority becomes worth the call.
Adapting a garage, shed, or outbuilding
Many readers do not need a new structure. They need an existing one to behave like proper outdoor storage. The list below covers the changes that make the biggest difference, in rough order of impact.
- Stop the leaks first. Re-felt the roof, refit gaskets, clear gutters, and re-seat any panels that have lifted.
- Raise the floor level. Timber bearers on paving slabs lift boxes and bags off cold, damp concrete.
- Add one wall of shelving. A single 1.8 metre shelf run can hold more than a whole extra cabinet.
- Install a pegboard or hook rail. Helmets, harnesses, and bags come off the floor and start to dry properly.
- Improve lighting. A bright, even LED strip changes how a space is used, especially in winter.
- Add a small heater or fan. In cold or damp climates, a thermostatic fan or a low-wattage tube heater reduces condensation dramatically.
These are not glamorous changes, but they are the ones people wish they had made on day one. They also make it easier to plan a realistic day trip budget that includes storage, rather than pretending the gear lives somewhere for free.
Vehicle-based and mobile outdoor storage
For some readers, the storage that matters most is the one in the back of the car. Mobile setups have their own rules, and many of them come from the wider outdoor recreation community, where wet, muddy, and dusty kit is just part of the day.
A few habits help:
- Use rigid plastic boxes for dirty and sharp items. A boot box, a tool box, or a stackable crate keeps mud and edges away from everything else.
- Keep one dry bag per person. Wet clothes, spare layers, and food each get their own labelled dry bag.
- Carry a small drying line. Elasticated lines with a couple of pegs let wet harnesses and socks dry on the way home.
- Empty the car the same day. The longer kit lives in a vehicle, the more it starts to smell. A simple “unload on arrival” rule keeps the car usable.
Vehicle-based storage is also worth pairing with a checklist for wet-weather trips, like the one described in the wet-weather trail packing guide, so the right kit ends up in the right bag rather than floating loose in the boot.
Common mistakes when setting up outdoor storage
Most problems with new setups come from a small group of recurring mistakes. None of them are dramatic, but each one tends to shorten the life of the gear.
- Storing gear that is still wet. Helmets, harnesses, ropes, and boots all need to be dry before they go into a closed box or bag.
- Sealing things too tightly. Airtight plastic bins in a warm, damp shed quickly become miniature greenhouses.
- Mixing chemicals with gear. Petrol, solvents, and even some cleaning products attack rope fibres and rubber. Keep them in a separate, ventilated area.
- Forgetting access. A store that requires moving three other things to reach the first aid kit is a store that fails in an emergency.
- Ignoring pests. Mice, wasps, and spiders all enjoy a quiet shed. Lidded boxes, mesh on vents, and a tidy floor discourage them.
- No inventory. Without a simple list, the same gloves are bought three times and the same harnesses go missing on loan.
Choosing the right size
Sizing is where most setups go wrong in one of two directions. A store that is too small ends up overflowing and defeating its own purpose. A store that is too big becomes a dumping ground and slowly fills with things that do not belong in it.
A rough rule that holds up well in practice:
- Measure the gear you have today.
- Add 20 to 30 percent for things you have not bought yet.
- Avoid doubling up “just in case” unless there is a real plan for the extra space.
For very small domestic setups, a single 1.5 by 0.7 metre deck box often handles a family’s basic kit. For a small operator running two or three courses at once, a 3 by 2.5 metre timber or resin shed is a more realistic starting point. A shipping container gives around 15 square metres of floor space and works well when several clubs or course groups share a site.
Maintenance: a small routine that prevents big problems
Outdoor storage lasts longer when it gets a few minutes of attention on a regular basis. None of these tasks take long, and they prevent the slow build-up of dust, moisture, and disorganisation.
| Frequency | What to check or do | Why it matters |
|---|---|---|
| After every use | Wipe down helmets, hang harnesses to dry, empty the first aid bin of used items | Stops mould, keeps kit ready, makes restocking obvious |
| Weekly | Sweep the floor, check for leaks or rodent activity, top up consumables | Catches small problems before they spread |
| Monthly | Inspect ropes and webbing for wear, check locks, test any lights or heaters | Gear safety depends on regular visual checks |
| Seasonally | Clear gutters and roof debris, re-treat timber if used, review the inventory | Keeps the structure sound and the list honest |
| Yearly | Replace desiccant or moisture absorbers, deep clean, refresh labels | Resets the store to a known good state |
Operators running paid sessions can fold these checks into their existing safety routines, alongside the kind of inspections covered in the zipline safety guide and the ropes courses explained guide, so storage becomes part of the same cycle rather than a separate chore.
Outdoor storage for different types of users
The same product can serve very different users, but the priorities shift. The table below pulls out the main differences.
| User | Main priority | Storage that usually fits |
|---|---|---|
| Family with young children | Safety, simple access, small footprint | Lockable deck box or small resin shed at home, away from play areas |
| Hobby group or club | Shared access, clear ownership, room to grow | Mid-size timber or metal shed, labelled zones, basic inventory sheet |
| School or youth group | Durability, insurance alignment, easy supervision | Shipping container or built room, locked when not in use, clear records |
| Small operator or course | Weather resistance, security, fast turnaround | Resin or metal store near the course, backup drying area indoors |
For a family planning a rope park day, the same storage thinking also helps with the packing list in the family rope park age and height rules guide: when kit has a clear home at home and in the car, the day itself runs more smoothly.
When to call in a professional
Most setups are within reach of a competent DIYer or a careful volunteer. There are a few situations, though, where professional input is worth the cost.
- Permanent operator sites. Insurance, local planning rules, and fire safety usually require a designed space rather than an improvised one.
- Large or shared shipping containers. Cutting, fitting, and ventilating a container without weakening it is a specialist job.
- Anything involving electrics or heating. A small mistake in a damp shed can quickly become a serious problem.
- Listed sites or protected areas. Local rules around materials, colours, and foundations can catch out even careful planners.
For most other cases, the combination of a clear inventory, a sensible structure, and a short maintenance routine is enough. The goal is not a showpiece. The goal is gear that comes out of storage in the same condition it went in.
A short checklist before you commit
Before ordering a shed, a container, or a run of cabinets, it is worth running through the same handful of questions. They cover the common reasons setups fail to deliver.
- What is the single largest item that has to fit, and how much space does it need around it?
- Is the site level, drained, and accessible with the gear that will be stored there?
- Does the roof, door, and floor plan handle heavy rain, not just the average day?
- Where will wet and dirty kit dry before going into storage?
- Who else needs access, and how is that access controlled and recorded?
- What is the budget for the structure, the groundworks, and the shelving together?
Answering these honestly tends to remove the surprises that show up on the first wet weekend or the first cold morning. Outdoor storage is rarely exciting, but when it is well planned, it quietly carries the rest of the operation.
Frequently asked questions
What counts as outdoor storage for adventure gear?
Any storage that sits outside the main living or working space and is used to hold adventure equipment between uses. That includes deck boxes, sheds, steel stores, shipping containers, and purpose-built equipment rooms, as well as vehicle-based setups in boots and roof boxes.
Is a plastic deck box good enough for helmets and harnesses?
For light, occasional use in a sheltered spot, a lockable plastic deck box can work. For regular use, especially in damp or sunny climates, a ventilated shed or resin store is a better choice because it handles condensation and UV more gracefully.
Do ropes and webbing need to be stored in the dark?
Strong, direct sunlight is the main concern. UV weakens fibres over time, so a dark, dry, ventilated spot is ideal. A simple rope bag inside a shaded shelf or box is enough for most domestic and club setups.
How do I stop my shed from going mouldy inside?
Ventilation is the most effective change. Add low and high vents, leave a small gap under the roof, avoid sealing the door completely, and never store wet gear inside. A raised floor and a small fan or low-wattage heater help in colder months.
Are shipping containers a good option for clubs and small operators?
They are popular because they are secure, weatherproof, and available in standard sizes. They do need ventilation, a proper floor, condensation control, and often planning permission, so they work best when someone is responsible for the conversion and ongoing checks.
How big should my outdoor storage be?
Measure the gear you have today, add 20 to 30 percent for future items, and avoid doubling up unless there is a clear plan for the extra space. A single 1.5 by 0.7 metre box suits a small family; a 3 by 2.5 metre shed handles a busy club; a shipping container fits a small operator with room to grow.
What is the cheapest way to improve an existing shed?
Stop the leaks first by re-felting the roof and refitting seals. Then add a timber floor, a wall of shelving, a pegboard for harnesses and helmets, and a bright LED strip. Together these changes often matter more than the size or material of the shed itself.
How often should I check gear that lives in outdoor storage?
A quick visual check after each use and a more careful inspection once a month is a sensible baseline. Ropes, harnesses, and helmets should be checked for wear, cuts, and deformation, with anything suspect taken out of service until reviewed.
Can I store petrol or gas canisters in the same shed as my gear?
It is better not to. Fuel and solvents give off fumes that can attack rope fibres, rubber, and some plastics, and they also introduce a fire risk. Keep fuel in a separate, ventilated metal cabinet well away from the main store.
Is vehicle-based outdoor storage a real option for regular users?
It can be, especially when paired with rigid boxes for dirty kit, dry bags for clothing, and a strict “unload on arrival” habit. For long-term storage it is not ideal, because cars cycle through big temperature and humidity swings, but for daily or weekly use it works well.
Related reading
Explore High Ropes Adventure
Trip tools
Essential adventure planning guides
Use these practical guides to compare rope park activities, prepare for a first high ropes day, check a booking, choose suitable footwear and contact the editorial team. Each page links to the relevant live tools and current planning sections.
Latest articles
- How to find national parks near me: a practical local search guide
- Paylater travel: how buy now, pay later works for trip bookings
- Bagsmart Blast Travel Backpack: A Practical Review for Day Trips and Adventure Days
- How to choose an outdoor rocking chair that actually lasts
- Indiana travel advisory map: how to read it before a day trip
- How to plan an outdoor day around a concert stop: a cardi b tickets field guide
- Outdoor sectional sofas: a practical buyer’s guide for patio living
- How amusement parks actually work: rides, safety, and what to expect
- Beis Travel: What the Bag Brand Offers for Outdoor Days
- Adventure park: what it is, what to expect, and how to plan a visit