Travel backpack: how to choose one that actually carries what you need
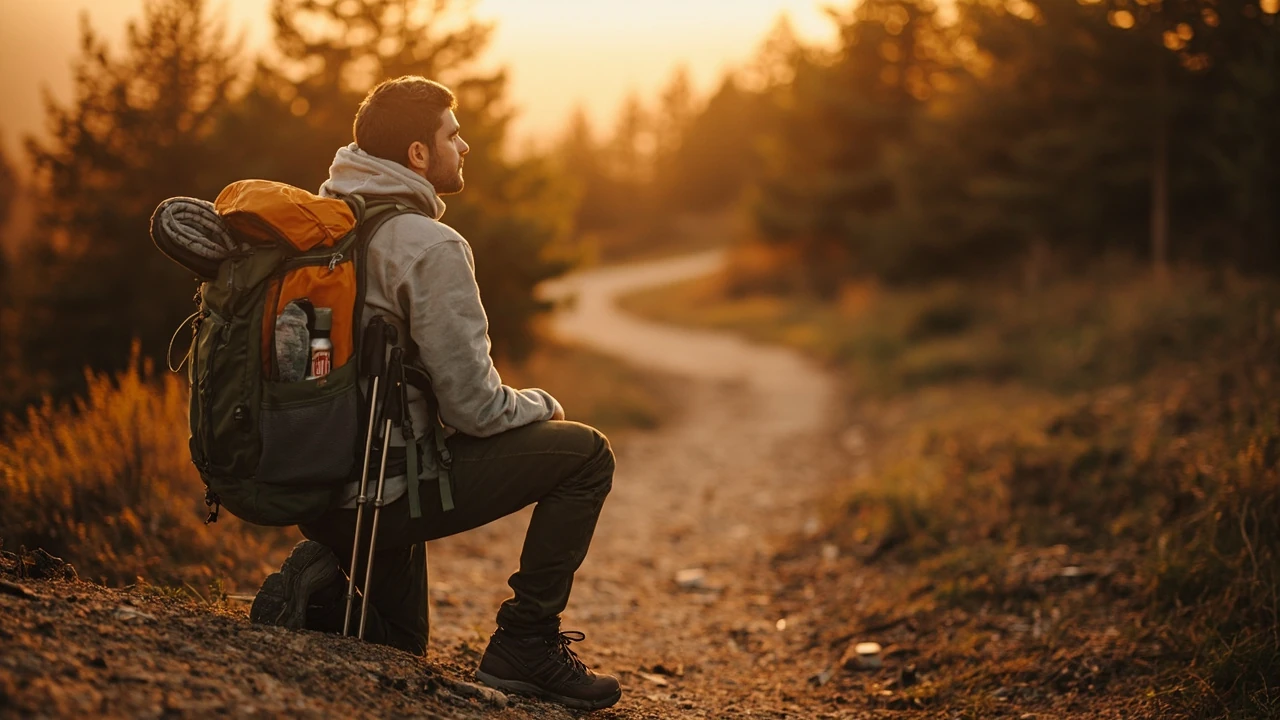
Travel backpack: how to choose one that actually carries what you need
A travel backpack is the single piece of gear that decides whether a short trip feels easy or exhausting. The wrong one digs into your shoulders, swallows small items at the bottom, and forces you to drag a second bag. The right one disappears on your back, keeps weight close to your spine, and leaves your hands free for a ticket, a trekking pole, or a child who wants to be carried across a stream. Choosing well matters more than most first-time travelers expect, because a backpack influences how far you walk, how often you stop, and how much you actually enjoy the day.
This guide is written for people planning day trips, weekend escapes, and active outdoor outings where a rolling case would be a bad idea. It focuses on practical decisions: volume, fit, frame, features, materials, and packing. It also explains how a travel backpack fits into a wider day plan, including the kind of weather and terrain that justify extra capacity or a sturdier build. If you already know you will be spending time at an adventure park, the same principles apply, and they pair naturally with the planning advice in The One-Day Forest Escape Planner.
What counts as a travel backpack
A travel backpack is a pack designed to carry personal kit for a trip, with enough volume for clothes, water, food, and a few activity-specific items. It is usually worn for hours at a time, so fit, ventilation, and load transfer matter as much as raw capacity. The term covers a wide range: a 20-liter daypack for a city day, a 40-liter weekender, and a 60-liter trekking pack. The right size depends on trip length, transport, and how much you can re-supply on the road.
Travel backpacks are often confused with hiking backpacks, school backpacks, and duffels. The differences matter:
- Travel backpack: built for mixed use, including airports, trains, and trails. Often has a stowable hip belt, lockable zippers, and a sleeve for a hydration bladder or laptop.
- Hiking backpack: built for long days on foot, with a stronger frame, ventilated back panel, and load-bearing hip belt. Heavier than a travel pack of the same volume.
- School backpack: designed for books and a laptop, not for sustained weight. The straps and back panel are usually too soft for full-day carrying.
- Duffel: easy to throw in a car trunk, but uncomfortable to carry for more than a short walk and offers little weight distribution.
For active travel where you move between transport, a trail, and an activity site, a travel backpack with hiking-pack DNA is usually the most useful choice.
Why the right travel backpack changes your trip
Most travelers notice comfort first, but the effects go deeper. A well-fitted pack changes how you plan the day. When weight sits on your hips instead of your shoulders, you walk farther without needing a break. When compartments are organized, you find your rain layer in under a minute when weather turns. When the pack has external attachment points, you stop leaving things behind because there is a clear place for them.
It also changes what you bring. A pack with no easy spot for a water bottle nudges you to skip refills. A pack with no rain cover means wet clothes by noon. A pack without a hip belt pushes you to leave behind the warm layer you would actually want at the top of a windy ridge. The features you choose quietly set the standard for how well-prepared you can be on any given day.
Sizing a travel backpack by trip length
Volume is the first number most shoppers look at, and for good reason. Too small and you cram. Too large and you carry empty space that adds weight and shift. The table below matches common trip types to a useful volume range, assuming you wash and re-wear base layers, and that you can re-supply food and water on the road.
| Trip type | Useful volume | Typical carry | What usually fits |
|---|---|---|---|
| One-day city or park outing | 15–25 L | Lunch, water, jacket, small first-aid kit | Light layer, snacks, phone, wallet, book |
| Active day trip with weather risk | 25–35 L | Full spare layer, rain shell, water, lunch | Wet-weather jacket, fleece, trail snacks, basic repair kit |
| Weekend travel with one night away | 35–45 L | Two sets of clothes, toiletries, light shoes | Spare trousers, shirt, underwear, packable towel, charger |
| Multi-day outdoor trip with own shelter | 50–65 L | Sleep system, cooking kit, food, layers | Sleeping bag, stove, food for several days, full weather layers |
| Extended travel with frequent re-supply | 40–50 L | Mix of clothing, electronics, documents | Carry-on-sized volume, often with a detachable daypack |
These ranges are a starting point, not a rule. A 25-liter pack can handle a weekend if you are disciplined and there is a washing machine at the other end. A 50-liter pack can be a nightmare for a day trip because empty space lets items slide around and shift your balance.
Fit: the single most important decision
Two packs of identical size and weight can feel completely different. The reason is fit. A travel backpack should sit high on your back, close to your spine, with the weight on your hips, not your shoulders. The hip belt should carry roughly 70–80 percent of the loaded weight when adjusted correctly. If you feel all of the load in your shoulders after ten minutes, the torso length is wrong or the hip belt is too high.
To check fit, load the pack with about 8–10 kg and walk for ten minutes. Pay attention to:
- Torso length: the back panel should reach the top of your shoulders without tilting forward. Most packs come in multiple torso sizes, and a few in adjustable sizes.
- Hip belt: should sit on the bony ridge of your hips, not on your waist. The padding should be firm enough to carry weight without compressing.
- Shoulder straps: should follow the curve of your shoulders without pinching or leaving a gap. The load lifter strap above each shoulder should sit at about 45 degrees to pull the top of the pack toward your body.
- Sternum strap: should sit roughly 5 cm below your collarbone. It keeps the shoulder straps from splaying outward.
If a pack does not come in more than one torso size, the design usually assumes a fairly wide range. In that case, the hip belt and load lifter adjustment do most of the work. People with shorter or longer torsos than average benefit from brands that offer sized variants rather than one adjustable model. A useful background reference is the travel overview, which places this part of the discussion in context.
Frame, back panel, and ventilation
Under the fabric, a travel backpack usually has one of three frame styles:
- Internal frame: a stiff or semi-stiff sheet inside the back panel. The most common style. Sits close to the back, keeps the load stable, and is comfortable for active movement.
- External frame: visible metal rods outside the pack body. Rare in travel packs today, mostly used in vintage hiking gear. Better for carrying very heavy loads on flat terrain, worse for balance on technical ground.
- Frameless: no internal structure. Used in small daypacks under about 25 L. Only comfortable when the load stays under about 5–6 kg.
Ventilation is what keeps your back from ending the day soaked in sweat. Mesh-covered foam panels, suspended mesh, and ribbed foam channels all attempt the same thing: keep a thin layer of air between the pack and your back. Suspended mesh works best in warm weather but adds bulk and weight. Foam channels are lighter and dry faster but let less air through. The right choice depends on climate and trip length, not on the brand label.
Materials and durability
Most travel backpacks use nylon or polyester, often with a water-resistant coating and a ripstop weave. The numbers that matter are the denier rating and the coating type. Higher denier means a thicker thread, which usually means more abrasion resistance. Lower denier means lighter weight but easier wear.
| Material trait | What it means | When it matters |
|---|---|---|
| 300D ripstop polyester | Light, budget-friendly, decent abrasion resistance | Light travel, fair weather, infrequent use |
| 420D–600D nylon | Middle ground for strength and weight | Regular weekend trips, mixed weather |
| 1000D or higher nylon | Heavy and very durable | Long expeditions, rough handling, repeated airline check-in |
| Recycled fabrics | Often similar performance with lower environmental impact | Brands vary; check the denier as well as the source claim |
Coatings and laminates also matter. A simple water-resistant finish sheds light rain for a few minutes, then soaks through. A proper rain cover or a pack with a built-in cover is a better bet for full wet days. The principles are the same as those in What to Pack for a Wet-Weather Trail Day, where the goal is keeping critical layers dry rather than keeping the whole pack dry.
Features that earn their place
Every pack promises a long list of features. The ones that actually matter depend on how you travel. The list below separates features that nearly always help from those that only help in specific cases.
- Hip belt with pockets: the pockets hold a phone, snack, or small camera. Pockets on the belt are the single feature most travelers appreciate after the first real trip.
- Front shove-it pocket: a stretch or open pocket on the front of the pack for a jacket, map, or snack. It saves you from digging into the main compartment.
- Side water bottle pockets: deeper is better. Shallow pockets make bottles fall out when you bend over.
- Compression straps: pull the load tight to the frame so the pack does not wobble. They also help when the pack is half full.
- Lockable zippers: useful in hostels and shared rooms. Worth having if you stay in shared accommodation, less important for solo cabin trips.
- Hydration sleeve: an internal pocket for a water bladder, with a port for the drinking tube. Useful on long active days, less useful for city travel.
Features that are easy to overvalue include excessive external loops, removable frames that add weight when used, and very small organizer pockets that swallow keys and never give them back. The right mix is the one you will actually use on the kind of trips you take.
How to pack a travel backpack for an active day
Packing is the skill that makes a pack feel bigger or smaller than its listed volume. The goal is to keep weight close to your back, keep heavy items low and centered, and keep the things you need often within easy reach. A common pattern looks like this:
- Bottom layer: the items you will not need until camp or the end of the day. A spare base layer, a sleeping bag, or shoes you only use at the destination.
- Middle layer: heavier items such as water, food, and electronics. Centered between your shoulder blades so the load does not pull you backward.
- Top layer: insulation you may need on the move, such as a fleece or a rain shell. Easy to grab when the wind picks up.
- External pockets: snacks, map, phone, small first-aid kit, and a soft water bottle in the side pocket.
- Hip belt pockets: the small things that always seem to vanish. Lip balm, tissues, a snack bar, a house key.
Compression sacks and packing cubes are optional but help if you tend to lose small items. A separate dry bag inside the pack is worth the small weight for electronics and a spare layer in wet conditions. If your pack does not have a built-in rain cover, a pack cover that lives in its own pocket is far easier to use than a plastic bag stuffed in at the last minute.
Travel backpack vs. wheeled bag: when each makes sense
The choice between a backpack and a small rolling case depends on terrain, transport, and how much you walk each day. The comparison is a fair question for anyone planning a multi-stop trip where they will be on and off trains, walking through old town streets, and climbing stairs without escalators.
| Factor | Travel backpack | Small wheeled case |
|---|---|---|
| Stairs and curbs | Hands free, no lifting required | Needs to be carried up or down each flight |
| Cobblestones and dirt | Handles rough ground with no extra effort | Bounces and stalls on uneven surfaces |
| Long flat surfaces | Less efficient than wheels | Lower effort on smooth floors and platforms |
| Storage on transport | Fits under seats and in overhead bins more easily | Often larger than carry-on size once overpacked |
| Hands available | Free for tickets, kids, poles | One or both hands tied up |
| Pack weight felt on body | Yes, especially in heat | Almost none |
For trips that mix transport, walking, and outdoor activity, the travel backpack usually wins. The wider logic of choosing between a backpack and wheels for outdoor day plans is covered in Train or Car for an Outdoor Day Trip? A Practical Comparison. Readers can also consult the tourism can be beneficial for poor for an independent source related to this section.
Caring for a travel backpack so it lasts
A good travel backpack should last many seasons if you treat it like kit rather than luggage. Three habits extend its life more than any other.
- Empty it after every trip: crumbs, sand, and moisture shorten fabric life. A quick shake and a wipe of the inside prevents mildew.
- Wash it sparingly and gently: hand wash with mild soap, rinse well, and air dry away from direct heat. Machine washing breaks down coatings and can bend internal frames.
- Store it loose and dry: avoid leaving it compressed in a closet. Loosen all straps and store it in a dry place so foam and padding recover their shape.
Re-proofing the DWR coating every year or two keeps the outer fabric shedding water as it should. A simple spray-on treatment applied after a wash restores the surface tension and keeps the pack from getting soaked in light rain.
Common mistakes when choosing a travel backpack
Most buyers end up with the wrong pack for one of a handful of reasons. Skipping these traps saves money and shoulder pain.
- Buying by brand, not by fit: a respected pack with the wrong torso length is a bad pack for you. Fit always beats label.
- Choosing the largest size that fits the budget: a half-empty 60-liter pack is harder to carry than a full 35-liter pack. Volume is a tool, not a status symbol.
- Ignoring the back panel: a soft, unventilated back panel turns a summer day into a sweat lodge. If you travel in warm weather, this is a deal-breaker.
- Skipping the hip belt check: a thin unpadded belt is the same as no belt at all. The hip belt is where the load lives, so the padding has to be real.
- Forgetting how you actually travel: a pack designed for a hostel circuit and a pack designed for forest trails have different priorities. Buy for the trip you take, not the trip you might take.
Matching the travel backpack to the kind of trip you take
Different trips reward different pack setups. The list below suggests a reasonable starting point for the most common scenarios.
- City weekend: 30–35 L, lockable zippers, internal organizer, simple hip belt, water bottle pocket, dark color to hide grime.
- Family day at a park or rope course: 25–30 L with extra room for snacks and a spare layer for a child. Look for a wide-mouth opening so you can find things without dumping the pack.
- Multi-day forest escape: 45–55 L with a strong hip belt, rain cover, and external attachment points for a sleeping pad or trekking poles.
- Adventure travel with multiple activities: 40 L with a detachable daypack for short outings from a base. A good compromise between carry-on size and capacity.
The Family Adventures and Weekend Ideas categories on this site focus on outings where a versatile travel backpack earns its keep. A pack that works for a forest escape usually also works for a day at an outdoor event, which is why it pairs well with the planning approach in What Makes an Outdoor Event Worth Travelling For?.
Budget and value: what to expect at each price point
Prices vary widely, and the gap between budget and premium packs is not always as large as the marketing suggests. The table below gives a sense of what each tier typically delivers for a travel backpack, based on common features at that level.
| Price tier | Typical materials | Fit and frame | Where the money goes |
|---|---|---|---|
| Entry level | 300D–600D polyester, basic zippers | One torso size, simple foam back panel | Brand overhead, basic features, limited warranty |
| Mid range | 400D–600D ripstop nylon, YKK zippers, taped seams | Sized or well-padded adjustable torso, internal frame | Better fabrics, real hip belt, ventilation, longer warranty |
| Premium | High-denier recycled nylon, weatherproof coatings, premium hardware | Custom-fit harness, suspended mesh back, lifetime repair programs | Custom fit, weight savings, repair culture, recycled materials |
A mid-range pack from a brand with a solid warranty is often the best value for travelers who do a few trips a year. Premium packs make sense when weight, fit, and long-term repair programs matter, especially for people who travel frequently. Entry-level packs work for occasional use, but expect zippers and seams to need attention within a few seasons.
Travel backpack checklist before you buy
Before you commit to a pack, run through this short list. It saves a return trip and a wasted afternoon.
- Does the torso length match yours, and does the hip belt sit on your hip bones?
- Is the volume right for the trips you actually take, not the trips you wish you took?
- Are the side pockets deep enough for a full water bottle?
- Does the back panel breathe, and does it stay comfortable after twenty minutes of walking?
- Is there a real hip belt with enough padding to carry real weight?
- Are the critical seams taped or bar-tacked at stress points?
- Is there a covered or lockable main compartment if you stay in shared rooms?
- Does it stand on its own when set down, or does it topple over?
If most of the answers are yes, the pack will do its job. The rest is color and personal taste.
Bringing it together for your next trip
A travel backpack is a small piece of gear with an outsized effect on how a trip feels. Fit, volume, materials, and a few well-chosen features are what separate a pack you forget you are wearing from a pack you cannot wait to put down. The best way to choose one is to think about the trips you already take, not the trips in a brochure, and to load and walk the pack before you decide.
Use the same care you would use to pick shoes or a jacket. Try it on with weight, walk for a few minutes, and pay attention to the hip belt, the back panel, and the pockets. If those basics work, the rest of the trip tends to follow.
Frequently asked questions
What size travel backpack do I need for a weekend trip?
For a one or two-night trip where you can re-supply food and wash a layer, a 35–45 L travel backpack is usually enough. Pack two sets of base layers, one mid layer, a rain shell, toiletries, electronics, and a packable day bag. If you are heading somewhere without luggage storage or where you must carry a sleeping bag, step up to 50–60 L instead.
Is a travel backpack different from a hiking backpack?
Yes, though the line has blurred. A travel backpack is built for mixed use including airports, trains, and short trail days. A hiking backpack is built for long days on foot and heavier loads, with a stronger frame and a more aggressive hip belt. Many modern packs blend the two, which works well for active trips where you will not be carrying more than 12–15 kg.
How do I measure my torso for a travel backpack?
Measure from the bony bump at the base of your neck (C7) down to the line between your hips, level with the top of your iliac crest. That measurement in centimeters is your torso length. Most brands list torso size ranges, and your measurement should fall roughly in the middle of one of those ranges for the best fit.
Are travel backpacks allowed as carry-on luggage?
Most 40 L travel backpacks meet the carry-on size limits of major airlines, though the exact limit varies. Soft-sided packs can often be squeezed into a tight bin. Always check your airline’s published dimensions and weight limits before you fly, and avoid packing anything that forces you to gate-check a fully loaded pack.
Do I need a rain cover for my travel backpack?
Yes, unless you are confident the fabric is genuinely waterproof rather than just water-resistant. A pack cover is the simplest way to keep your back dry and your contents safe in steady rain. If you do not want to buy a cover, line the inside of the pack with a large dry bag for electronics and a spare layer.
How much weight should I carry in a travel backpack?
As a rule of thumb, try to keep a loaded travel backpack under 20 percent of your body weight for a day of easy walking, and under 15 percent if you will be on your feet for hours or on uneven ground. The hip belt should carry most of the load, so the right pack makes a real difference here. A lighter pack is not always possible, but a better-fitting pack is.
Can a travel backpack replace a carry-on suitcase?
For many travelers, yes, especially for trips of a week or less with re-supply along the way. A 40 L travel backpack leaves both hands free, fits into overhead bins, and survives cobblestones and stairs better than wheels. The trade-off is that you have to lift it into the bin yourself, and overpacking becomes much easier.
What is the best way to organize a travel backpack?
Use packing cubes or dry bags by category, place heavy items low and centered, and put the things you need on the move in the top and external pockets. Keep small items in hip belt pockets so they do not vanish. A separate electronics pouch in the main compartment protects chargers and cables from water and impact.
How do I stop my travel backpack from smelling?
Empty it after every trip, air it out, and avoid sealing damp clothes inside. Wipe the inside with a mild soap solution if needed and let it dry fully. A small sachet of baking soda left inside overnight absorbs odors between trips. Never store a pack in a plastic bag or a tightly closed closet while it is still damp.
Are expensive travel backpacks worth the price?
For occasional travel, no. For frequent or long trips, often yes. Premium packs offer better fit, lighter weight, and repair programs that extend their life by years. The break-even point depends on how often you travel, how you treat your gear, and how much a lighter, better-fitting pack is worth to you on long days.
Related reading
Explore High Ropes Adventure
Trip tools
Essential adventure planning guides
Use these practical guides to compare rope park activities, prepare for a first high ropes day, check a booking, choose suitable footwear and contact the editorial team. Each page links to the relevant live tools and current planning sections.
Latest articles
- Outdoor pillows: how to choose the right ones for a deck or trail rest stop
- How to find Morgan Jay tickets without overpaying
- How to find national parks near me: a practical local search guide
- Paylater travel: how buy now, pay later works for trip bookings
- Bagsmart Blast Travel Backpack: A Practical Review for Day Trips and Adventure Days
- How to choose an outdoor rocking chair that actually lasts
- Indiana travel advisory map: how to read it before a day trip
- How to plan an outdoor day around a concert stop: a cardi b tickets field guide
- Outdoor sectional sofas: a practical buyer’s guide for patio living
- How amusement parks actually work: rides, safety, and what to expect