What Happens If You Freeze on a Ropes Course: A Practical Guide
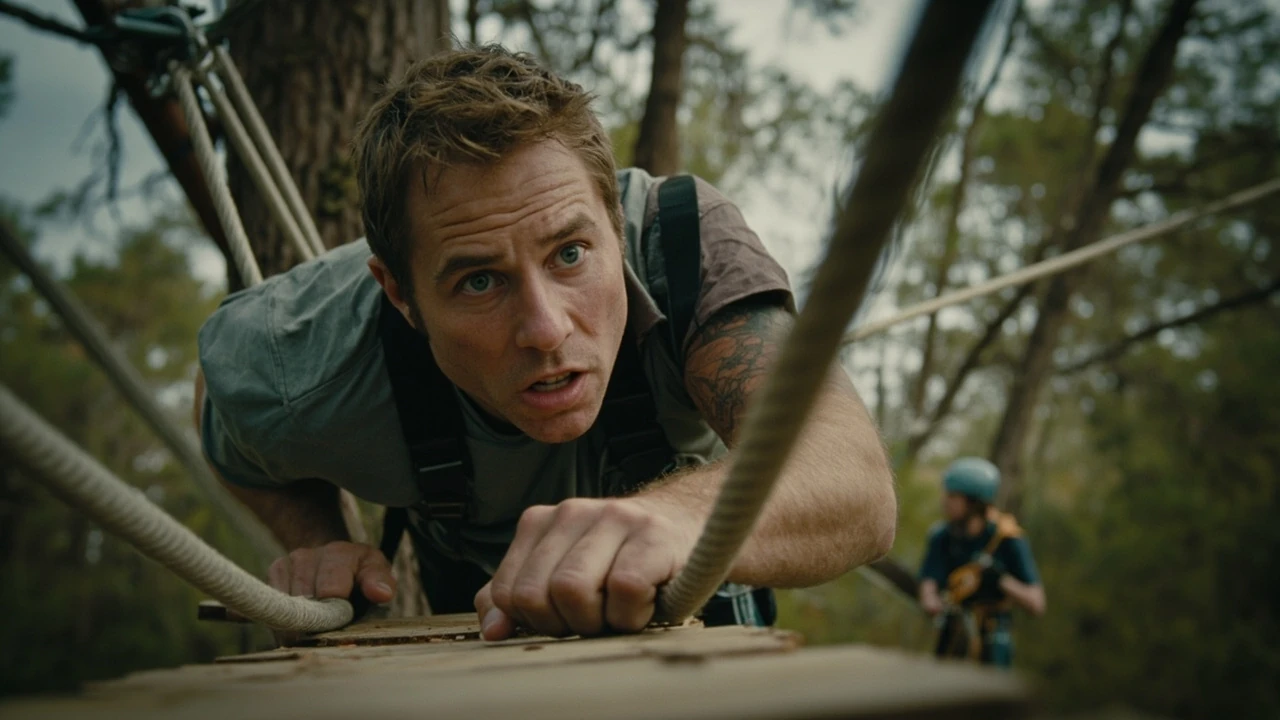
What happens if you freeze on a ropes course
You step off the platform, grip the first cable, and ten seconds into the crossing your hands stop moving. Your legs stop moving. You are standing in the middle of a ropes course, clipped in, and you cannot take the next step. This is a more common experience than most first-time visitors expect, and the answer to what happens if you freeze on a ropes course is calmer than the moment feels: you stay clipped in, a trained guide reaches you, and you come down the same way everyone else does. The course itself is engineered to hold a stationary person indefinitely.
Freezing is a known response to height, exposure, and unfamiliar movement. Park designers plan for it, guides train for it, and harnesses are tested to hold a person who is not moving at all. The challenge is not the equipment. The challenge is the pause in your head, and the techniques that help you leave that pause without rushing past it. This guide walks through the mechanics of a freeze, how trained staff respond, and the practical methods that help visitors move again.
Why people freeze mid-course
Freezing is not a sign of weakness or poor fitness. It is a predictable reaction of a nervous system that is trying to keep you safe. Several things combine to produce it.
- Height exposure. The body reads any fall risk, even a small one, as a survival problem. Muscles tighten, breathing shortens, and the brain narrows attention to the immediate handhold.
- Sensory mismatch. Trees, cables, and platforms look solid from the ground and feel strangely springy at height. When the visual system and the balance system disagree, the brain can pause movement until the conflict resolves.
- Loss of reference points. The start platform, where the route felt simple, is now behind you. The next platform looks far away. Without a clear next handhold, the legs hesitate.
- Cognitive load. You are listening to instruction, clipping a lanyard, watching your footing, and not falling. That is a lot for an unfamiliar task. When the working memory fills, the body stops to make room.
- Audience effect. Friends, family, or a queue of strangers on the ground are visible below. The social pressure of being watched can amplify a small hesitation into a full stop.
Recognising the trigger is the first step out of it, because the freeze is a state, not a verdict. Once you can name it, the next decision is easier.
How the equipment handles a stationary person
Before thinking about what to do, it helps to know what is already working. Every modern high ropes course uses a belay system designed to hold a person who is not climbing at all. Two common systems appear on adventure parks.
| Belay system | How it holds you when you stop | What you feel |
|---|---|---|
| Continuous belay with twin lanyards | At least one lanyard is always anchored to a safety line; a smart carabiner or shuttle blocks the line so a stalled climber cannot slide | A soft tug upward on the harness; a click when a lanyard is correctly clipped |
| Self-belayed trolley on a cable | A trolley travels with you along a steel cable and locks instantly if you fall, slip, or simply stop leaning forward | A steady connection overhead with no slack; gentle resistance if you lean back |
| Static rope with traditional belay | A trained belayer below holds the rope and locks off as soon as tension changes | Direct feedback from the rope as you move; verbal callouts from the belayer |
All three systems share one feature: the moment you stop moving, nothing else needs to happen. The carabiner, shuttle, trolley, or belayer simply holds you in place. There is no timer, no failure state, and no time pressure built into the equipment. If you want a deeper breakdown of how a belay line interacts with a harness and a lanyard, the article on high ropes belay systems explained for first-time visitors is a useful companion read.
How trained guides respond to a freeze
Guides are trained for this exact situation. The standard response is a sequence, not a rush.
- Confirm the guest is clipped in. The first check is visual. The lanyard is on the cable, the carabiner is locked, the harness is fitted. The equipment decision is already made.
- Make eye contact and slow the moment down. A guide will speak in a calm, even tone and ask the guest to breathe. Lowering the cognitive load is more useful than issuing instructions.
- Offer a handhold, not a rescue. If the guest can move, the guide points to one specific next step, such as the next wooden block or the next cable. A single target is easier than a whole route.
- Talk the guest across if needed. For longer freezes, the guide will name each handhold and each foot placement out loud, keeping the rhythm slow and predictable.
- Lower the guest if the freeze does not break. Most courses have a controlled descent option, such as a transfer to a rescue team on the ground or a zip-line exit. Lowering is treated as a normal outcome, not a failure.
What a guide will not do is climb up uninvited or grab the guest from the side. Both actions can startle a frozen person and create a real fall risk. The standard is verbal support first, physical help second, and a calm exit if the freeze holds.
What you can do in the first ten seconds
The window between a hesitation and a full freeze is short, and a few small actions tend to break the loop.
| Action | Why it helps |
|---|---|
| Press your weight into the harness | Confirms to your body that the line is holding, which reduces the grip-on-tight reflex in your hands |
| Name the next handhold out loud | Switches the brain from a vague worry into a concrete task |
| Exhale fully twice | Long exhales lower heart rate and tell the nervous system the threat has passed |
| Look at your hands, not the gap | Directs attention to something you can control instead of the space below |
| Count to three, then take one step | A small timed commitment beats an open-ended decision to keep going |
None of these actions require courage. They require a routine. Practising them on the ground before your first element makes them easier to reach for at height.
Common freeze points and why they happen
Different elements trigger different fears. Knowing the usual suspects helps you prepare for the one that matches your route.
- The first platform departure. The transition from solid wood to moving cables is the single most common freeze point. The body is still treating the platform as ground.
- The middle of a long bridge. The starting handhold is behind you and the ending one is small in the distance. Without a mid-point reference, the legs can stall.
- Transitions between two elements. The point where you have to unclip one lanyard and clip the next is a freeze hotspot on continuous belay courses, because both hands leave the cable at once.
- High but stable elements. Counter-intuitively, a swaying rope bridge freezes fewer people than a rigid plank at the same height. The swaying is scary, but it gives the body feedback. A still, narrow beam gives the brain nothing to read.
- Element seven of a long course. Fatigue is real. The fifth, sixth, and seventh elements often produce a late freeze simply because grip strength and decision-making have both dipped.
Practical ways to reduce the chance of freezing
Freezing is not random. A few habits before and during the climb lower the odds noticeably.
- Walk the lower course first. Many parks offer a low practice loop. Running through clip-in, handhold, and foot placement on a 1-metre element teaches the motor pattern before height is added.
- Warm up your hands and grip. Cold hands grip too hard. A few shoulder rolls and finger spreads before you start keeps the grip honest.
- Plan one anchor, not a route. Pick a single spot on the next element and aim for that, rather than picturing the whole crossing.
- Match the pace of the slowest friend. Following your own rhythm is harder when you are watching someone else. Move at the speed that keeps you breathing.
- Tell the guide in advance. Parks hear this every day. Saying, “I freeze at height,” lets a guide position themselves where you can hear them without surprise.
If you are planning the visit for a group, the article on how to find a safe adventure park near you covers what to look for in a park’s safety briefing and pre-climb practice, both of which reduce mid-course freezing.
When lowering is the right call
Sometimes a freeze does not break. That is fine, and lowering is built into the design of every reputable course. The signs that it is time to ask for a controlled exit are easy to read.
- Your hands are shaking hard enough that the next clip is unsafe.
- Your breathing has become shallow and fast for more than a minute.
- You cannot lift your eyes from the platform below.
- You have asked for help and still cannot initiate the next step.
Lowering is a normal outcome. It is logged in the park’s records, the staff are not surprised, and the rest of your day continues. Many visitors return to a course later, often choosing a different element layout, and find that the second attempt is straightforward.
How parks design courses around freezing
Course design is part of the answer. Engineers and route designers work with psychologists, instructors, and insurance assessors to build environments that minimise avoidable freezes.
| Design feature | What it addresses |
|---|---|
| Visible handholds in high-contrast colour | Gives the eye a target and reduces visual search time mid-element |
| Wide foot planks on early elements | Builds confidence before narrower crossings appear later in the course |
| Rest platforms between high elements | Allows breathing room and lowers cumulative fatigue across a long course |
| Ground spotting by trained staff | Reassures guests through voice and presence without interfering with the climb |
| Element progression from low to high | Acclimatises the nervous system gradually rather than asking the body to adjust all at once |
These features are not aesthetic choices. They are how a course is graded for difficulty, and they are part of why freezing, when it happens, tends to happen at predictable points rather than randomly.
What staff check before you ever leave the platform
A freeze is much harder to manage if the equipment is not right. Pre-climb checks are the part of the day most visitors do not see, and they directly affect what happens if you freeze on a ropes course later in the session.
- Harness fit. Staff tighten the leg loops and the waist belt so a slip cannot slide the harness up or down.
- Helmet fit. A snug helmet prevents the head from tilting, which keeps the inner-ear balance system reading the right angle.
- Lanyard connection. A tug test confirms the carabiner is closed and locked, and a second check confirms the lanyard is on the correct safety line.
- Clothing and footwear. Closed-toe shoes with grippy soles, no loose scarves, no dangling camera straps. Anything that could catch or slip is removed.
These checks take about two minutes. They are the reason a frozen guest can pause indefinitely without the system losing integrity.
What freezing is not
It helps to clear up a few common misunderstandings before a first visit.
- Freezing is not a panic attack. A panic attack involves a sudden surge of fear and physical symptoms. Freezing is slower, quieter, and usually starts with a single hesitation rather than a wave.
- Freezing is not the same as being unfit. Grip strength, balance, and core stability help, but most freezes happen on the first visit regardless of fitness level.
- Freezing is not a failure of the course. A well-designed course is supposed to challenge you at the edge of your comfort. If you never felt the edge, the course was too easy.
- Freezing is not recorded as a poor outcome. Parks track completed descents and controlled exits, and both are treated as successful visits.
Training drills you can practise on the ground
A short practice session before your visit makes the real course feel familiar. None of these drills require a harness.
- Three-breath reset. Stand with your eyes closed. Inhale for four counts, exhale for six. Repeat three times. This is the same rhythm you will use at height.
- One-step commitment. Place a plank or a strip of tape on the ground. Walk to the middle, stop, then say out loud, “left foot, plank, eye on the marker.” Take one step.
- Handhold naming. Look at a climbing wall or a staircase. Pick the next four holds or steps and name them aloud in order. This is the same cue guides use from the ground.
- Harness press. Sit in a chair with a cushion behind you. Lean back slightly so the cushion catches your weight. This teaches your body that the harness and a line are a safe place to sit, which is exactly what you will do at height if you freeze.
How freezing differs across course types
Not all courses produce the same kind of freeze. The structure of the route changes the trigger.
| Course type | Typical freeze point | Best response |
|---|---|---|
| Low practice course, under 2 metres | Almost none; used to build confidence | Focus on lanyard habit, not speed |
| Mid-level adventure course, 4 to 8 metres | First platform departure and mid-bridge | Anchor on one handhold, breathe twice, then step |
| High-level course, 10 metres and above | Transition between elements and final return to platform | Ask the ground guide to name each move; consider lowering if freeze holds |
| Zip-line finishes | Last platform before the zip | Lean back, look up the line, and let the guide give the release call |
What to tell a friend who is worried about freezing
If you are visiting with someone who is anxious about freezing, the conversation before the day matters as much as the equipment.
- Reassure them that a freeze is handled by a guide, not by themselves.
- Explain that the harness holds them whether they move or not.
- Offer to go first on the first element so they can watch a familiar face.
- Agree on a private signal, such as a hand on the harness, that means, “I’m freezing.”
- Plan a low-pressure warm-up, such as a walk on the lower course, before the high course.
You can also remind them that parks see this every week. A guide’s calm response is not a performance. It is the same routine they run dozens of times a season.
Frequently asked questions
Is freezing dangerous on a ropes course?
Freezing itself is not dangerous. The belay system is designed to hold a stationary climber, and the harness, lanyard, and cable carry the load whether you move or not. The risk only appears if a frozen guest tries to rush or unclips a lanyard, both of which trained guides actively prevent.
How long can you stay still on a ropes course?
There is no technical limit. As long as you remain clipped in, the equipment will hold you indefinitely. In practice, most freezes break within a few minutes, and any freeze that holds longer is resolved by a controlled descent, not a removal by force.
Will the staff make me come down if I freeze?
Not immediately. Staff will talk you through the next steps first. A controlled descent is offered only if the freeze does not break after verbal support, or if a guest asks for one. Coming down is treated as a normal outcome.
What should I do with my hands when I freeze?
Press your weight into the harness by leaning back slightly. This reduces the white-knuckle grip on the cables and tells your body the line is taking the load. From there, look at your hands and name the next handhold out loud.
Can I skip an element if I freeze on it?
Most courses allow guides to transfer you to a lower element or to a zip-line exit if one element is too much. Skipping is common and is part of how a course is graded. The route is not a test you have to complete in order.
Does freezing mean I should not do a high ropes course?
No. Freezing is a normal response on a first visit, and many regular climbers report a freeze on their first session. Most parks offer lower practice courses, slower group sessions, and trained guides specifically so first-time visitors can build up gradually.
How do guides know when a freeze is starting?
Trained staff watch for hand tremors, fixed staring, and a long pause with no foot movement. They will speak to you before the freeze fully sets in, because early support is faster and less disruptive than a full rescue.
Can children freeze on a ropes course?
Yes, and they often do, especially around transitions between elements. Most family-oriented courses include rest platforms, larger handholds, and ground staff who are used to talking younger climbers across the harder parts. If you want a broader look at how courses are designed for families, the article on how to find a safe adventure park near you has a useful checklist.
What is the difference between freezing and acrophobia?
Acrophobia is a persistent, intense fear of heights that affects daily life. Freezing on a ropes course is a temporary response in a specific environment. Many people with mild height sensitivity freeze on a first ropes course and feel fine on the second visit.
Should I tell the park in advance that I might freeze?
Yes. Sharing this with the booking team or the on-site guide before the climb begins changes nothing about your day and lets the staff position themselves to help you faster. It is one of the simplest ways to make a first visit easier.
A practical next step
If you have a visit planned, the most useful thing you can do in the next week is a short ground routine. Practise the three-breath reset, walk a strip of tape as if it were a plank, and name handholds out loud on a staircase. On the day, ask the guide where the lowest warm-up element is, do that one first, and decide on a private signal with anyone in your group. If you freeze, you will know the harness is holding, the guide is watching, and the next step is a name, a breath, and a single move. The course is built for that moment, and so are you.
Related reading
Explore High Ropes Adventure
Trip tools
Essential adventure planning guides
Use these practical guides to compare rope park activities, prepare for a first high ropes day, check a booking, choose suitable footwear and contact the editorial team. Each page links to the relevant live tools and current planning sections.
Latest articles
- Tame Impala tickets: how to find them, what they cost, and what to know before you buy
- Outdoor pillows: how to choose the right ones for a deck or trail rest stop
- How to find Morgan Jay tickets without overpaying
- How to find national parks near me: a practical local search guide
- Paylater travel: how buy now, pay later works for trip bookings
- Bagsmart Blast Travel Backpack: A Practical Review for Day Trips and Adventure Days
- How to choose an outdoor rocking chair that actually lasts
- Indiana travel advisory map: how to read it before a day trip
- How to plan an outdoor day around a concert stop: a cardi b tickets field guide
- Outdoor sectional sofas: a practical buyer’s guide for patio living