Zipline braking systems explained for beginners: how they actually work
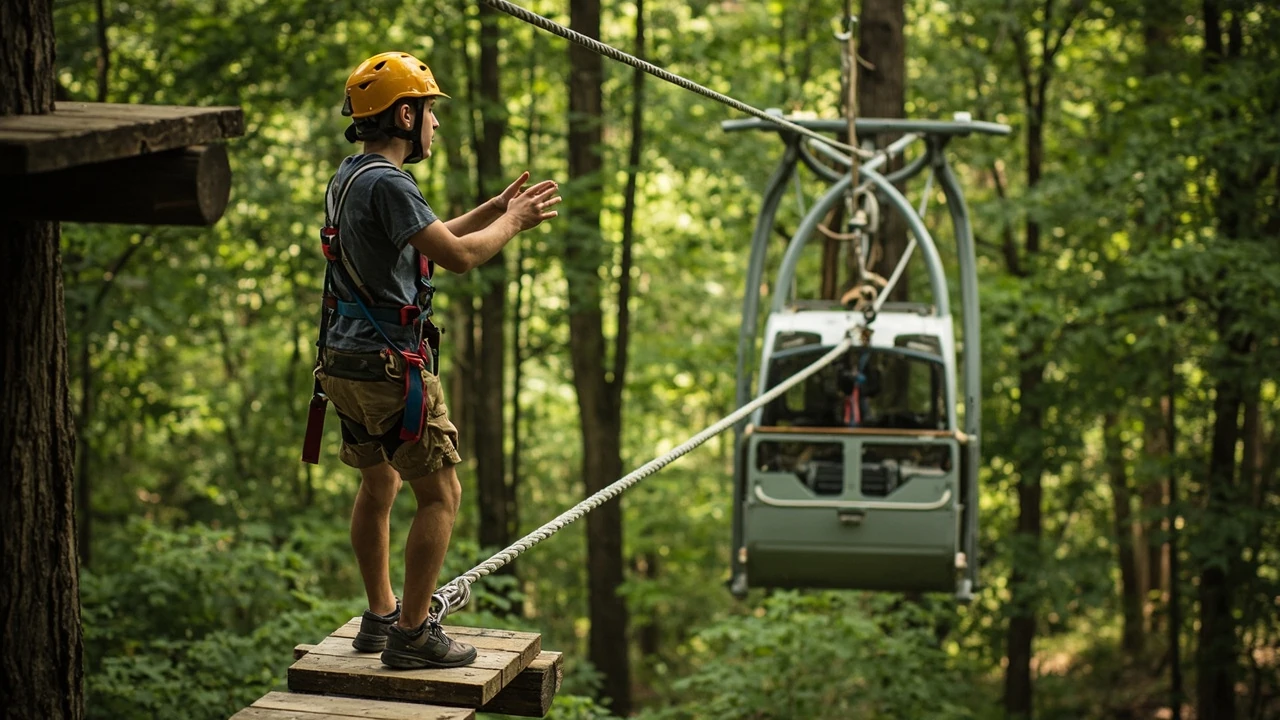
Zipline braking systems explained for beginners
You reach the launch platform, clip into the trolley, take a breath, and wonder the same thing almost every first-time rider wonders: how does this thing actually slow down? The answer is not mysterious, and it does not depend on the rider grabbing the cable or doing something clever at the last second. On a well-built zipline, braking is built into the course, and the rider’s job is simply to arrive in the right posture and let the system do its work. This guide walks through zipline braking systems explained for beginners in plain language, so you know what each type does, why it exists, and how to ride one with confidence.
If you are planning your first visit, it also helps to understand how a zipline fits into a larger ropes-course day, from the harness and trolley you wear to the landing platform where the trolley is caught. The overview of ropes courses on this site gives a useful picture of where the braking step sits in the wider safety chain, and the practical family rope park planning guide covers the age, height, and weight rules that usually decide which lines you can ride in the first place.
What a zipline braking system actually does
A braking system has one job: take a moving rider and bring them to a controlled, predictable stop before the end of the cable, without a jarring impact and without leaving the rider hanging. Three things have to happen in a short space, often in less than a second of travel.
- Energy absorption: the kinetic energy the rider built up while gliding has to be absorbed gradually, not in a single sharp jolt.
- Force management: the deceleration has to stay within limits that a human body can tolerate without injury, even with a heavier or lighter rider.
- Repeatability: the stop has to work the same way for a 45-kilogram child and a 110-kilogram adult, in wet weather and in dry, with a fresh trolley and a worn one.
Beginners often assume the rider has to do something active, like lean back, drag a glove, or grab a rope. On modern commercial and adventure-park lines, that is rarely true. The braking is engineered into the system. The rider’s task is to arrive in the correct body position, keep hands and feet clear, and trust the design.
The three braking families you will meet on a course
Almost every braking setup you will ride on a commercial zipline belongs to one of three families. Some courses blend two of them, but the underlying logic is the same.
| Braking family | Where it lives | What the rider feels | Main advantage | Main limitation |
|---|---|---|---|---|
| Passive fixed brake | Built into the landing area on the cable or platform | A steady, predictable deceleration that begins before the landing platform and ends with the rider stopping inside it | No rider action required, very consistent, works for almost any body weight within the posted range | Stop point is fixed; the line must be tuned to a specific weight range and approach speed |
| Active rider brake | Triggered or steered by the rider near the end of the run | A short burst of deceleration controlled by a hand-held device, glove pad, or steering input | Can be tuned to rider weight and weather on the day | Requires correct technique; poor form can lead to hard arrivals or under-shooting |
| Magnetic or eddy-current brake | Mounted on the cable, trolley, or arrival platform | A smooth, almost silent ramp-up of force that feels slightly heavier as speed increases | Self-regulating across a wide range of weights, low maintenance, gentle on equipment | Higher setup cost; not as common on smaller park lines |
Many commercial courses use a passive fixed brake because it removes the largest variable from the equation: the rider. A course that depends on a guest braking correctly at the end is a course that occasionally deals with a guest who forgets, panics, or arrives too fast. A passive system removes that failure mode.
Passive fixed brakes: the workhorse of beginner lines
A passive fixed brake is exactly what it sounds like. It is a braking device mounted at a fixed point on the line that engages automatically as the trolley passes over it. The rider does nothing. The two designs you will see most often are the catch net with a friction collar and the padded buffer block at the end of the cable, sometimes called a bungee or spring stop.
Here is how a typical passive catch system works in practice:
- You launch from the platform and the trolley rolls along the cable under gravity.
- As you approach the landing, a second cable or a ramped section channels the trolley toward a padded catch net or a rubber-style buffer block.
- The trolley enters the catch zone and the energy is absorbed gradually as the buffer compresses, the harness is held by an operator, or the trolley is decelerated by friction on a braking block.
- You come to rest inside the landing platform, often with a hand from the landing guide to steady you.
The reason passive systems feel so calm is that the braking distance is fixed. The course designer chose the brake placement and the buffer stiffness based on the steepest reasonable approach speed, the heaviest expected rider, and the line’s slope profile. As long as the rider’s weight is within the posted range, the same stop will work every time.
One detail that surprises beginners is that the course cannot legally let you ride if you are outside the weight range. The brake is tuned to a band, not a single number. Heavier riders produce more kinetic energy and may need a longer braking distance, while lighter riders may not generate enough force to trigger some friction systems fully. The posted minimum and maximum weights are not suggestions; they are part of the brake design.
Active rider brakes: when you are part of the system
On some lines, especially on longer or steeper runs where a passive catch would be impractical, the rider is part of the braking system. This is more common on guided eco-tour ziplines, canopy tours, and some mountain courses, and less common on small park ziplines. There are three main active designs you will meet.
- Hand-held brake lever: a handle attached to the trolley by a short lanyard that the rider pulls or pushes to apply friction to the cable. The force has to be smooth, not a sudden grab.
- Leather glove pad: a heavy leather or composite pad worn on the trailing hand that the rider presses onto the cable or onto the trolley housing to create drag. This requires good upper-body strength and good body position.
- Steering and edging: on some courses the rider does not grab anything but shifts body weight to steer a passive brake into engagement at the right moment. The trolley itself does the work; the rider just chooses the line.
Active systems reward good technique and punish poor technique. The most common beginner mistake is to grab the brake too hard and too late, which produces a sharp jerk rather than a smooth ramp. Guides usually teach you to start with light pressure, ramp up over a couple of seconds, and ease off just before stopping so you do not bounce forward in the harness. The same general idea, gradual pressure over time, applies whether the brake is a lever, a glove, or a magnetic unit you steer toward.
Magnetic and eddy-current brakes: smooth, quiet, and self-regulating
Magnetic braking is the modern option that has spread quickly across new-build adventure parks in the last decade. Instead of friction between solid surfaces, the brake uses the principle that a conductor moving through a magnetic field experiences a resistive force. The faster the trolley or the brake housing moves, the more drag it generates, and when the trolley slows, the force tapers off naturally. You feel this as a smooth rise in apparent weight, then an equally smooth release.
From a beginner’s perspective, the practical benefits are real.
- Self-regulating force: the brake does not need to be retuned every time a heavier or lighter rider turns up. The physics adapts.
- Low wear: there are no pads to replace every few hundred rides, so the brake stays consistent for a long time.
- Quiet operation: there is no squeal of friction pads, which makes the experience feel calmer and less industrial.
- Consistent stop point: riders tend to land in a similar place on the platform, which is friendlier for first-timers.
The trade-off is mostly cost and engineering. Magnetic brake units are more expensive to design and install, and the cables and trolleys need to be matched to the brake. On smaller park lines with short, gentle runs, the economics often push the builder back toward a passive friction or buffer brake. As a rider you will not normally know which system you are on unless you ask; the difference is in the feel, not in the harness or the trolley you wear.
What the rider does, and what the rider should not do
On every well-run zipline, the rider’s contribution to the brake is small. The system does the heavy lifting. Your job is to set the system up for success and then stay out of its way.
- Listen at the launch platform: the guide will tell you which posture they want, usually hands on the trolley, eyes up, legs slightly bent and together.
- Keep your weight in the harness, not on the bar: leaning onto the bar or grabbing the cable changes how the trolley sits and can slow you early or push you off-line.
- Do not grab the cable with bare hands: even a glancing touch at speed can cause friction burns. If the line uses a glove brake, the glove stays on until the guide tells you to use it.
- Brace at the end, do not flail: if you are on a passive system, the brake will engage before you reach the platform. Tense your core, keep your legs slightly bent, and let your body absorb the deceleration.
- Wait for the landing guide: on most lines, a staff member will catch your trolley or your harness. Do not try to climb out of the harness or step off the platform until they give the word.
Most of the uncomfortable arrivals on beginner lines are caused not by a brake failure but by a posture problem. A rider who stands bolt upright, with locked knees and a stiff back, will feel a normal deceleration much more sharply than a rider who keeps a slight bend in the knees and lets the harness do the work. The brake is the same either way. Your body is the variable.
How weather and line conditions change the picture
Braking systems are designed for a range of conditions, and a responsible operator will tell you when the line is out of that range. Three factors change braking the most.
| Condition | Effect on approach speed | Effect on brake performance | What the operator usually does |
|---|---|---|---|
| Wet cable or light rain | Trolley may run slightly faster on a downhill line because water reduces rolling friction | Friction brakes may need a slightly longer run-in; magnetic brakes are largely unaffected | Add a short buffer zone, slow the entry ramp, or pause the line if conditions exceed the design case |
| Strong wind across the line | Cross-winds can slow or speed the rider depending on direction; tail-winds usually increase speed | Brake force stays the same, but the rider’s arrival angle changes, so the catch has to be wider | Lower the weight range, change the launch direction, or close the line if gusts exceed the safe limit |
| Cold temperatures | Cables contract slightly, which can change sag and therefore slope profile | Brake distance can shift by a small amount as the cable profile changes | Recheck brake placement, retune the catch, and run a test trolley before opening the line |
| Heavy use in a day | Brake pads or buffers warm up, especially on busy afternoons | Some friction systems lose a small amount of efficiency as temperature rises | Operators rotate the line, swap pads, or shorten run length during peak periods |
You will not see most of this work, and you are not expected to. The reason these adjustments happen is so that the rider’s experience is the same on the first ride of the day and the last ride of the evening, in dry weather and in drizzle. If a line is open, the operator has decided the brake is in its design window for the conditions.
How a beginner can tell what kind of brake is on a line
You do not need to climb the tower to find out, and you do not need to ask the guide to do a teardown. A few quick observations will tell you which family the line uses, and that knowledge will help you ride it well.
- Look at the landing platform: if you see a large padded catch net, a ramped buffer block, or a long rubber-style stop, you are riding a passive fixed brake and you do not need to do anything except brace.
- Look at your trolley and harness: if the guide hands you a leather glove, a brake handle, or a lanyard with a T-bar, you have an active brake. Pay close attention to the briefing and ask for a second walk-through if anything is unclear.
- Listen for a hum: magnetic brakes often produce a soft rising hum or whirr as the trolley enters the brake zone. It is a useful audio cue that the brake is engaging.
- Ask the staff: the simplest answer is often the best one. Most guides will happily tell you what kind of brake the line uses and what they expect from you at the end.
Once you know which system you are on, the rest is just body position and timing. The brake itself has already been chosen, installed, and checked. Your job is to arrive ready for it.
Common beginner questions about zipline braking
First-time riders tend to ask the same handful of questions, and the answers are more reassuring than people expect. A well-designed brake is built to forgive a great deal.
What if I forget to brake on an active line? On guided lines, the landing guide is trained to call out the braking moment and to assist. On self-braking lines, there is nothing to forget because the system is passive. The worst case on most courses is a firm but safe stop, not a runaway.
Can I get hurt if I brake too hard? On an active line, grabbing the brake suddenly can cause a sharp deceleration and the harness can swing forward. The harness and helmet are designed for this, but it is uncomfortable and unnecessary. Smooth pressure is the rule.
Why is there a weight range at all? Because the brake is tuned to a specific energy band. A rider at the upper end has more kinetic energy to dissipate, and a rider at the lower end may not trigger some friction systems fully. The range keeps the stop predictable for everyone.
Do brakes fail often? In well-run operations, brake components are inspected daily, and consumable parts like pads are replaced on a schedule rather than when they fail. Course design assumes that any single component can fail and the line will still be safe. This is the idea behind redundancy in zipline engineering, and it is one reason the sport has a strong safety record at regulated parks.
Is braking different on a small park zipline compared with a mountain course? The principles are identical. The mountain course may have a longer approach speed and therefore a longer brake distance, but the rider’s role is the same: arrive in position, let the system work, brace at the end.
What this means for your first visit
For most beginners, the takeaway from zipline braking systems explained for beginners is simple. The line is engineered so that you do not have to be an expert to ride it well. The brake is sized for the posted weight range, the operators tune it for the conditions, and the guides are trained to support you through the launch and the landing. Your real contribution is small but important: listen at the brief, ride in the posture they ask for, keep your hands and feet clear of the cable, and brace rather than flail at the end.
That last point, the brace, is the one habit that separates a pleasant first ride from a rattled one. The deceleration on a well-tuned line is no worse than sitting down firmly into a chair. If you keep your legs slightly bent, your core engaged, and your eyes on the landing platform, the brake will feel like a slow, predictable arrival rather than a sudden event. That, more than any piece of hardware, is what beginners have to learn, and it is also the part of the ride that experienced riders notice the least because it has already become habit.
Frequently asked questions
What is the most common type of zipline brake for beginners?
Most beginner-friendly park ziplines use a passive fixed brake such as a padded catch net, a buffer block, or a spring stop at the landing platform. These brakes engage automatically, so the rider does not have to perform any braking action, which removes the largest source of beginner error.
Do I have to do anything to slow down on a zipline?
On a passive line, no. The system slows you down before you reach the end of the platform. On an active line, you may need to apply a hand lever, glove pad, or steering input near the end of the run, and the guide will brief you on the exact technique before you launch.
How does a magnetic zipline brake work?
A magnetic brake uses the resistance created when a conductor moves through a magnetic field. The faster the trolley moves, the more drag the brake produces, and the drag tapers off as the trolley slows. The result is a smooth, self-regulating deceleration that does not need frequent retuning.
Why do ziplines have minimum and maximum weight limits?
The brake is tuned to a specific energy range. Lighter riders may not generate enough force to trigger some friction systems, and heavier riders carry more kinetic energy that the brake has to absorb. The weight range keeps the stopping distance and force within safe limits for every rider.
Can a zipline brake fail?
Any mechanical part can fail in theory, which is why regulated courses use redundant systems and daily inspections. In practice, brake-related incidents on commercial lines are rare, and the design assumes that any single component can fail without putting the rider at risk.
What is the safest body position at the end of a zipline?
Keep your legs slightly bent and together, your core engaged, your eyes on the landing platform, and your hands on the trolley or on the bar as briefed. Avoid grabbing the cable or the brake unless the guide has specifically told you to, and let the harness take the deceleration force rather than locking your knees.
Does rain make a zipline harder to brake?
Wet cables can affect approach speed slightly and may change how friction brakes feel at the end of the run. Responsible operators monitor the conditions and will pause a line, retune the catch, or adjust the weight range if the weather moves outside the design case.
Are braking systems the same on small park ziplines and long mountain ziplines?
The principles are the same, but the scale changes. Longer and steeper lines often use magnetic brakes or longer active brake zones to manage the higher approach speed, while smaller park lines usually rely on a passive catch net or buffer block because the energy involved is lower.
What should I ask the guide about the brake before I ride?
Ask whether the line is passive or active, where the brake engages, what posture they want you to use at the end, and what to do if you feel unsure mid-ride. A short conversation at the launch platform is the most effective way to make your first ride a calm one.
How can I practice the right body position before my first zipline?
Stand with your knees slightly bent, your weight on the balls of your feet, and your arms in the position the harness supports. Practise a small knee bend, the way you would when sitting into a chair. That simple movement is the same one you will use when the brake engages at the end of the line.
Related reading
Explore High Ropes Adventure
Trip tools
Essential adventure planning guides
Use these practical guides to compare rope park activities, prepare for a first high ropes day, check a booking, choose suitable footwear and contact the editorial team. Each page links to the relevant live tools and current planning sections.
Latest articles
- Outdoor pillows: how to choose the right ones for a deck or trail rest stop
- How to find Morgan Jay tickets without overpaying
- How to find national parks near me: a practical local search guide
- Paylater travel: how buy now, pay later works for trip bookings
- Bagsmart Blast Travel Backpack: A Practical Review for Day Trips and Adventure Days
- How to choose an outdoor rocking chair that actually lasts
- Indiana travel advisory map: how to read it before a day trip
- How to plan an outdoor day around a concert stop: a cardi b tickets field guide
- Outdoor sectional sofas: a practical buyer’s guide for patio living
- How amusement parks actually work: rides, safety, and what to expect