Adventure park: what it is, what to expect, and how to plan a visit
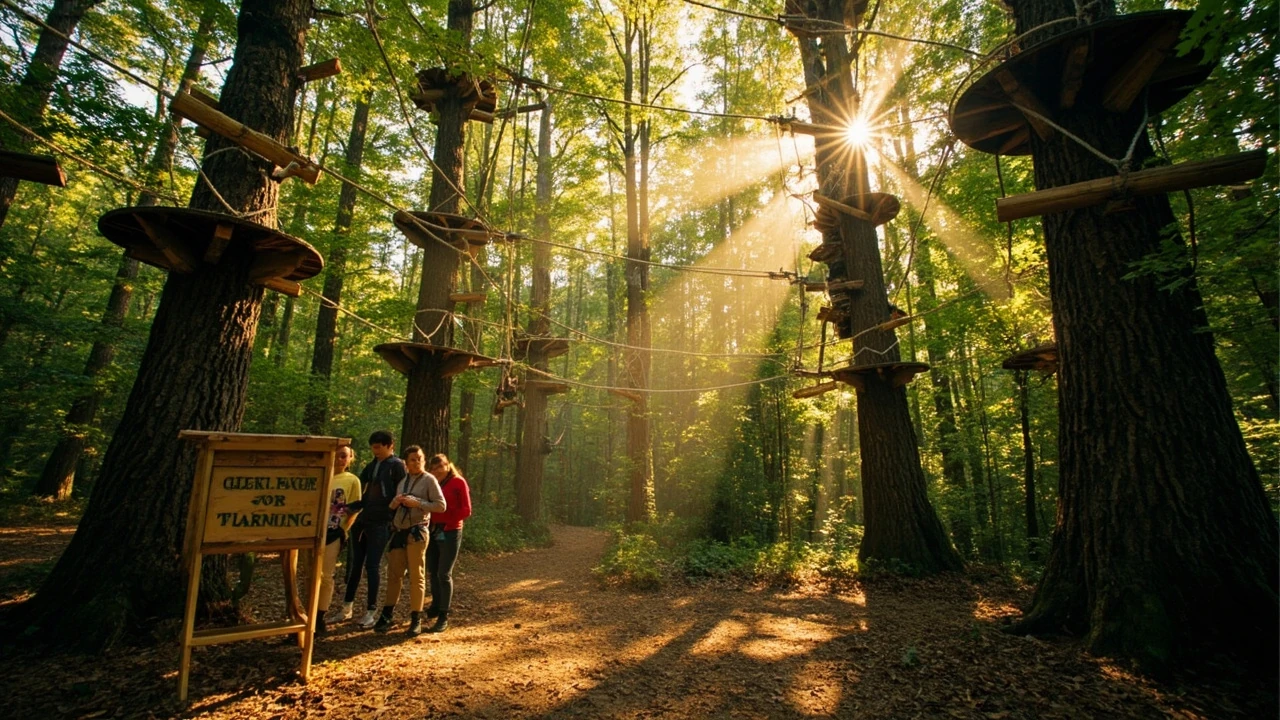
Adventure park: what it actually is and what a first visit looks like
A family pulls into a gravel car park beside a strip of pine forest, kids already arguing about who will reach the highest platform first. One parent opens the boot and starts pulling out trainers, water bottles, and a pair of gloves. That small scene is the everyday reality of an adventure park: a managed outdoor site where the attraction is a set of elevated, ground, or water-based activities built around physical challenge, supervised safety, and a fixed ticket window.
The phrase “adventure park” is used loosely in travel writing, but the visitor-facing version is more specific. It is a commercial site that charges for entry, runs a trained staff team, and offers a defined set of activities such as high ropes courses, zip lines, climbing walls, nets, and low-rope team tasks. The course elements sit on permanent structures, the safety systems are inspected, and the day is shaped by a printed timetable rather than a self-guided hike.
This article focuses on the visitor experience. It explains what an adventure park usually contains, how the safety system works, who the activities are designed for, what a first visit costs in real terms, and how to plan a day that ends with tired arms rather than a wasted ticket.
What an adventure park actually contains
Most adventure parks are built around a layered mix of activities, so a family with a six-year-old and a teenage cousin can buy one ticket and find a level that suits each of them. The exact mix varies by site, but the structure of the offer tends to be similar.
- High ropes courses at different heights, usually 3 to 12 metres above ground, with rope bridges, logs, swings, and moving elements strung between poles or trees.
- Zip lines that connect course sections or run as standalone rides across valleys, lakes, or forest gaps.
- Climbing walls and towers, often bolted to a fixed frame, with auto-belay systems for solo climbing.
- Low ropes and team elements at ground level, used for warm-ups, school groups, and confidence building.
- Nets, trampolines, and obstacle zones for younger children who are below the height threshold for the elevated courses.
- Briefing areas and gear stations where staff fit harnesses, helmets, and gloves, and run the safety talk.
A site that calls itself an adventure park will normally have at least three of these elements and a staffed reception. A single zip line on a farm is not the same product, even if the words are sometimes used interchangeably in marketing.
How the main activity types differ
The label on the ticket usually covers a wider mix of activities than a casual visitor expects. The table below shows how the common elements differ in cost, time, and physical demand, which helps when comparing two parks or planning a longer day.
| Activity type | Typical height | Time per attempt | Skill demand | Best for |
|---|---|---|---|---|
| High ropes course, beginner level | 3-5 m | 20-40 minutes for the full loop | Low; balance and a willingness to step off the platform | First-time adults, families with older children |
| High ropes course, advanced level | 8-12 m | 30-60 minutes | Moderate; longer crossings, moving elements, hand fatigue | Teenagers, adults with some upper-body strength |
| Zip line | Often 10-30 m above ground, runs of 50-300 m | 1-3 minutes per ride | Low; mostly the ability to sit in a harness and lean back | Almost anyone above the minimum weight |
| Climbing wall with auto-belay | 6-12 m | 5-10 minutes per climb | Moderate; grip, footwork, and a small jump at the top | Older children and adults who like vertical movement |
| Low ropes and team elements | 0.5-1.5 m | 10-20 minutes per element | Low to moderate; coordination and group communication | School groups, mixed-ability groups, warm-up |
| Junior nets and obstacle zone | 0-2 m | 30-90 minutes | Low; climbing and crawling in nets | Children below the high ropes height limit |
The numbers above describe a typical European-style park. A site in a different climate or a more amusement-led resort can run a different mix, and operators publish the exact heights and limits on their own pages.
How the safety system works on a high ropes course
Safety is the part most first-time visitors ask about, and it is also the part operators are most willing to explain. Two systems dominate the industry, and a third is used for ground-level elements.
| System | How it works | What the visitor notices | Where it is used |
|---|---|---|---|
| Continuous belay with a fixed carabiner | A carabiner runs on a steel cable above the course. The clip cannot be opened at height, so the visitor is attached the whole time. | One carabiner, no partner, no need to swap clips mid-bridge. | Most modern high ropes courses, especially those designed for general public use. |
| Traditional partner belay | Two climbers move together on a section of course. One climbs, the other stands on the ground and operates a belay device. | You wait for your partner, swap roles, and learn a short set of commands. | Older courses, climbing-style towers, training venues. |
| Auto-belay on a climbing wall | A retractable lanyard follows the climber up and lowers them slowly if they let go. | No partner needed, no commands, a short briefing before the first climb. | Climbing walls and towers, not bridges. |
| Static nets and ground-level obstacles | No fall risk above a few metres, so the visitor is not clipped in. | Free movement, no harness needed for some elements. | Junior zones, low ropes, family warm-up areas. |
The continuous belay system is the most common on a modern adventure park course because it removes the partner step and keeps the visitor attached to the safety line at all times. The catch is that it only protects against a fall from the element itself; it does not replace the harness fitting, the briefing, and the course rules.
Three habits make the day safer regardless of the system:
- Listen to the full safety briefing, even on a second visit. The course may have changed, and the briefing is the moment staff check that the harness is fitted correctly.
- Keep both hands on the safety line when transferring between elements. Most incidents happen during transitions, not mid-bridge.
- Tell staff if you are unsure about your weight, your health, or your fear of heights. Operators can move you to a lower course rather than risk a quiet panic on the highest bridge.
For a more detailed breakdown of how the harness and clip work, the site’s belay systems explainer covers the same topic in a visitor-friendly way.
Who an adventure park is designed for
Adventure parks sit in a middle band between a children’s soft-play centre and a full mountaineering day. The audience reflects that middle position.
- Families with children aged 6 to 14 form the core of most weekday and weekend bookings. Height rules apply on the elevated courses, usually starting around 1.0 to 1.2 metres for the easiest loops.
- Teenagers and adult groups tend to use the upper courses, the harder zip line, and the climbing wall. Bachelor groups, sports teams, and corporate days are common midweek.
- School and youth groups often use the low ropes section and the easier high loops as part of a personal-development programme, with instructors running the sessions.
- First-time visitors are explicitly planned for. The first loop on most courses is built to be reachable by anyone who can climb a stepladder, as long as the harness fits.
Two groups need to check before booking rather than at the gate:
- Visitors with reduced mobility, recent injuries, or pregnancy should ask the operator about specific course access. Some loops are step-free, others involve a small ladder climb.
- Visitors well above the upper weight limit of the harness, usually around 120 to 130 kg depending on the model, should also check in advance so the operator can confirm whether their gear can accommodate them.
The site’s family age and height guide walks through the same set of rules in a planner-friendly format.
What a typical adventure park visit costs
Pricing varies by country, season, and what’s included, but the structure of the cost is consistent. The table below shows the components a visitor is likely to see on a booking page.
| Cost component | What it usually covers | Typical pattern |
|---|---|---|
| Day pass, adult | Entry, full course access, harness and helmet | Higher at weekends, lower in off-peak or late afternoon |
| Day pass, child or junior | Same as adult pass with a height-based age band | Often 20-40 percent below the adult rate |
| Course extension or upgrade | Access to the higher loops or extra zip line runs | A small surcharge on top of the day pass |
| Group or school rate | Pre-booked block for 10 or more participants | Discounted per person, often with a free supervisor place |
| Equipment hire | Gloves, optional shoes, lockers | Either included in the pass or a few euros extra |
| Coaching or instructor-led session | Guided warm-up, technique tips, team tasks | Add-on for groups who want more than a self-led visit |
For most visitors, the day-pass price is the only number that matters, because gear and parking are usually included. The exceptions are sites that charge separately for gloves or for a small locker for valuables, and these are flagged clearly at the booking step.
It is worth planning a realistic spend before the day, because the entry ticket is only one line on the bill. Fuel or train tickets, food on site, and a small spend on gloves add up. A useful starting point is the site’s day trip budget planner, which covers the same line items in a wider travel context.
How long a visit actually takes
A common mistake is to treat an adventure park like a museum, where an hour covers the highlights. In practice, the visit is shaped by the briefing, the queue at the gear station, and the time it takes to move through each loop. The realistic time blocks for a first visit look like this:
- Arrival and check-in: 15 to 30 minutes, including the waiver and the size of the harness.
- Safety briefing and practice loop: 20 to 30 minutes. This is the moment staff confirm that the clip works as expected and the harness is comfortable.
- Main course time: 60 to 120 minutes, depending on the number of loops chosen and how busy the course is.
- Rest, food, and watching friends: 30 to 60 minutes. Most parks have a terrace or a picnic area that overlooks the course.
- Optional second run or zip line: 20 to 40 minutes, often for visitors who found the first loop easier than expected.
For a first visit, three hours on site is a fair minimum, and four to five hours is more comfortable, especially with children. Visitors who plan a long day on site should ask about the closing time of the last course, because the gear is usually handed back 15 to 30 minutes before the park closes.
How to plan a first visit without the common mistakes
Most first-time problems come from small mismatches between expectations and the actual layout of the day. The checklist below covers the issues that come up most often at reception.
- Book a time slot, not just a date. Most parks now run fixed entry windows so the gear station and the briefing room are not overwhelmed.
- Wear closed-toe shoes. Sandals, flip-flops, and most fashion trainers are not allowed on the elevated courses.
- Tie long hair back and remove loose jewellery. Catches on the carabiner are rare but unpleasant.
- Skip a heavy breakfast. The harness fits better and feels less restrictive on a half-full stomach, especially for younger children.
- Bring water and a small snack for the rest break. Some parks have a café, others only vending machines.
- Check the weather and the closure policy before driving over. Wind, lightning, and heavy rain close the elevated courses but not necessarily the whole site.
Weather deserves a closer look because it is the most common reason for a wasted trip. Operators usually publish a clear policy, and a quick read of the site’s rain, wind, and closure guide before driving out is worth ten minutes at the gate.
What to wear and what to pack
The dress code on the course is not strict, but a few simple choices make the day more comfortable. Comfortable clothing that allows a full range of arm movement is the main point; a fitted long-sleeved top and full-length trousers are ideal in cool weather, and a T-shirt with shorts works in summer.
The packing list is short because the park provides the safety-critical gear:
- Trainers or light hiking shoes with a grippy sole.
- A small backpack with water, snacks, sunscreen, and a thin layer for the rest break.
- A hair tie for anyone with long hair.
- Gloves, either brought from home or bought at the gear station. They protect the palms on the cables.
- A change of socks for children, in case a wet platform catches them out.
Avoid bringing dangling scarves, loose hoods, and bulky coats. Hoods in particular catch the wind and the carabiner, and the harness feels less stable over a thick winter jacket.
For a longer outdoor day that starts with the course and ends in the forest, the site’s wet-weather packing list covers the small extras that earn their place in the bag.
How an adventure park compares with a theme park, a forest park, and a sports centre
Visitors often weigh an adventure park against a more familiar day out. The differences are useful when deciding which option fits the group.
| Format | Main appeal | Physical demand | Weather sensitivity | Best for |
|---|---|---|---|---|
| Adventure park (rope-based) | Physical challenge, shared experience, low key repetition | Moderate; arms, grip, balance | High for elevated courses, low for ground zones | Families, groups, first-time active visitors |
| Theme park (rides) | Variety, spectacle, fast throughput | Low to moderate; mostly sitting and standing | Low for most rides | Younger children, visitors who want rides rather than activity |
| Forest park or nature reserve | Walking, scenery, low-cost access | Low; chosen by the visitor | Low, with normal outdoor precautions | Visitors who want a quiet day and their own pace |
| Indoor climbing centre | Technique training, regular practice | High; repeated climbs and bouldering | None; indoor climate | Regular climbers and training-focused visitors |
For visitors who already know they like a quiet, self-paced day in nature, a forest or nature reserve is often a better fit. For visitors who want a structured, active day that a mixed-age group can share, the adventure park is the most efficient option. The choice is not a moral one; it is a question of who is in the group and what kind of tired they want to be at the end of the day.
How to plan an adventure park day around travel and group size
The trip to the park shapes the day as much as the visit itself. For a group, the choice of transport changes both the budget and the arrival mood.
- Car: Best for groups of three or more, and useful when the park is in a rural area with limited public transport. Plan for a small parking fee and a short walk from the car park to the gear station.
- Train or coach: Often the cheaper and more relaxed option for a couple, especially when the park is on a regular line. The trade-off is that the last mile from the station may be a taxi or a longer walk.
- Minibus with a driver: The right answer for a school or youth group, because it keeps the group together and reduces the number of separate bookings.
For visitors weighing the train against the car, the site’s train-versus-car comparison covers the same decision in a wider outdoor-day context.
For larger groups, the day works best with a single point of contact, a shared arrival time, and a clear plan for the rest break. A group of ten who all book the same time slot will usually finish their first loop at the same moment, which is helpful for the lunch table and the second run.
How an adventure park fits into a longer weekend plan
Adventure parks are rarely the only stop on a weekend. A useful plan treats the park as the central active block of one day, with quieter activities around it.
| Day | Morning | Afternoon | Evening |
|---|---|---|---|
| Day 1: arrival | Travel, light forest walk or town visit | Adventure park briefing and first loop | Local dinner, early night |
| Day 2: rest day | Easy walk, market, or museum | Lake, river, or scenic drive | Slow dinner, plan a third day if staying |
| Day 3: optional | Second visit to the park, or a different outdoor venue | Travel home | — |
For visitors building a longer trip around an outdoor venue, the site’s one-day forest escape planner covers the supporting structure of the day, from the morning coffee to the last bus back.
What first-time visitors usually get wrong
A few mistakes come up often enough to be worth flagging in advance:
- Booking a late afternoon slot as a first visit. The briefing takes longer than expected, and the course closes before the second loop is finished.
- Underestimating the harness on younger children. A child who is the right height but very small in the shoulders can slip inside a poorly fitted harness. Staff will check, but a close-fitting base layer helps.
- Skipping the warm-up loop. The first easy loop is the moment to learn the clip. Jumping straight to the upper course is the most common reason for a quiet panic on the second bridge.
- Leaving valuables in the car. Most parks do not have large locker banks, and the small lockers go fast on busy days.
- Driving without checking the weather and the course status. The site may still be open, but the elevated courses may be closed for wind. A quick call or a check of the live page saves a wasted trip.
None of these are deal-breakers, but each one is the kind of small miss that turns a three-hour visit into a six-hour round trip.
How an adventure park handles safety incidents and inspections
Operators are required to follow a defined inspection and maintenance schedule, and most publish a short version of it on their own pages. The common elements are:
- Daily visual checks of the course, the cables, and the harnesses by the on-site team.
- Periodic recorded inspections by an external inspector, often an engineer or a certified rope-course auditor.
- Documented maintenance intervals for the elements that wear fastest: the carabiner, the lanyard, the platforms, and the steel cable itself.
- Trained first aid cover on site during opening hours.
Visitors who want to know more can ask at the briefing for a short overview of the inspection schedule. Operators are used to the question and usually happy to explain.
How an adventure park day compares with a ropes-course taster
A ropes-course taster is a one-hour session run by an instructor, often at a school or a corporate day. An adventure park is a self-led day on a larger site. The difference matters because the cost, the time, and the audience are not the same.
| Format | Length | Group size | Best for |
|---|---|---|---|
| Ropes-course taster | 1-2 hours | 8-20 people with an instructor | School groups, corporate team days, a first taste of the activity |
| Adventure park day pass | 2-5 hours | Individuals, families, small groups, self-led | Families, groups of friends, repeat visitors |
| Full ropes-course training | Half-day or longer | Small groups with a senior instructor | Instructors, advanced climbers, team-building programmes |
For visitors who have never tried an adventure park before, a day pass is the most flexible starting point. For visitors who already know they like the activity, a taster session is a useful add-on for a group that wants a more structured experience.
How to choose between two adventure parks
Two parks in the same region can look similar on a map and be very different on the day. The short list of questions below is the most useful way to compare them before booking.
- How many courses and zip lines does the site run, and what is the height of the highest loop?
- What is the minimum and maximum height, weight, and age for the main courses?
- Is the safety system continuous belay, partner belay, or a mix?
- How long is a typical visit, and is the day pass time-limited or open-ended?
- What happens in bad weather, and how much notice does the operator give for a closure?
- Is food available on site, and is there a covered area for the rest break?
Operators who answer these questions clearly on their own pages are usually the ones who run a smoother day. The site’s ropes courses explainer covers the technical side of the same decision.
How an adventure park fits into a special event or group booking
Adventure parks work well as the centrepiece of a birthday, a stag or hen day, a school reward trip, or a small corporate day. The site usually offers a fixed group rate, a reserved briefing slot, and a private area for the rest break. For visitors planning an event, the questions to ask are:
- What is the minimum group size for the group rate, and how many free supervisor places are included?
- Can the group bring food, or is catering supplied by the park?
- Is there a private briefing slot, and how early should the group arrive?
- Is the upper course included in the group rate, or is it an extra?
- What is the cancellation policy in case of bad weather?
For visitors weighing an adventure park against a different kind of group day, the site’s outdoor event comparison covers the same trade-offs from a wider angle.
How an adventure park handles younger children
Most parks set a minimum height for the elevated courses, often around 1.0 to 1.2 metres, and a minimum age for some activities. The numbers are not arbitrary: they reflect the reach a child needs to clip into a continuous belay and the leg length to step between platforms safely.
For children below the height limit, the answer is usually the junior zone, the low ropes, or the net obstacle area. These are designed for the same age band and use the same safety approach, but at a height where a fall is not a concern. Operators are explicit about the split because they would rather move a child to a fitting course than run a difficult day for the family.
Parents who are unsure should ask at the gate. The team is used to the question, and a short check now saves a long conversation later.
How a first-timer can get more out of the day
Visitors who already know they want a full day on the course can get more out of the visit with a few small choices:
- Book the earliest slot of the day. The course is quieter, the briefing is shorter, and the second loop is easier to fit in.
- Start on the lower course, then step up. The body warms up, the clip becomes familiar, and the upper course feels less intimidating.
- Take a short rest at the terrace between loops. The hands recover, the shoulders recover, and the second loop is faster.
- Use the second visit discount if the operator offers one. The second day is usually cheaper and a better experience, because the briefing is shorter and the clip is familiar.
None of these are rules, and a single visit is a perfectly good day. They are simply the small choices that the regulars make.
What to ask before booking
Five short questions cover most of the practical uncertainty:
- Is the day pass time-limited, and what is the last entry time?
- What is the height and age policy for the main courses, and what is available for younger children?
- What is the weather policy, and how is a closure communicated?
- Is parking and gear included in the pass, and is there a café on site?
- Is there a group rate, and how far in advance does it need to be booked?
A clear answer to each of these on the operator’s own page is a good sign that the rest of the day will run smoothly.
Frequently asked questions
What is an adventure park?
An adventure park is a managed outdoor site that charges for entry and offers a set of physical activities built around a safety system, usually including high ropes courses, zip lines, climbing walls, and junior zones. The activities are supervised by trained staff and run on a fixed daily timetable.
Is an adventure park the same as a theme park?
No. A theme park is built around mechanical rides, while an adventure park is built around physical activities that the visitor completes themselves. The two are sometimes combined at large resort sites, but the core product is different.
What is the minimum age or height for an adventure park?
Most parks set a minimum height of around 1.0 to 1.2 metres for the easiest elevated course and a separate, lower junior zone for children below that limit. Exact numbers are set by the operator and are published on the booking page.
Do I need any experience to visit an adventure park?
No prior experience is needed. The safety briefing at the start of the visit covers the clip, the harness, and the course rules, and the practice loop is built so a first-time visitor can complete it within a few minutes.
How safe is an adventure park?
Adventure parks use a continuous belay system on the elevated courses, daily visual checks of the equipment, and periodic external inspections. The harness stays attached to the safety line at all times on the elevated course, which removes the most common cause of incidents on partner-belayed climbs.
What should I wear to an adventure park?
Closed-toe shoes with a grippy sole, comfortable clothing that allows a full arm reach, and a hair tie for long hair. Avoid sandals, loose hoods, and bulky coats, which can catch on the harness or the carabiner.
What happens if it rains on the day of my visit?
Light rain usually keeps the lower courses open, but wind, lightning, and heavy rain close the elevated courses and the zip line. Operators publish their closure policy on the booking page and update the live status during the day.
How long does a visit to an adventure park take?
A first visit usually takes three to five hours, including the check-in, the safety briefing, the main course, and a rest break. Visitors who plan a second loop or a longer zip line run should allow an extra hour.
Can I bring food and drink into the adventure park?
Most parks allow water bottles and small snacks, and many have a café or a picnic area. Outside catering is sometimes restricted for group bookings, and the policy is usually published on the operator’s page.
Is an adventure park suitable for a group or a birthday?
Yes. Most parks run a group rate for ten or more participants, a reserved briefing slot, and a private rest area. The booking is usually made in advance with a single point of contact at the operator.
Plan the day, not just the ticket
The most useful shift in planning an adventure park visit is to treat the day as a small project, not a single purchase. The ticket is the entry point, but the day is shaped by the briefing time, the height rules, the weather, the transport choice, and the food on site. A 30-minute plan on the operator’s own page, plus a quick check of the weather on the morning of the visit, is enough to convert a long round trip into a day that ends with tired arms and a clear plan for the next one.
Related reading
Explore High Ropes Adventure
Trip tools
Essential adventure planning guides
Use these practical guides to compare rope park activities, prepare for a first high ropes day, check a booking, choose suitable footwear and contact the editorial team. Each page links to the relevant live tools and current planning sections.
Latest articles
- Adventure park: what it is, what to expect, and how to plan a visit
- Indoor activities near me: practical options for rainy days and tight schedules
- Backrooms movie tickets: how screenings, formats, and seat tiers actually work
- Outdoor Christmas lights: a practical guide for gardens, trees and facades
- Asap tickets: what they are and how to use them for last-minute day trips
- Outdoor shower ideas, plumbing and etiquette for adventure parks and cabins
- Travel clipart: where to find it and how to use it well
- Outdoor table guide: choosing, placing, and using one well
- Viator travel agent: how the booking platform actually works
- Sweet tart ropes: what the flavour means in a ropes course