Outdoor shower ideas, plumbing and etiquette for adventure parks and cabins
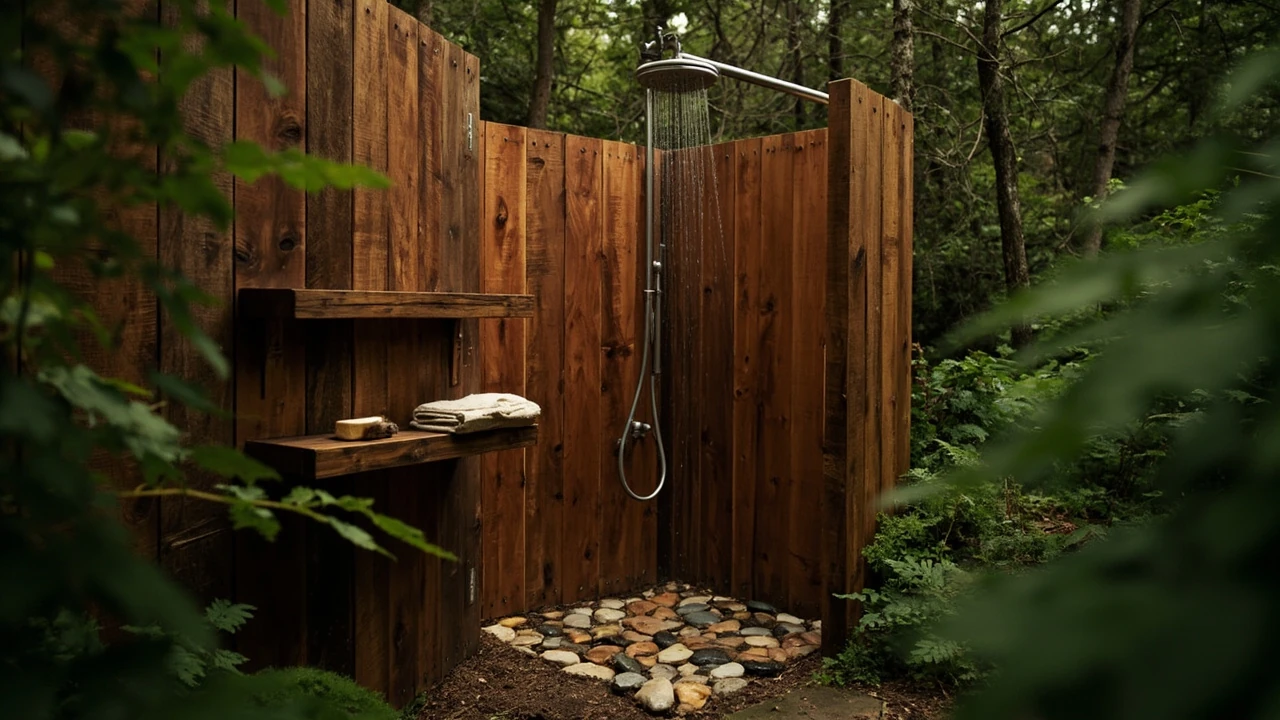
Outdoor shower
A tired family walking off a ropes course on a warm July afternoon tends to share one quiet wish: a place to rinse off the sweat, sunscreen, harness rub and forest dust before getting back in the car. At most small adventure parks, glamping sites and rural cabins, that wish is met by a simple outdoor shower, usually a timber enclosure, a cold or solar-warmed supply, and a stone or gravel base that lets the water drain away. This guide explains how outdoor showers actually work in those settings, what they cost in time and parts, how to keep them hygienic, and how to behave around shared ones when you visit a park.
Because the site covers ropes courses, family adventure days and outdoor event planning, the angle here is practical rather than luxury. We will look at layouts, plumbing, drainage, privacy, water heating, seasonal use, and the etiquette that makes a shared outdoor shower pleasant for the next visitor as well as the current one.
Where an outdoor shower makes sense at an adventure site
An outdoor shower earns its place when three conditions are met at once: a clear user need, a workable drainage route, and a sensible distance from food, restrooms and play areas. Adventure parks, forest cabins, glamping fields, scout camps, surf schools, mountain bike centres and rural hostels all have at least one of those conditions. Most have several.
The first question is who the shower serves. A day-visitor ropes course with a 90-minute turnaround and a packed car park rarely justifies a heated enclosure, but it does justify a cold rinse station near the harness return. A glamping field with overnight guests needs more privacy, more hot water, and a clear path to dry towels. A scout hut with a single outdoor shower serves a different brief again: simple, robust, drained away from any well or stream.
When the user need is clear, the layout gets easier. The shower should sit on a route people already use, not on a path they have to be redirected to. It should also sit between the dirty zone and the clean zone, so that harness marks, mud and sunscreen do not have to be carried through indoor areas.
Three layouts that work on small sites
- Rinse station by the gear return. One timber post, a single cold tap, a small wooden grate. Used by day visitors who are about to drive home and just need to wash grit off hands, feet and shoulders.
- Private cubicle next to accommodation. A 1 by 1.2 metre enclosure with a latch door, a roof and a curtain for changing. Common at glamping pods, forest cabins and bunkhouses.
- Communal block at the edge of the activity zone. Two or three cubicles in a timber frame, with separate entrances for men and women and a small covered drying area. Common at larger residential adventure centres.
Each layout places different loads on the plumbing and the drainage. A rinse station is the easiest to install because it uses so little water. A private cubicle is the most flexible because it can be served by a small electric or gas heater. A communal block is the most expensive and usually only pays off when occupancy is consistent week to week.
Plumbing basics for a small outdoor shower
Most outdoor showers run on a surprisingly small plumbing system. The core parts are a water source, a pipe run, a control valve, a head, a drain, and, in cooler months, a method of heating or freeze-proofing. The decisions below cover the everyday trade-offs, not the heavy engineering of a public pool building.
Water source
The simplest source is a mains-fed garden tap extended with a frost-protected pipe to the shower head. In many rural sites, mains pressure is low, which means a cold shower can feel less like a rinse and more like a trickle. Where pressure is poor, a small break-tank in the loft of the nearest service building, or a compact pressurised unit next to the shower, can make a real difference.
Off-grid sites use a header tank raised on a small timber frame, often 200 to 400 litres, so a gravity-fed shower can run for a few minutes at usable pressure. A header tank also lets a solar coil or a small gas water heater feed the cubicle without a mains connection.
Pipe run and insulation
Pipe runs above ground should be clipped firmly, lagged with closed-cell foam, and ideally run inside a simple timber chase on the sunny side of the building. Underground runs must sit below the local frost line, which is roughly 600 mm in much of central Europe and deeper in colder regions. A common mistake is to bury a pipe just deep enough to hide it and then discover the first hard frost splits a fitting.
For sites that close in winter, a drain-down design is the most reliable. A small lever valve at the lowest point of the pipe run lets the operator empty the line at the end of the season. Combined with lagged pipe, this avoids the cost of trace heating along the whole route.
Heating water without wasting energy
Heating choices sit on a spectrum from passive to active. The table below summarises the options a small site usually faces.
| Method | Best for | Approximate warm window | Key limitation |
|---|---|---|---|
| Solar coil or solar bag | Summer glamping, sunny sites | 2 to 4 usable showers per sunny day | Cloudy weather, hard frosts |
| Instant gas water heater | Cabins with a gas supply | Unlimited, on demand | Gas certification, flue or balanced flue |
| Electric point-of-use heater | Enclosed cubicles near power | Unlimited within cable rating | Needs RCD protection, water-resistant cabling |
| Wood-fired water tank | Off-grid sites with a stove | As long as the fire is lit | Slow to heat, needs supervision |
| Cold only | Rinse stations, summer-only use | Daylight hours in warm months | Uncomfortable in cool weather |
For a small adventure park or cabin site, the most common combination is a cold rinse station for day visitors and an electric point-of-use heater in a small number of private cubicles. The electric unit only runs when a guest is actually showering, which keeps running cost low compared with a stored hot cylinder.
Drainage, base and the ground underneath
An outdoor shower is only as good as the ground it stands on. Standing water turns a pleasant rinse into a wading experience, and saturated soil near a cubicle becomes a mud patch within a week. The base needs three things: a slight fall, a porous surface, and a clear route for the water to leave the immediate area.
Three base options
- Wooden slats on a gravel bed. Easy to build, easy to lift for cleaning, suitable for one or two private cubicles. The gravel under the slats must be at least 100 mm deep and laid over a layer of landscape fabric to stop soil mixing into the drainage layer.
- Stone or concrete pad with a centre channel. More durable, easier to clean with a hose, and a good fit for communal blocks. The pad must slope about 1.5 to 2 percent towards the channel, and the channel must run to a soakaway or a small French drain at least 3 m from the cubicle.
- Wheelbarrow-friendly rubber mat on compacted earth. Useful for a temporary summer shower at a scout camp or an event, but not a long-term solution because the mat moves, the earth beneath it puddles, and the mat itself becomes slippery.
Where the soil is heavy clay, a soakaway on its own will not cope. A simple solution is a short rubble trench, around 300 mm wide and 600 mm deep, filled with clean stone, running from the drain to a ditch or a permeable part of the site. On sandy or free-draining soils, a small soakaway pit under the pad usually works on its own.
Whatever the base, the drain water should never flow towards a stream, a well, a vegetable patch or a play area. Grey water from a shower is low in contaminants compared with sewage, but it still carries soap, sunscreen, skin cells and hair, and these can affect sensitive sites if they accumulate.
Privacy, shelter and lighting
Privacy is what turns a tap on a post into a usable outdoor shower. The minimum is a screen that blocks the view from the most common approach, usually a path or a seating area. A full enclosure with a latch door is only needed where the cubicle is visible from several directions or where users are likely to be changing as well as showering.
Materials range from woven hazel hurdles and reed screening, which blend well with a forest setting, through tongue-and-groove timber boards, to recycled plastic panels for sites where rot is a concern. The screen should leave a 50 to 80 mm gap at the bottom for ventilation; a fully sealed cubicle stays damp and starts to smell.
Shelter matters even in summer. A simple pent roof, sloped away from the most common wind direction, keeps rain off the user and the controls. It also extends the life of any timber by keeping the end grain drier.
Lighting should be low, warm and motion-activated. Bright white floodlights next to a shower cubicle make users uncomfortable and attract insects. A small 3-watt LED bulkhead at head height, set to come on at dusk and turn off after a few minutes of no movement, is usually enough.
Keeping an outdoor shower hygienic
An outdoor shower is a warm, damp, often shaded space. That combination is friendly to algae, mould and soap scum. A weekly routine of 20 to 30 minutes keeps things pleasant without the need for harsh chemicals. The table below shows a realistic maintenance rhythm for a small site.
| Frequency | Task | Why it matters |
|---|---|---|
| Daily in peak season | Sweep or hose the pad, empty the hair trap | Stops blockages and slippery films |
| Weekly | Wipe down walls and head with a mild detergent | Reduces soap scum and mildew |
| Monthly | Check pipe clips, lubricate valves, clear the drain channel | Prevents slow leaks and surprise failures |
| End of season | Drain the pipe run, cover the head, treat timber if needed | Protects against frost and UV damage |
Choosing a finish also shapes the cleaning load. Cedar and larch weather to a soft silver and need little more than a brush. Painted softwood needs a fresh coat every two to three years to keep moisture out. Stainless steel fittings last longer than chrome in a damp outdoor setting, especially within a few kilometres of a coast.
Soap choice matters more than people expect. Hard, lather-heavy body bars and cheap shampoos leave a tacky film on timber and stone within a few weeks. A simple liquid soap dispenser refilled from a bulk bottle tends to keep the cubicle cleaner, partly because the dose is controlled and partly because the product rinses away more cleanly.
Etiquette at a shared outdoor shower
The shared outdoor shower is one of the small tests of how a group behaves on a day out. A little courtesy goes a long way, especially at a small site where the same cubicle may serve six different groups in a single afternoon. The points below cover the situations that come up most often.
- Check before you undress. A surprising number of misunderstandings at adventure parks start with someone assuming an enclosure is empty. Knock, call out, or wait for the latch to fall before opening a door.
- Keep it short during busy periods. Five minutes is a generous shower for a forest activity day. Longer sessions at peak times can leave a queue and force the operator to close the cubicle for cleaning.
- Keep soap and mud inside the cubicle. A rinse station exists so people wash off before going indoors, not so they carry half the shower back into the café. Step back onto the pad to lather and rinse, then walk away.
- Take your hair with you. Hair in the drain is the single most common cause of a blocked outdoor shower. A simple hair trap costs a few euros and saves a callout.
- Hang your towel to dry, do not leave it on the bench. A damp towel on a wooden bench encourages mould and feels unpleasant to the next user. A peg on an outside rail dries the towel and keeps the cubicle clear.
- Report problems straight away. A dripping head or a slow drain is much cheaper to fix when it is reported on the day. A dripping head left for a week often means a soaked timber post and a more involved repair.
For families visiting a ropes course, a short conversation before the day starts is often the most useful preparation. Agreeing who goes first, how long each person will take, and where the dry clothes are waiting avoids the most common friction point of any group shower.
Planning an outdoor shower for an adventure park or cabin site
Putting in a new outdoor shower is rarely just a plumbing job. It usually touches the planning rules for the site, the drainage consent, the water supply agreement and, in some places, the rights of way. A simple planning checklist helps avoid surprises.
- Confirm the user need. How many people per day, in which months, for how long each visit. This sets the size and the heating requirement.
- Confirm the supply. Mains, header tank, or off-grid. A flow test on the existing supply often reveals problems before any pipe is bought.
- Confirm the drainage route. Where the water will go, how far it is from any well, stream or vegetable bed, and whether a soakaway is realistic on the soil.
- Confirm the planning position. In many regions, a small timber cubicle within the curtilage of an existing activity site is permitted development, but the rules around distance from a boundary or from a listed building vary. A quick check with the local authority avoids a costly mistake.
- Confirm the power and gas. An electric point-of-use heater needs a properly rated circuit, an RCD and a weatherproof isolator. A gas water heater needs a certified installer and the right flue arrangement.
- Confirm the daily operation. Who cleans it, who locks it at night, who checks it after a storm. A shower that is not operated consistently soon falls out of use.
For readers planning a ropes course day rather than a building project, the same logic still applies, just at a smaller scale. A short, practical approach is laid out in Your First High Ropes Course: What to Expect, which covers how visitors handle the end of a session, including washing off harness marks and changing before a long drive home. For park operators weighing the cost of a new cubicle against the benefit to visitors, the broader picture of what makes an outdoor day work is explored in Adventure parks explained: what they are, how they work, and what to expect.
What to pack for a shared outdoor shower on a day out
Visitors who plan ahead tend to have a much better time. A small kit, kept in a separate mesh bag, means the cubicle stays tidy and nothing gets left behind. The list below is the realistic minimum for a family of four spending a day at a forest activity centre.
- Two microfibre towels each, one for standing on and one for drying.
- A pair of cheap flip-flops or water shoes, especially useful on a stone or rubber mat.
- A refillable bottle of liquid soap, decanted from a bulk container at home.
- A wide-tooth comb and a small hair tie for anyone with long hair.
- A dry bag for clean clothes, kept on the bench or pegged on the rail.
- A small bin bag for wet towels and used tissues, because a shared cubicle rarely has a bin.
Operators can support these habits by providing a small shelf at standing height, a peg rail, and a covered bin. None of these additions is expensive, and together they cut cleaning time noticeably.
Limitations and things an outdoor shower cannot fix
It is worth being honest about the limits of an outdoor shower in this kind of setting. It is a rinse and a freshen-up, not a full bathroom. It will not deal with long hair in cold weather, with very young children who need a stable warm bath, or with guests who need accessible washing facilities. A site that relies on outdoor showers for its main accommodation should think carefully about who it can really serve.
Access is the biggest gap. A cubicle with a 50 mm step, a small wooden slat floor and a short door is not usable for many wheelchair users, for people with limited balance, or for anyone recovering from an injury. Where accessibility matters, a level concrete pad, a wider door, a fold-down seat and a handheld head turn a simple outdoor shower into something genuinely inclusive. The cost is modest, and the benefit for visitors is real.
Cold weather is the other honest limit. A cold outdoor shower in November is a rinse for the hardy, not a comfort. Most small sites close the outdoor cubicle for the colder months and offer an indoor facility instead. Trying to keep an outdoor shower open year round with trace heating and a small enclosure is technically possible, but rarely worth the running cost at low-occupancy times of year.
Frequently asked questions
How much does it cost to install a basic outdoor shower?
A simple cold-only timber cubicle on a small site typically costs in the low thousands of euros, including the post, head, pipe run, gravel base and a simple soakaway. Adding an electric point-of-use heater, a proper roof and lighting roughly doubles that figure. Costs vary with distance from the nearest service building, the ground conditions and the local labour rate, so any precise figure should come from a site visit.
Do outdoor showers need planning permission?
In many regions, a small timber cubicle within the curtilage of an existing site is treated as permitted development, but rules differ between councils and countries. A short call to the local planning office before ordering materials is worth the time, especially if the site is in a protected area or near a listed building.
What is the best base for an outdoor shower?
For one or two private cubicles, wooden slats on a gravel bed are usually the best balance of cost, drainage and comfort. For a communal block with heavier use, a concrete pad with a centre channel is more durable and easier to clean. The key is a slight fall on the surface and a clear route for the water to leave the cubicle.
Can an outdoor shower use grey water safely?
Yes, in most settings, provided the grey water is kept away from wells, streams and vegetable beds. A simple soakaway or a short rubble trench is usually enough for the small volumes from a domestic cubicle. Soap and shampoo residues are low in contaminants, but they still affect sensitive sites if they accumulate.
How do you keep an outdoor shower from freezing?
The most reliable method is a drain-down design. A small valve at the lowest point of the pipe run lets the operator empty the line at the end of the season, which removes the water that would otherwise freeze and split the pipe. Lagged pipe and trace heating on the most exposed section add an extra margin in colder regions.
Are outdoor showers hygienic for shared use?
When the cubicle is cleaned on a regular rhythm and the drain is kept clear of hair, an outdoor shower is no less hygienic than a small indoor bathroom. The two issues that most affect shared use are a slippery soap film on the pad and a blocked drain, both of which are easy to prevent with a short daily routine.
What kind of soap should visitors use in an outdoor shower?
A simple liquid soap that rinses cleanly is the most considerate choice. Hard body bars and very thick shampoos leave a tacky film on timber and stone that is hard to clean and unpleasant to stand on. Operators can help by providing a bulk refill dispenser rather than asking each visitor to bring their own product.
How do you make an outdoor shower accessible?
The most useful changes are a level threshold, a wider door, a fold-down seat, a handheld shower head on a slider, and a non-slip pad. These additions do not dramatically increase the build cost, and they make the cubicle usable for a much wider range of visitors, including older family members and guests with temporary injuries.
Should a ropes course provide an outdoor shower?
For most day-visitor courses, a simple cold rinse station near the harness return is enough. Visitors who are heading home usually do not need a full shower, only a chance to wash off sunscreen, sweat and any harness rub. A private cubicle becomes more useful for residential visits, group bookings and family stays, where guests are on site for a full day or longer.
Where should an outdoor shower be sited on a small site?
The best position is on a route people already use, between the activity zone and the car park or the accommodation, and on soil that already drains reasonably well. It should sit at least a few metres from a well, a stream or a vegetable garden, and ideally where the operator can see it from a window or a CCTV camera without being intrusive.
Related reading
Explore High Ropes Adventure
Trip tools
Essential adventure planning guides
Use these practical guides to compare rope park activities, prepare for a first high ropes day, check a booking, choose suitable footwear and contact the editorial team. Each page links to the relevant live tools and current planning sections.
Latest articles
- Outdoor shower ideas, plumbing and etiquette for adventure parks and cabins
- Travel clipart: where to find it and how to use it well
- Outdoor table guide: choosing, placing, and using one well
- Viator travel agent: how the booking platform actually works
- Sweet tart ropes: what the flavour means in a ropes course
- Demon Slayer movie tickets: how to find a screening and prepare for a day out
- How to choose NBA tickets without overpaying
- Time travel movies worth watching on a slow weekend
- Overseas adventure travel: how to plan a trip that actually works
- Choosing an outdoor bench that actually lasts