All trails at a high ropes or adventure park: a complete visitor guide
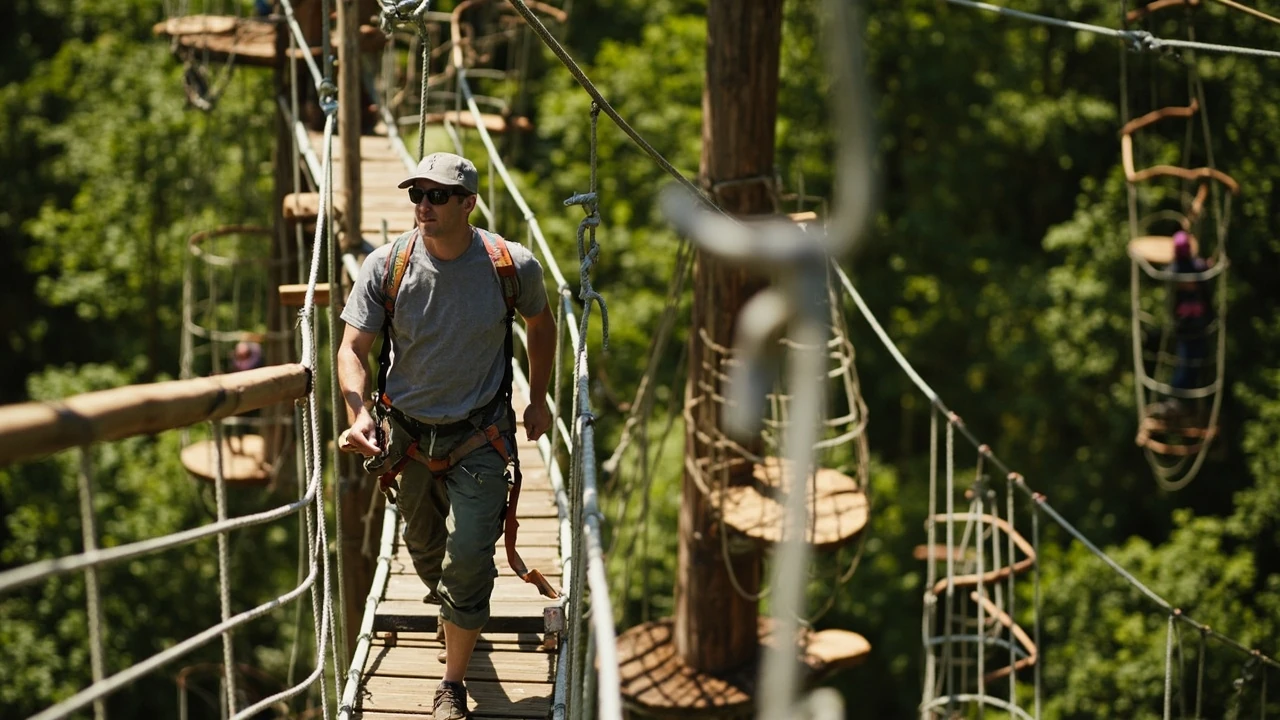
All trails at an adventure park: how to choose, time, and finish the full course set
A family of four walks up to a high ropes park ticket hut, the parents staring at a colour-coded map while two children argue about which line to start on. The map shows six routes looping through the trees, each tagged with a different colour, difficulty symbol, and a number between one and four. This is the moment when “all trails” stops being a phrase and becomes a real planning problem. Do you queue for the easiest line first, work up, or scatter across the park and meet at the central platform? How long does the full set actually take, and which trails should you skip if a child loses confidence halfway up?
This guide is for visitors who want to use a park’s full trail set in one visit without overpromising to the slowest member of the group. It also helps group leaders, teachers, and party organisers plan a route that fits a fixed time window. The advice applies to any aerial adventure park that runs multiple loops at graded difficulty, whether the operator calls them courses, circuits, routes, or trails. The terms are often used interchangeably on signage, so “all trails” in this article means the complete set of marked loops the operator has open on the day of your visit.
To make the planning concrete, the rest of the article works through how a graded trail set is usually structured, how long the full set takes in real conditions, which height and age rules quietly exclude some members of a group, what the safety system changes between trails, and how to time the day around meals and weather. Two short comparison tables and several practical lists help you read a park map without guessing. Internal links point to the site’s existing guides on first-time high ropes visitors and the different types of ropes courses, which cover the broader picture for first-timers.
What “all trails” usually means on a park map
Most UK and European high ropes parks publish a map that groups trails by colour, number, or theme, and the phrase “all trails” on tickets and signs refers to every loop included with a standard admission. The exact grouping changes by operator, but the underlying structure is consistent because it is set by the ropes course safety standard the park follows.
A typical four to six trail set breaks down as follows:
- One or two introductory trails in green or blue, set at lower height (2 to 4 metres), with wide timber elements, long rope spans, and continuous belay systems. These are designed to introduce the harness, lanyard, and the rhythm of transferring from one element to the next without forcing a height commitment.
- Two or three intermediate trails in red, with mixed obstacles at 4 to 8 metres, including moving elements such as suspended logs, rolling barrels, and net bridges. The belay system is often the same continuous line as the introductory trails, so once a guest has clipped in, they stay clipped in for the rest of the circuit.
- One or two advanced trails in black, at 6 to 12 metres, with narrower elements, longer gaps, and trickier balance sections. Some parks reserve a second, more demanding belay system for these trails and require a separate briefing before entry.
What the map does not always show is that the same height, distance, and obstacle type can feel very different depending on tree sway, wind, and the position of the sun. A red trail on a still morning is a different proposition from the same red trail at 3 pm on a gusty day. The colour and number are a useful starting point, but they are not the full story.
How long the full trail set takes in real conditions
Operators usually quote a session length of 2 to 3 hours for the full trail set, but the real figure depends on four variables: the number of loops, the queue at the central platform, the fitness of the slowest climber, and the length of the briefing. The table below turns the operator’s headline figure into a more honest estimate for a mixed-ability group.
| Group type | Trails completed | Average pace per trail | Briefing and harness fitting | Total session time |
|---|---|---|---|---|
| Two confident adults, no children | All trails, including the hardest loop | 15 to 20 minutes | 25 to 30 minutes | 2 hours 30 minutes to 3 hours |
| Family with one child under 10 | 3 to 4 of the easier trails, skipping the hardest loop | 20 to 30 minutes | 30 to 40 minutes | 2 hours 30 minutes to 3 hours 30 minutes |
| School or youth group of 12 | All trails in waves of 4 to 6 | 20 to 25 minutes | 45 to 60 minutes | 3 hours to 3 hours 30 minutes |
| Corporate team of 8 to 10 | All trails, slower pace, with photo stops | 25 to 35 minutes | 40 to 50 minutes | 3 hours 30 minutes to 4 hours |
The slowest climber on any trail sets the pace for the whole loop, because safety rules require everyone to stay together between platforms. If the slowest member of a group needs 30 minutes for a single trail, the full set becomes a 4 to 5 hour commitment, not the headline 2.5 hours. For groups with a fixed end time, the safer assumption is to budget 3.5 hours and plan to skip the last, hardest trail if the clock is tight.
Height, age, and harness rules that quietly cut the trail set
Every park uses a minimum height rule, often 1 metre 20 for children’s trails and 1 metre 40 for adult loops, because the harness must sit correctly on the torso and the lanyard must reach the safety line without an extension. A child who meets the height rule for the introductory trail can still be excluded from the intermediate set if they cannot reach a clip point unaided, and a young teenager who clears 1 metre 40 may still be turned away from a black trail if the operator judges their reach too short for a particular element.
The age ranges used on signage are general guidance, not a guarantee, and the actual decision is made at the harness fitting station. The two checkpoints that matter are:
- Harness fit. The dorsal D-ring must sit between the shoulder blades, and the leg loops must be snug. A loose harness passes the visual check but fails the moment the wearer leans forward on a moving element.
- Reach. The child or adult must be able to clip and unclip the carabiners on the safety line without help, because instructors do not follow each climber along the trail.
This is why a group of three generations often ends up splitting the trail set. The grandparents and the youngest children run the green loop twice, the parents and older children work through red, and the teenagers finish on black. The total trail count is the same; the time on each one is just very different.
Why a park’s safety system changes how the full trail set feels
The phrase “all trails” hides a real difference between parks that use a continuous belay system and parks that use a traditional two-clip lanyard. On a continuous system, the climber hooks a single carabiner onto a cable that runs the full length of the trail and slides along behind them, so there is no spot where the climber is detached from the line. On a traditional system, the climber moves two lanyards between anchors at every transition, which means there is a brief moment between clips when the climber is held only by one carabiner.
| Feature | Continuous belay trail | Traditional two-clip trail |
|---|---|---|
| Number of clips per transition | One carabiner, slides along the line | Two lanyards, must be moved in order |
| Best for first-time visitors | Yes, the most common modern choice | Possible, but slower and more error-prone |
| Briefing length | 10 to 15 minutes | 20 to 30 minutes |
| Failure mode if a clip is missed | The carabiner cannot be opened without a deliberate action, so an unclip is loud and obvious | Easy to leave one lanyard clipped and forget the other, especially on the harder trails |
| Typical parks | Newer builds, family-focused operators, and most modern chains | Older courses and some adventure parks that want a more technical experience |
For a group that wants to complete the full trail set, the belay system is more important than the colour of the trail. On a continuous system, a tired or nervous climber can be talked through the whole loop with one rule, “keep the carabiner in front of you at all times.” On a traditional system, the same climber has to remember a two-step procedure at every platform, which is where most first-time errors happen. A site’s guide to belay systems for first-time visitors walks through both setups in more detail.
A practical order to run all trails in one visit
Most first-time visitors queue for the easiest trail, finish it, and then realise the harder ones are now busier. Reversing the order, finishing on the easiest trail, is usually faster and ends the day on a positive note. The order below assumes a four to six trail set on a continuous belay system and a group that has done a standard briefing.
- Warm up on the trail that matches the slowest climber’s confidence, not their ability. If the slowest climber is anxious, start on a green loop even if they could manage red. Confidence lost on the first trail is hard to recover on the third.
- Move to the hardest trail second, while hands and forearms are fresh. Grip strength drops sharply after 90 minutes on a rope course, and a black trail punishes tired hands more than a green one.
- Run the intermediate red trails next, in any order. By this point the group is in rhythm, so the pace is faster and the queue at the central platform is shorter because the easier trails are now the bottleneck for newcomers.
- Finish on a second run of the easiest trail. This gives a photo-friendly finish, a chance for the slowest member of the group to feel fast, and a clean way to leave the course when the session timer runs out.
If the park has a particularly long or particularly popular trail, treat it as the main event and time everything else around it. A 90-minute wait for a single signature trail can wreck a session, so it is worth asking at the briefing which loop the staff expect to peak.
Reading a park map without guessing
Maps at the ticket hut are usually schematic rather than to scale, and the icons used on them are not standardised. Before committing to the full trail set, ask the staff to walk you through five specific points on the map. The list below is the minimum a careful visitor should confirm.
- Which trails share a platform. Two trails that look independent on the map may share a single entry platform, so the queue at that platform is for both.
- Which trails have a height gate. A height gate is a physical bar that the harness must clear, not just a height number on a sign. Some parks install gates on the entry bridge, others on the first element of the trail.
- Which trails are closed for maintenance on the day. Maintenance closures are not always printed on the map handed out at the ticket hut, but they are posted at the platform. Asking at the briefing saves a wasted walk to a closed loop.
- Where the bailout points are. A bailout point is a platform where a tired or frightened climber can leave the trail and be lowered to the ground by staff, without completing the loop. Knowing where these are keeps a nervous group from feeling trapped.
- Where the meeting point is at the end. A full trail set ends at different platforms depending on which loop was last, so a fixed meeting point avoids the long walk back through the forest to find a missing parent.
What to pack and wear for the full trail set
The full trail set is roughly 3 hours of continuous climbing, with hands on rope or timber the whole time. The packing list for that is closer to a short hike than a gym session, and it overlaps closely with the site’s wet-weather trail packing list, which is worth reading even on a dry day because British weather changes inside three hours.
- Closed-toe shoes with grip. Approach shoes, trail runners, or lightweight hiking boots are ideal. Trainers are acceptable if the sole has a clear tread; smooth-soled shoes are refused at most parks.
- Clothing that covers the shoulders and thighs. A harness worn over bare skin rubs badly at the top of the thigh, and a t-shirt that rides up exposes the lower back to the dorsal D-ring. Long sleeves are not required in summer, but a layer is useful if the wind picks up at canopy height.
- A small bag for the central platform only. Loose items, phones in particular, must be stowed in a lockable pouch on the harness or left in a locker at the base. A zipped pocket is not a substitute because a dropped phone from 8 metres is a write-off and a hazard for the next group.
- Water and a snack. Most parks sell water at the base, but the price is high and the queue is long. A 500 ml bottle per person and a small energy bar cover the gap between the briefing and the last trail.
- Hair ties, glasses straps, and a way to secure loose jewellery. Earrings, watches, and untied hair catch on carabiners and on the safety line, and a knocked-off pair of glasses is a common reason for a slow walk back to the base.
How weather changes the trail set
Wind is the variable that closes trails most often, and it closes them by height. A 30 km/h gust at ground level is a 50 km/h gust at 10 metres, and a trail at canopy height can be shut while the green loop is still open. Rain is less decisive; a steady drizzle is usually fine, but a heavy downpour on a steel cable can be impassable because the carabiner will not slide along a flooded line. The site’s guide to rope park weather and closures covers the operational thresholds in more detail, and it is worth reading before driving to the park if the forecast is borderline.
For visitors, the practical question is what to do when a trail is closed mid-session. The usual answer is that staff reroute the group to a parallel trail at lower height, and the full trail set becomes the full available set, with a partial refund or a free return visit if more than two trails are shut. Asking about the closure policy at the briefing is faster than asking at the moment a trail is closed, because the staff have more time to explain on the ground than at a busy central platform.
Group size, photo stops, and the slow cost of going around the full set
The bigger the group, the harder it is to keep the full trail set on schedule. A party of twelve cannot stay together on a single line because most continuous belay cables are sized for a maximum of around eight climbers between platforms. The working maximum is six, which gives a margin for the slow member of the group to pause without blocking the line. Above six, the group has to split into waves, and waves need a meeting point and a time window. The table below shows how a wave structure works for a 12-person school group on a four-trail set.
| Wave | Climbers | Start trail | Order of remaining trails | Notes |
|---|---|---|---|---|
| Wave 1 | 6 climbers | Red trail A | Red B, Black, Green (twice) | Strongest group, runs the harder trails first |
| Wave 2 | 6 climbers | Green loop | Red A, Red B, Green (second run) | Less experienced, builds up to red, finishes on the easiest trail |
| Meet at | All 12 | Central platform | After each wave’s third trail | 10 minute debrief and photo stop, then swap |
Photo stops are the single biggest hidden cost in the schedule. A group that plans two 10-minute photo stops on each trail loses 80 minutes from a four-trail session, which is enough to drop a full trail. The fix is to assign one person in the group to carry a small action camera on a chest mount, which leaves both hands free and records the entire loop without breaking the rhythm.
Frequently asked questions
How many trails are included in “all trails” at a typical adventure park?
Most UK high ropes parks include four to six trails in a standard admission, with one or two extra advanced loops available as an add-on. The exact count depends on the operator and the size of the forest site, and the ticket description usually names the number of trails. The map at the ticket hut shows the full set, and a green introductory loop is almost always part of the count.
Can a family with a child under 10 use the full trail set?
Usually not. Most parks set a minimum height of 1 metre 20 for the introductory trails and 1 metre 40 for the intermediate set, and a child under 10 often does not meet the reach requirement for the harder trails. A common pattern is for the youngest climber to run the green loop twice while the rest of the family works through the harder trails, and the group reunites at the central platform after each loop.
How long does it take to complete all trails in one visit?
A full session, including briefing, harness fitting, and all trails, is usually 2.5 to 3.5 hours for a group of two to four adults. Larger groups, school parties, and anyone with a nervous climber should budget 3.5 to 4 hours. The slowest climber on any trail sets the pace, because the safety rules require everyone to stay together between platforms.
Do the trails get busier later in the day?
Yes. Most parks run timed entries, and the morning slots are quieter, the early afternoon slots are the busiest, and the late afternoon slots thin out again. If a quiet climb matters for a nervous group, the first slot of the day is the easiest, and the last slot of the day is the second easiest. The middle of the day is the worst for queues at the central platform.
What happens if a trail is closed while my group is mid-session?
Staff will reroute the group to a parallel trail at lower height, and the full set becomes the full available set. If more than two trails are closed, most operators offer a partial refund or a free return visit. The closure policy is worth asking about at the briefing, because the staff on the platform are usually too busy to explain it in detail during a closure.
Is the harness and lanyard briefing different for the harder trails?
On a continuous belay system, the briefing is the same for every trail, because the carabiner behaves identically on each loop. On a traditional two-clip system, the briefing for the harder trails is longer, because the lanyard has to be moved at every transition and the order matters. A park that runs a separate briefing for the black trail will usually schedule it for 15 to 20 minutes at the entry platform.
Can I leave the trail set and come back to the same platform later?
Most parks allow a single re-entry to the course in the same session, usually for a meal break or a toilet stop, but the staff will check the harness and the carabiner on the way back in. A second re-entry is at the operator’s discretion, and some parks refuse it because the climber has to be re-briefed. Asking at the briefing is the cleanest way to find out the local rule.
Are the trails graded by difficulty in the same way at every park?
The colour and number conventions are similar but not standardised. Green is almost always the easiest and black the hardest, but the red trails in one park may be harder than the black trails in another. The site’s guide to the types of ropes courses explains the broader grading logic, and the staff at the briefing will always tell you which trail is the hardest on the day.
What is the difference between a “trail” and a “course” at an adventure park?
The two words are used interchangeably on most signage, and they refer to the same thing: a marked loop of obstacles between two platforms. A “course” sometimes refers to the whole park and a “trail” to one loop within it, but the operator’s ticket conditions are the only place the distinction is enforced. The site’s overview of how adventure parks work uses the words in the same loose way.
Do I need to book all trails in advance, or can I turn up?
Most UK parks now prefer advance booking because the timed-entry system controls queue length on the central platform. A walk-up ticket is often possible on a quiet weekday, but the morning and late afternoon slots sell out first at busy sites. Booking the full trail set in advance is also the only way to lock in a specific start time, which matters for groups with a fixed coach pick-up or a fixed meal reservation.
The full trail set at a high ropes park is rarely the same as the brochure description, because the slowest climber, the queue at the central platform, and the weather on the day all change what the day actually feels like. The honest version of the plan is a 3.5 to 4 hour window, a wave structure for any group above six, and a clear order that finishes on the easiest trail. With that plan, the full set is realistic, and the day ends with a tired, satisfied group rather than a long wait at the base while one child finishes a loop alone. For first-time visitors, the next step is to read the site’s guide to what to expect on a first high ropes course, and to phone the park on the morning of the visit to confirm the trail count and the weather window.
Related reading
Explore High Ropes Adventure
Trip tools
Essential adventure planning guides
Use these practical guides to compare rope park activities, prepare for a first high ropes day, check a booking, choose suitable footwear and contact the editorial team. Each page links to the relevant live tools and current planning sections.
Latest articles
- Tame Impala tickets: how to find them, what they cost, and what to know before you buy
- Outdoor pillows: how to choose the right ones for a deck or trail rest stop
- How to find Morgan Jay tickets without overpaying
- How to find national parks near me: a practical local search guide
- Paylater travel: how buy now, pay later works for trip bookings
- Bagsmart Blast Travel Backpack: A Practical Review for Day Trips and Adventure Days
- How to choose an outdoor rocking chair that actually lasts
- Indiana travel advisory map: how to read it before a day trip
- How to plan an outdoor day around a concert stop: a cardi b tickets field guide
- Outdoor sectional sofas: a practical buyer’s guide for patio living