Hiking trails near me: how to choose a route you’ll actually enjoy
Hiking trails near me: how to choose a route you’ll actually enjoy
You opened three map apps to look for hiking trails near me, and now you have eleven overlapping pins, two contradictory distance estimates, and no real sense of which route is worth the drive. The problem is rarely a lack of trails. It is a lack of a quick way to filter them. The approach below turns that scattered list into one route you’ll actually finish, by matching the trail to your time, fitness, gear, and the season you’re walking in.
Start with the search, not the trail
Most people begin by browsing trail photos and then try to fit a real day around the prettiest picture. The search works better in the opposite direction. Decide four things before you open a map:
- How much drive time is acceptable in each direction
- How many hours you want to spend on the trail, including stops
- The maximum elevation gain your legs are honestly ready for
- The surface you can walk on safely, whether that is paved, gravel, dirt, or a rocky path
With those answers, the phrase “hiking trails near me” becomes a filter rather than an open question. A two-hour loop on a forest track is a different trip from a four-hour ridge walk, even when the trailhead signs sit next to each other.
Where to actually look for hiking trails near me
Search results mix a few useful sources with a lot of generic roundups. A more reliable method is to combine three of them and compare what each one says.
- National and regional park websites usually publish an official trail list with distance, elevation, and current conditions. These pages are slow to update, but the route data is usually accurate.
- Local government and forestry service maps show public access land, seasonal closures, and which paths cross private property. This matters more for legality and safety than for scenery.
- Community-driven trail databases refresh quickly, but the descriptions vary in quality. Use them to spot recent trip reports and warnings, not as the final word on distance.
You can also narrow the search by phrasing. Adding words like family-friendly, dog-friendly, stroller-friendly, or accessible changes the result set significantly, because the same trail may be marketed differently to different audiences.
Read a trail description the way rangers do
Trail blurbs lean on words like easy, moderate, and challenging without defining them. A more honest read comes from looking at four numbers instead of one label.
| Number to check | Why it matters | Quick rule of thumb |
|---|---|---|
| Total distance | Sets the time budget, including water breaks and photo stops | Plan for roughly 1 km per 20 to 25 minutes on flat ground, more on climbs |
| Elevation gain and loss | Determines leg effort and knee load on the way down | Anything over 300 m of gain in 5 km starts to feel strenuous |
| Surface type | Affects footwear choice and how stable the path is after rain | Roots, scree, and mud change the rating of an otherwise easy route |
| Loop vs out-and-back | Influences how you pace and how you find your way back | Loops feel shorter mentally; out-and-backs let you shorten the day easily |
If a description omits one of these, treat the trail as under-reported. The more missing details, the more you should look for a recent trip report from a regular hiker.
How to tell a beginner trail from a marketing-friendly one
Many short trails are labelled beginner because they are short, not because they are safe or comfortable. A more useful test is to ask whether the trail would still feel easy in poor conditions.
- Is the path wide enough to walk two abreast, or does it narrow to single file on a slope?
- Are the marker posts frequent and visible, or do you depend on a phone map the whole time?
- Is there shade in summer, or are you exposed for long stretches with no water source?
- Is there an obvious bail-out point within the first kilometre if someone in the group runs out of energy?
Trails that answer yes to most of those questions tend to be genuinely accessible. Trails that answer no are often fine for experienced walkers but a poor fit for a first family outing, regardless of how the brochure describes them.
Match the route to the group, not the other way around
The same set of hiking trails near me will look completely different depending on who is walking. A few common group profiles and what to prioritise for each:
| Group type | What to prioritise | What to deprioritise |
|---|---|---|
| Young children | Short distance, low elevation, toilets or a café at the trailhead | Summits, exposed ridgelines, remote loops |
| Teenagers and casual adults | Variety of terrain, viewpoints, a clear sense of progress | Long flat forest roads with little to look at |
| Older relatives or mixed-age groups | Benches, gradual grade, shaded sections, easy parking | Steep stairs, slippery rock, narrow ledges |
| Regular hikers looking for training | Repeats, measurable elevation, a known route to track time | Heavily touristed photo spots |
One practical way to set the day’s target: pick a route where the slowest member of the group can still finish with about 20 percent of their energy left. Finishing tired is fine. Finishing empty usually means someone will refuse the next invitation.
Check conditions before you drive out
A trail that is perfect one weekend can be closed, flooded, or uncomfortably busy the next. Before committing, glance at three live sources:
- Recent trip reports from the last two or three days, which catch mud, fallen trees, and reroutes faster than official pages.
- Weather windows for the specific hours you plan to walk, not the whole day. A 30-minute storm in the middle of a ridge walk is a different decision from a 30-minute storm at the trailhead.
- Park alerts for wildlife activity, prescribed burns, logging work, or temporary closures that do not always show up on general map apps.
It also helps to check sunrise and sunset times against your planned pace. A short trail that ends in the dark with no headlamp is a more common cause of trouble than getting properly lost.
Pack for the trail you picked, not the trail you hoped for
Gear lists often assume the perfect day on the perfect route. The real day has bugs, a wrong turn, an unexpected downpour, and one blister. A more honest kit is built around small, specific problems.
Three small habits reduce the cost of any mistake:
- Carry a paper map or printed route sheet, even if you use a phone app, because batteries die and signals drop.
- Pack layers that let you adjust by 10 degrees without stopping, especially on climbs where effort and wind both change.
- Bring more water than you think you will need, and a snack with both quick sugar and slower-burning carbohydrate.
Plan the day around the trail, not around the trailhead
Most groups underestimate how much of a hiking day happens before and after the walk itself. The drive, parking, changing into boots, the post-walk meal, and the recovery at home are part of the experience, not side notes. A simple time split that tends to hold up across a normal day:
- 20 to 30 percent of the day for driving in and parking
- 50 to 60 percent for the actual trail, including breaks
- 15 to 20 percent for the meal or coffee after, which often decides whether the day feels like a win
For trips where the hiking day is one piece of a larger plan, the same logic that shapes a day-trip budget applies. Travel time, food, and the activity itself compete for the same hours, and the day is only realistic when all three are sized against each other rather than added up afterwards.
Read the trailhead sign before you read the app
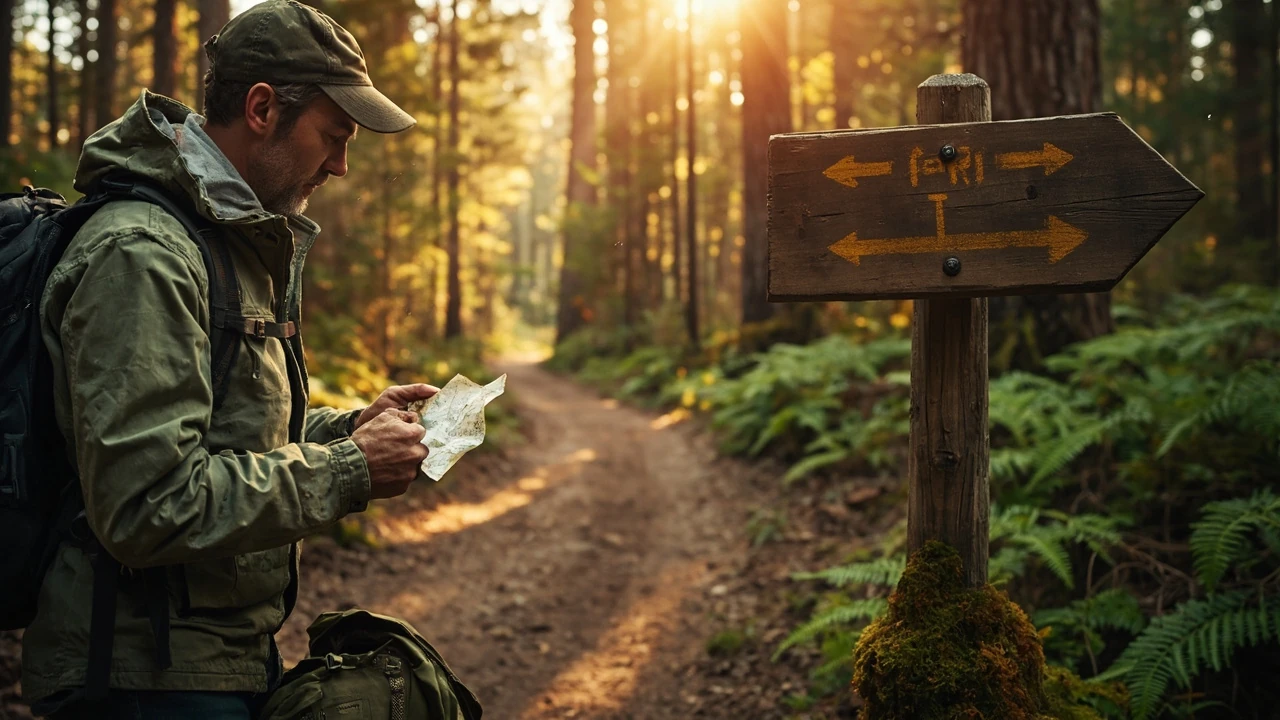
Trailhead boards are easy to ignore because they look old-fashioned, but they usually answer the four questions that matter most in the first ten minutes: which direction the loop runs, where the steepest section sits, what the current closure is, and which colour blaze to follow. Reading the board before you open your phone also sets a useful habit. You are confirming the route on paper, not discovering it on a screen, which is a better starting mindset for any group.
Use the trail to plan the next one
Each outing is a small experiment. The route you finished smiling on is more useful than the one a top-ten list said you should love. Keep a short note after each hike with four lines:
- Distance, elevation, and actual time on trail
- What felt harder or easier than expected
- One thing that worked well for the group
- One thing you would change next time
After three or four notes, your own list of hiking trails near me will be more reliable than any algorithm, because it is filtered through how your body and your group actually respond to a day outside.
How seasons quietly change the same trail
The same route behaves differently across the year, and the differences are large enough to change which group a trail suits. A shaded gully that is pleasant in July can be slick and cold in February, and an open ridge that is fine in spring can be sun-exposed and waterless by August. Reading a local trail report from the same month you plan to walk in tells you more than any permanent description will.
Short trails versus big days, and how to mix them
A healthy hiking calendar usually mixes short local walks with a smaller number of longer days. Short trails build familiarity, let you test gear, and keep younger or older walkers in the habit of going out. Longer routes give the group something to look forward to and a reason to train. Most families find that two short walks for every long day keeps enthusiasm steady through the year.
When to skip the search and revisit an old favourite
There is a point at which the fastest way to find good hiking trails near me is to walk a trail you already know in a new direction, at a new time of day, or in a new season. Repeat walks get a bad reputation, but they sharpen your eye for small changes in the path and let you focus on the people you are with instead of the navigation. Saving one familiar loop in the rotation is often the difference between a year of hiking and a year of planning hikes.
Pace, rest stops, and the honest time budget
Most day hikers plan their route in kilometres and then forget about minutes. The honest time budget starts with your slowest walker, not the trail map. On a gentle forest path, an unhurried group with kids or older relatives usually covers 2.5 to 3 km per hour. A fitter group on a rolling ridge can push that to 4.5 km per hour, but only if they skip the long viewpoint stops.
A useful trick is to break the route into thirds in your head. Plan to walk the first third slowly, settle into a working pace for the middle third, and slow down again for the final third when legs are tired. That pacing keeps the group together and reduces the risk of someone twisting an ankle on a downhill at the end of the day. Build in two short stops of five to ten minutes, plus one longer stop near a viewpoint or water source, rather than a single long lunch break that splits the day in half.
Water, food, and the small calculations that matter
The old rule of half a litre per hour of moderate effort holds up well for temperate weather and a shaded path. On a hot, open ridge, that number doubles. The simplest way to size your water is to count the hours you expect to walk, multiply by 0.5 L for cool or shaded routes or 0.75 to 1 L for exposed ones, then add a one-litre reserve for unexpected delays, a detour, or a longer finish than planned.
Food matters more than most beginners expect. A bar eaten in the first 30 minutes carries you through the easy start. A sandwich or wrap at the halfway point covers the heavy middle. A small sugary snack in the last 30 minutes helps tired legs finish without flagging. Avoid heavy, salty meals before climbs; they sit in your stomach and pull water out of you at exactly the wrong moment.
Reading the path under your feet
Trail descriptions focus on distance and elevation, but the surface under your boots decides whether a route is fun or miserable. Compacted dirt and pine needle paths drain well and stay stable after rain. Clay-heavy soils turn into a slip risk the day after a storm. Gravel can roll under a boot on a downhill. Rocky sections with loose stones slow everyone down and punish cheap footwear.
Walk the first kilometre slowly and pay attention. If the path is already muddy, the rest of the loop will be muddier. If you can hear a stream crossing ahead, the bridge may be marked or it may be a ford, and that changes the difficulty of the whole day. If the trail climbs immediately out of the trailhead, the descent at the end will feel longer than the map suggests, especially on tired knees.
Navigation without a phone signal
Most modern hikes rely on a phone app, and most modern mishaps come from that app failing. Signal drops in valleys, batteries die in cold weather, and a cracked screen at the wrong moment is a real problem. A paper map or a printed route sheet, stored in a zip bag, is a cheap insurance policy.
Three habits make navigation easier even with a phone. First, read the route description before you start, not while you walk, so you know the major junctions in advance. Second, glance at the map every 15 to 20 minutes to confirm you are where you think you are, rather than only when you feel lost. Third, mark the car or the trailhead on the map before you leave, so if you do need to backtrack in a hurry you are not searching for the way out as well as the way back.
Wildlife, livestock, and other things the map does not mention
Trail pages list distance and elevation because those are easy to measure. The things that actually shape a day are the things that are hard to write down. Cows on a pasture path change how the kids behave. A bull in the same field is a reason to take a different loop. Loose dogs off leash in a dog-unfriendly area can turn a calm walk into a stressful one. Ticks are a real concern on grassy and wooded paths from spring through autumn, and a simple pair of gaiters plus a tick check at the car saves a lot of trouble later.
Reading recent trip reports catches most of this. A note about a stile being broken, a bridge being out, or a herd of cattle in the upper meadow is worth more than another line of marketing copy. When in doubt, a quick search of the trail name plus “trip report” or “conditions” pulls the most useful information in under a minute.
Etiquette, right of way, and leaving the trail as you found it
Most trails work because the people on them follow a small set of shared habits. Hikers going uphill generally have the right of way because they are working harder and have less room to step aside. Groups make way for runners and riders. Everyone makes way for pack animals. Music on speakers is fine on a city path and a bad idea on a narrow ridge.
Pack out what you bring in, including orange peels and apple cores, which do not break down the way most people think. Stay on the marked path even when a short cut looks tempting, because the eroded shortcut on a popular trail is what destroys the trail itself. Keep dogs on leash where the rules ask for it, and out of areas marked for grazing or wildlife. The trail is shared, and the experience is only as good as the worst-behaved group on it.
Frequently asked questions
How do I find hiking trails near me if I don’t know the local area at all?
Begin with the closest national or regional park website, then layer in a community trail database for recent reports. Cross-check access rules on the local government or forestry service page so you know whether the trailhead is on public land and what the parking situation looks like. That combination covers accuracy, freshness, and legality in one pass.
What is a reasonable trail length for a first hike of the season?
For most adults returning after a break, a 5 to 7 km loop with under 200 m of elevation gain is a sensible opening. Add distance gradually across the next two or three outings rather than doubling the first day, because tendons and feet adapt more slowly than cardiovascular fitness does.
Are shorter trails always easier than longer ones?
No. A 3 km scramble with poor footing can be more demanding than a flat 10 km rail-trail walk. Distance matters, but surface, gradient, and exposure all change the picture. Read the full trail profile, not just the kilometre count, before deciding.
How early should I arrive at a popular trailhead?
For well-known routes on weekends, arriving 60 to 90 minutes after sunrise usually puts you ahead of the main wave. Midweek visits are quieter regardless of time. If parking is the limiting factor, check whether the park uses a timed entry or a permit system before you drive out.
Can I take children on a trail described as moderate?
Often, yes, but only if you plan for a slower pace, more breaks, and a clear turn-around point. A moderate label on a map usually assumes an adult of average fitness moving at a steady pace. With kids, expect to add 30 to 50 percent to the stated time and treat any scramble as a no-go.
How do I handle a trail that turns out to be harder than expected?
Stop, reassess, and pick the lowest-effort option that still gets you back safely. That might mean turning around early, skipping a side loop, or taking the shortest road walk back to the trailhead. Pushing on through a route the group cannot finish comfortably rarely ends well, and it puts strain on whoever is struggling the most.
What should I do if my phone dies or loses signal on the trail?
Rely on a paper map and the route description you read beforehand. Stay on the marked path, retrace your steps to the last known junction if you are unsure, and head downhill toward any sign of a road or watercourse. Carrying a small power bank and keeping the phone in airplane mode extends battery life significantly.
Are dog-friendly hiking trails near me usually more crowded?
Often, but not always. Many dog-friendly routes are the most popular entry-level trails, which makes them busier on weekends. Less-visited dog-friendly paths exist in most regions, but they tend to be harder to find on general searches. Local hiking groups and forums are usually the fastest way to surface them.
How do I know if a trail is safe after heavy rain?
Recent trip reports are the fastest signal. Paths that cross streams, run along clay, or descend into valleys are the first to become slippery or flooded. If the area had significant rainfall in the past 48 hours, choose a higher, rockier route and save the lowland loops for a drier day.
Is it worth paying for a printed trail map?
For an area you plan to walk in more than two or three times, yes. Printed maps show side trails, seasonal closures, and property boundaries that many apps simplify away. They also remove the temptation to keep checking the phone, which most walkers find improves the day once the route is familiar.
How much water should I carry for a half-day hike?
A practical baseline is half a litre per walking hour for shaded or cool routes, and closer to one litre per hour on exposed ridges in warm weather. Add a one-litre reserve for unexpected delays, and refill at streams only if you have a filter or know the source is reliable.
Related reading
- How to Build a Realistic Day Trip Budget
- Zipline safety: what riders and operators actually check
Related reading
Explore High Ropes Adventure
Trip tools
Essential adventure planning guides
Use these practical guides to compare rope park activities, prepare for a first high ropes day, check a booking, choose suitable footwear and contact the editorial team. Each page links to the relevant live tools and current planning sections.
Latest articles
- How to find national parks near me: a practical local search guide
- Paylater travel: how buy now, pay later works for trip bookings
- Bagsmart Blast Travel Backpack: A Practical Review for Day Trips and Adventure Days
- How to choose an outdoor rocking chair that actually lasts
- Indiana travel advisory map: how to read it before a day trip
- How to plan an outdoor day around a concert stop: a cardi b tickets field guide
- Outdoor sectional sofas: a practical buyer’s guide for patio living
- How amusement parks actually work: rides, safety, and what to expect
- Beis Travel: What the Bag Brand Offers for Outdoor Days
- Adventure park: what it is, what to expect, and how to plan a visit